
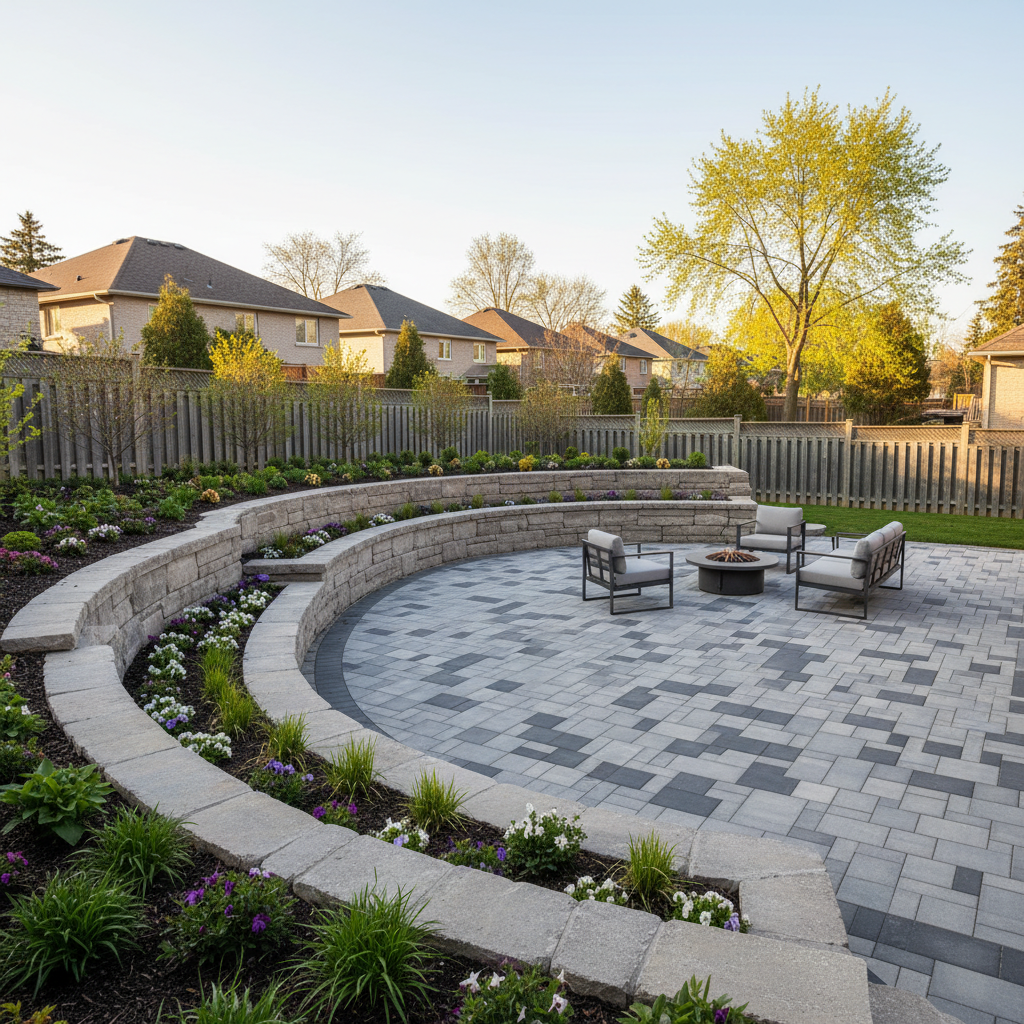
Mississauga retaining wall cost is best understood by looking at design, site conditions, and build quality—not a single price tag. From our base at 100 Matheson Blvd E unit 202, HR Greenroots Landscaping guides homeowners on materials, drainage, engineering, and maintenance so your wall performs for decades and delivers real value.
By HR Greenroots Landscaping • Last updated: May 28, 2026
Quick Summary
Retaining wall value depends on soil conditions, wall height and length, material choice, drainage design, and access for equipment. In Mississauga and the Regional Municipality of Peel, permits may apply based on height, location, and slope. Prioritize base preparation, geogrid reinforcement, and clean edge control for long-term performance.
Here’s the short version homeowners ask us for before we visit a site in Mississauga:
- Scope drives investment: Height, length, curves, steps, and lighting increase complexity.
- Soils and slope matter: Clay vs. granular soils change base depth, drainage, and geogrid needs.
- Materials vary in lifecycle: Segmental block, poured concrete, and armour stone age differently.
- Drainage is non‑negotiable: A 4-inch perforated pipe with clean stone reduces hydrostatic pressure.
- Access is a cost lever: Tight yards mean smaller machines and more labor hours.
What Is a Retaining Wall?
A retaining wall is a structure that holds back soil to create level areas, protect foundations, and control erosion. Proper walls include compacted base, drainage stone, a perforated drain, and sometimes geogrid reinforcement. Common materials are segmental block, poured concrete, timber, and armour stone.
Function first. A retaining wall exists to resist lateral earth pressure and manage water so grade changes become safe and usable outdoor space. When your yard drops 24 inches or more, the loads on that slope can exceed thousands of pounds per foot of wall length. Construction must plan for that force.
- Core components: Excavation, 6–8 inches of base aggregate compacted in 2–3 inch lifts, the first course leveled and partially buried (often 10% of wall height), plus drainage stone and fabric.
- Reinforcement thresholds: Segmental block walls typically add geogrid above ~3–4 feet of height or when surcharge (like a driveway) sits behind the wall.
- Water management: A continuous 4-inch perforated pipe wrapped in fabric and daylighted to a safe outlet is standard practice.
At HR Greenroots, we combine soil behavior, structural detailing, and clean edge control to build walls that last and still look sharp years later. Explore design fundamentals in our retaining wall design guide and see how they connect to whole-yard planning in our Mississauga design-build overview.
Why Retaining Wall Investment Matters
Investing in design and construction quality prevents movement, bulging, and drainage failures. Strong base prep, geogrid reinforcement, and correct backfill density reduce callbacks, protect adjacent patios and driveways, and keep landscapes low‑maintenance for 10–20+ years.
Here’s why getting it right the first time pays off for Mississauga homeowners:
- Safety and code: Taller walls and walls near property lines may trigger permits or engineering. Photos at base, drain, and grid checkpoints validate compliance.
- Downstream protection: A levelled grade prevents soil washout that can undermine interlocking patios or sod. A 1% pipe slope is a simple, measurable safeguard.
- Lifecycle value: Walls built with proper drainage keep faces cleaner and joints tighter season after season, reducing algae streaks and frost-jacking at caps.
- Maintenance savings: Geotextile behind the wall reduces fines migration; fewer weeds and less settlement over 3–5 winters.
- Resale impact: A straight, plumb wall with even 2–3 inch caps signals quality work to buyers and inspectors.
In our experience, more than half of wall failures we’re called to assess trace back to absent drainage stone or an undersized base—two preventable issues with good planning. For a deeper dive on water control, see our retaining wall drainage guide.
How a Retaining Wall Actually Works
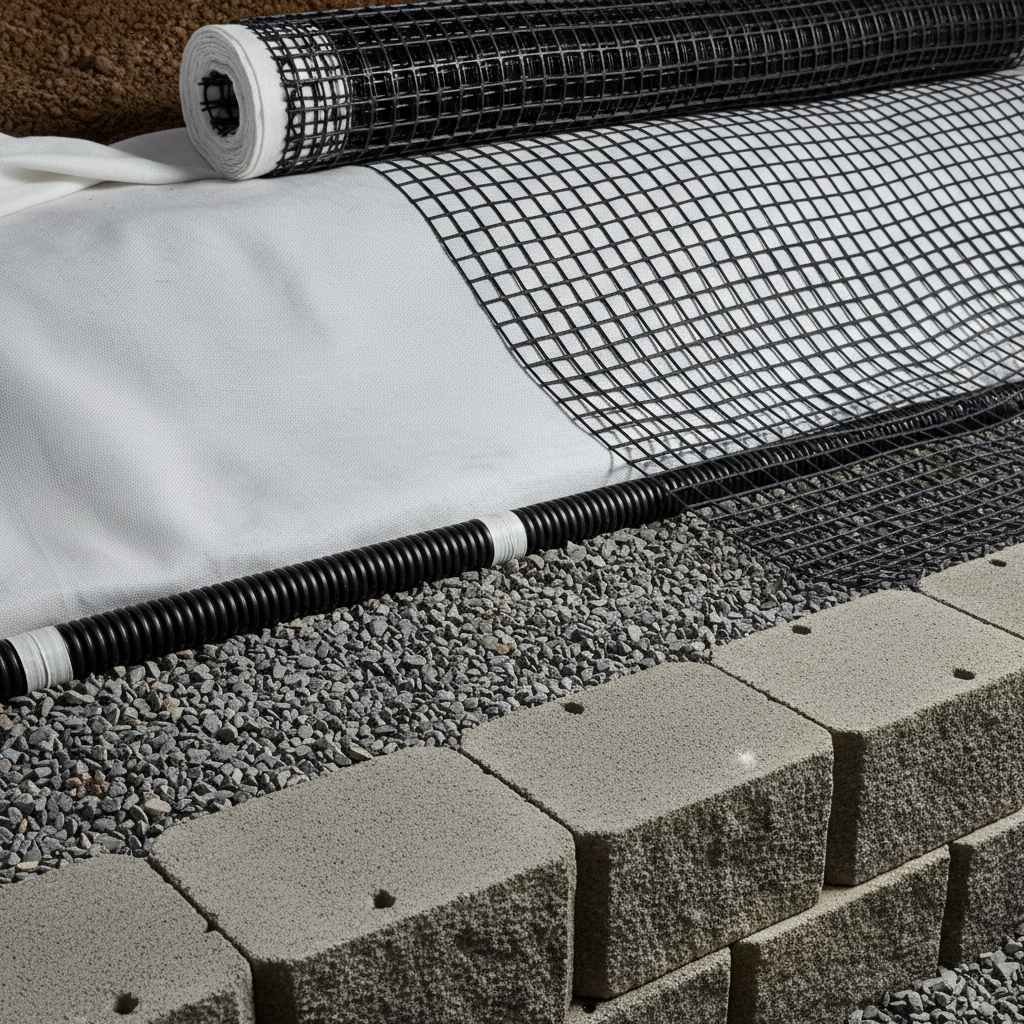
A wall resists lateral soil pressure by combining mass, friction, and reinforcement. The system includes a compacted base, a buried first course, drainage stone to lower water pressure, and geogrid that ties the wall face into the retained soil mass.
Think of a retaining wall as a gravity system with smart water control:
- Base and bearing: Dense-graded aggregate spreads load; freeze-thaw cycles demand proper depth and compaction (2–3 passes per lift).
- Drainage plane: 12 inches of clear stone behind the wall promotes free-draining conditions and reduces hydrostatic pressure.
- Geogrid layers: Placed every 16–24 inches in height; grid length is often 0.7–1.0 times wall height depending on surcharge.
- Setback and batter: Block systems build in a slight lean (typically 4–8 degrees) to counter earth pressure.
- Control of runoff: Surface swales or channel drains keep roof or driveway water from charging the backfill.
On sites with clay, we often extend the stone zone and add a separation fabric to prevent fines contamination. Small details—like burying roughly 10% of wall height in the first course—drive big performance differences. This is also where integration with nearby interlock or sod matters; see how we tie systems together in our retaining wall service approach.
Types of Retaining Walls and Where Each Shines
Common choices in Mississauga are segmental block walls, armour stone, and poured concrete. Segmental systems excel for curves and modular builds, armour stone offers a natural look with large mass, and poured concrete suits modern lines or tight footprints when engineered.
Segmental (concrete block) walls
- Best for: Curves, steps, planter tiers, and consistent finish across 20–60 foot runs.
- Specs to note: Pins or lips set setback; units are often 6–8 inches tall; caps add 2–3 inches.
- Reinforcement: Geogrid at specified intervals; longer grids near surcharges like driveways.
Armour stone walls
- Best for: Natural aesthetics and heavy mass where large equipment can access.
- Specs to note: Stones commonly 12–36 inches tall; joints are dry-stacked with tight bearing.
- Drainage: Still needs a 4-inch pipe and clear stone backfill to at least 12 inches.
Poured-in-place concrete
- Best for: Sleek, modern profiles or narrow spaces with engineered design.
- Specs to note: Rebar, footings below frost, and formwork; waterproofing and weeps reduce pressure.
- Finish options: Exposed aggregate, smooth, or decorative form liners.
Choosing the "right" wall is about loads, drainage, and access as much as looks. We advise clients to decide the geometry, water path, and reinforcement first, then select the face style.
Factors That Influence Mississauga Retaining Wall Cost
Your total investment is shaped by height and length, soil and slope, materials and caps, drainage design, steps and curves, site access, and any required permits or engineering. Tighter access, clay soils, and complex layouts add time and materials, while good access and simple runs streamline work.
- Geometry: Every 10 feet of length increases materials linearly; each 90° corner adds cutting and layout time.
- Height tiers: Taller than ~3–4 feet often means geogrid and possibly engineering for safety.
- Subsurface: Organics must be removed; poor soils require deeper excavation and thicker base (6–8 inches minimum).
- Drainage features: 12 inches of clear stone and a fabric-wrapped pipe create a reliable water path.
- Finishes: Bullnose caps, lighting, and integrated steps add precision and man‑hours.
- Access: If a mini skid is the largest machine that fits, production slows versus a full-size skid steer.
- Permits/approvals: Height, proximity to property lines, and nearby structures may trigger reviews.
We always evaluate wall alignments relative to existing walkways, decks, and driveways to avoid pinch points and to keep water moving away from foundations. For slope-heavy properties, our slope correction guide shows how walls, swales, and grading work together.
Planning, Permitting, and Local Rules in Peel
In Mississauga, approvals may apply based on wall height, location, and site sensitivity. Expect reviews when near property lines, watercourses, or utilities. Professional design and clear drawings speed decisions and reduce revisions.
Local compliance improves outcomes and timelines. Here’s how we approach it with clients:
- Site review: Locate easements, drainage swales, utilities, and trees to protect roots and services.
- Trigger checks: Height thresholds, adjacent loads (like driveways), and setbacks can require engineered drawings.
- Documentation: Scaled plans with sections, notes on base depth, drainage pipe routing, and geogrid layers help reviewers.
- Sequencing: We coordinate inspections with excavation and base prep to keep projects moving.
Neighborhood context matters too. In tight infill lots, shoring or temporary benching may be safer than steep temporary cuts during excavation. We also coordinate with neighbors to manage access windows and reduce disruption.
How HR Greenroots Builds a Retaining Wall That Lasts
We follow a tested sequence: precise layout, excavation to plan, geotextile placement, base in compacted lifts, level and bury the first course, stack and glue per system specs, add geogrid where required, install 12 inches of clear stone with a perforated pipe, and finish with caps and edge control.
- Layout and benchmarks: We pull strings, set grades with a laser, and mark cut/fill limits.
- Excavation: Remove organics; over-excavate for base width (often wall depth + 12 inches). Keep temporary slopes at safe angles.
- Fabric and base: Non-woven geotextile separates native soil; base compacted in 2–3 inch lifts with 2–3 passes.
- First course: Level front-to-back and side-to-side; bury ~1/10 of wall height.
- Drainage zone: 4-inch perforated pipe pitched 1% to outlet; 3/4-inch clear stone to 12-inch thickness.
- Reinforcement: Geogrid installed per manufacturer tables—longer near surcharges and corners.
- Face and caps: Glue caps after sweeping, then add edge restraint to adjoining interlock.
- Finish grades: Topsoil and sod or mulch to lock in moisture and control erosion.
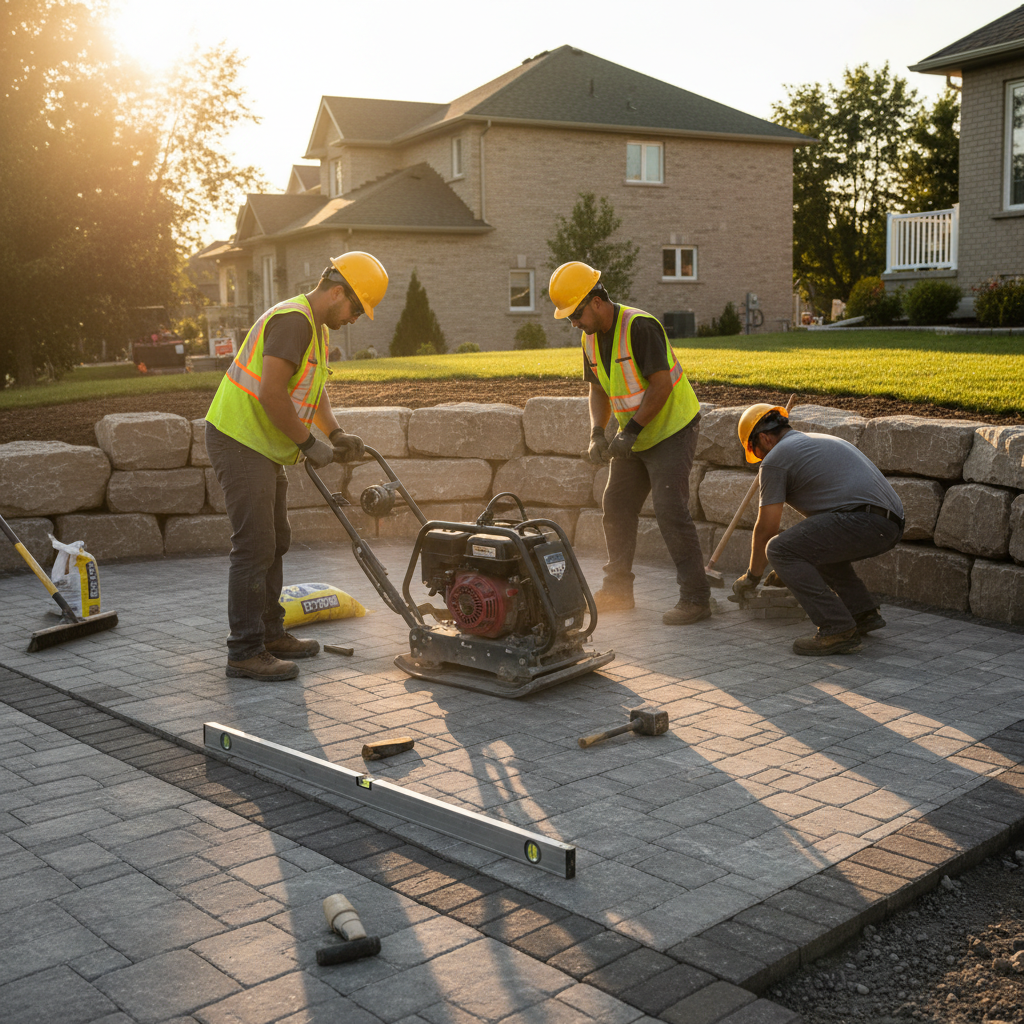
Quality control is measurable: plate compactor passes, lift thickness checks, and level readings every 3–4 blocks. We document each checkpoint so homeowners can see precisely what’s under the surface.
Best Practices and Specs Homeowners Should Expect
Ask your contractor to specify base depth, lift thickness, compaction targets, drain routing, and grid layers in writing. Require photographic checkpoints for base, pipe, and grid before backfill. Clear specs reduce rework and support long-term performance.
- Base and bedding: 6–8 inches dense-graded base; 1 inch of leveling sand only when manufacturer allows (never replace stone zone with sand).
- Compaction: Plate compactor with overlapping passes; proof roll until no visible deflection.
- Drainage: Pipe outlets protected with a screen; daylights to a safe, non-erosive location.
- Grid placement: Extend grid minimum 0.7× wall height; maintain proper overlap at seams.
- Setbacks: Keep heavy loads (sheds, driveways) a safe distance behind the wall or increase grid length/engineering.
We document each stage, which makes future maintenance easier and helps realtors and inspectors verify build quality. For perimeter privacy that complements your wall, review our privacy fence options for Mississauga properties.
Tools, Materials, and Resources
Expect pro-grade tools like lasers, plate compactors, cutoff saws, and tampers. Materials include segmental blocks or armour stone, 3/4-inch clear stone, dense-graded base, non-woven fabric, geogrid, and a 4-inch perforated pipe with sock. Accurate tools and the right aggregates drive longevity.
- Layout: Laser level, string lines, marking paint, and grade stakes keep geometry true.
- Excavation: Mini excavator, skid steer, and buckets sized for tight access where needed.
- Compaction: 200–300 lb plate compactor; jumping jack only for trench spots, not the stone zone.
- Sawing and finish: 12–14 inch cutoff saw with wet cutting for clean miters on caps and steps.
- Aggregates: ASTM #57 (3/4-inch clear stone) behind wall; dense-graded for base and under pavers.
Homeowners often ask about “gravel vs. stone” behind the wall—the answer is clean, angular stone to prevent fines clogging. That single choice reduces future pressure dramatically.
Case Studies: Mississauga Projects and Lessons Learned
Real sites show why design details matter. On clay slopes we extend the drainage stone; on tight lots we phase work to protect neighbors. Each case reinforced the same lesson: base, drainage, and grid determine whether a wall stays straight after several winters.
Backyard tier with interlock patio
- Challenge: 30-inch grade change against a small yard created unusable space and runoff toward the house.
- Approach: Segmental wall with two grid layers; 12-inch stone zone; 1% pipe fall; new interlocking patio tied with edge restraint.
- Result: Usable dining area and stable lawn after two winters; no joint opening noted.
Front yard armour stone with steps
- Challenge: Steep approach and limited parking; homeowner wanted natural curb appeal.
- Approach: Armour stone tiers with 16-inch rises; widened driveway with interlocking pavers; careful machine access plan.
- Result: Safer access and parking; stones remained tight and true through freeze-thaw cycles.
Corner lot with tight access
- Challenge: Fenced yard limited equipment; clay subsoil held water after storms.
- Approach: Mini skid operations; extended stone backfill to 16 inches; surface swale to route roof runoff away from the wall.
- Result: No bulging after spring thaw; turf adjacent to the wall stayed even and dry.
Local considerations for Mississauga
- Schedule excavation around spring thaw and heavy rains to protect open cuts; late spring through fall offers steadier compaction results.
- Near Saigon Park or Lambton College areas, coordinate deliveries to avoid peak traffic windows; narrow streets affect access and staging.
- Infill lots may drain toward neighbors; include a surface swale or channel drain to keep flow on your property.
Maintenance and Longevity
Well-built walls need minimal upkeep: keep weep outlets clear, redirect roof water, and inspect caps and joints annually. Expect minor seasonal movement in freeze-thaw climates; proper drainage and grid minimize visible change and keep faces tight for many years.
- Annual checks: Clear leaves at outlets; verify downspouts don’t discharge behind the wall.
- Adjacent surfaces: Re-sweep polymeric sand on nearby pavers every few seasons to keep edges locked.
- Vegetation: Avoid deep-rooted shrubs right at the wall; choose shallow-rooted perennials in top planters.
- Snow and ice: Use calcium chloride near pavers; rock salt can damage concrete surfaces over time.
Documenting build photos makes tiny tweaks easy because we can see pipe routes, grid layers, and base extents before we open anything up.
Working with HR Greenroots: From Idea to Finished Wall
Our design-build process starts with a site consult, then a scope and layout plan, followed by scheduled installation. We integrate walls with interlocking patios, sod, fencing, and lighting so your yard functions as one cohesive space—backed by reliable communication and on-time delivery.
- Site consultation: Measure grades, review drainage, and identify access and staging.
- Concept plan: Align wall lines with walkways, decks, and future features.
- Construction: Follow documented specs and photo checkpoints at base, pipe, and grid installs.
- Integration: Tie in new sod, interlocking, fencing, or a deck to finish the space.
- Care plan: Maintenance pointers and seasonal checklists keep performance high.
Clients choose us because we combine planting, hardscaping, and maintenance thinking—reducing handoffs and ensuring your wall works with the whole yard. For budget planning across the yard, see our Mississauga landscape design cost drivers.
Frequently Asked Questions
Homeowners ask about permits, timelines, materials, and winter work windows. Here are direct answers so you can plan with confidence and avoid surprises before construction begins.
Do I need a permit for a retaining wall in Mississauga?
Permits depend on wall height, location, and site context. Reviews are more likely near property lines, driveways, and water features, or above certain height thresholds. We’ll flag triggers during a site consult and prepare drawings if approvals are required.
How long does retaining wall installation take?
Smaller segmental walls often build in days; larger or multi-tier projects can span multiple weeks. Access, weather, and added features like steps or lighting affect scheduling. We provide a realistic timeline after measuring the site and confirming staging.
Which retaining wall material lasts the longest?
All three—segmental block, armour stone, and poured concrete—can last for decades when built on a compacted base with proper drainage. Choose based on access, desired look, curves vs. straight lines, and whether engineering is needed for nearby loads.
Can retaining walls be built in winter?
Yes, but quality control is tougher. Frozen soils, snow, and meltwater complicate excavation and compaction. We prefer late spring through fall for consistent results; if winter work is necessary, we use ground thaw and staged protection to keep specifications tight.
How do you prevent water pressure behind the wall?
We install a continuous 4-inch perforated pipe, pitch it to daylight or a catch basin, and surround it with 12 inches of clean, angular stone. Non-woven geotextile separates soil from the stone so fines don’t clog the drainage plane over time.
Key Takeaways
Plan for soils, water, and loads first, then pick materials. Specify base depth, grid layers, and pipe routes in writing. In Mississauga, align with local reviews and access realities. A well-detailed wall protects nearby patios, sod, and foundations for many seasons.
- Define geometry, drainage, and reinforcement before choosing a face style.
- Document measurable specs: base depth, lift thickness, pipe slope, grid length.
- Coordinate with interlocking, sod, fencing, and lighting for a cohesive result.
- Schedule work around wet seasons and tight access to maintain quality.
Conclusion: Plan for Performance, Not Just Price
Mississauga retaining wall cost is the outcome of informed design, soil and water control, and disciplined installation. When base, drainage, and reinforcement are specified and verified, walls stay straight, patios remain stable, and yards become safer, more usable spaces for years to come.
Here’s the bottom line: a great wall starts with a clear plan. Define your goals, confirm site constraints, and insist on documented specs—base depth, pipe slope, and grid lengths. Those numbers tie design intent to real‑world performance through freeze-thaw cycles.
Ready to move forward? Book a site consultation with HR Greenroots Landscaping. We’ll measure grades, assess soils, and create a phased plan that integrates interlocking, sod, fencing, and lighting so everything works together. When your wall anchors a cohesive yard, you get lasting value without surprises.


