Retaining wall drainage is the system that moves water away from the wall—using gravel backfill, perforated pipe, outlets, and proper grading—to prevent soil pressure, frost heave, and premature failure. This retaining wall drainage guide explains exactly how HR Greenroots Landscaping designs and builds drainage in Mississauga properties from our base at 100 Matheson Blvd E unit 202.
By HR Greenroots Landscaping • Last updated: 2026-05-12
Quick Summary
A durable retaining wall needs free-draining backfill (typically 12–24 inches), a 4-inch perforated pipe at the wall’s heel, fabric separation, and clear discharge to daylight or a catch basin. Grade surfaces to shed water (about 2%) away from the wall and protect with weep holes or outlets every 6–10 feet.
Here’s what you’ll get from this complete guide:
- Plain-language definition of retaining wall drainage and why it matters
- How the drainage layers work together (base, backfill, pipe, outlets, grading)
- Best practices HR Greenroots applies on Mississauga and GTA projects
- Step-by-step install checklist you can hand to a contractor
- Tools and resources, plus 13 mini case examples from real-world scenarios
What Is Retaining Wall Drainage?
Retaining wall drainage refers to the layers, components, and slopes that collect and redirect water away from the wall. The goal is to lower hydrostatic pressure behind the wall so soils stay stable, the wall remains plumb, and freeze–thaw cycles don’t push the wall forward or upward.
In our projects across Mississauga and the Regional Municipality of Peel, we build drainage as a system. It’s never just a pipe. It’s coordinated base prep, free-draining stone, geotextile separation, outlets to daylight, and surface grading that works with your yard—not against it.
Core components you should expect
- Compacted base: Dense-graded aggregate, compacted in lifts, for a stable foundation.
- Free-draining backfill: Usually 3/4-inch clear stone 12–24 inches thick behind the wall.
- Perforated pipe: A 4-inch pipe at the heel of the wall to collect water.
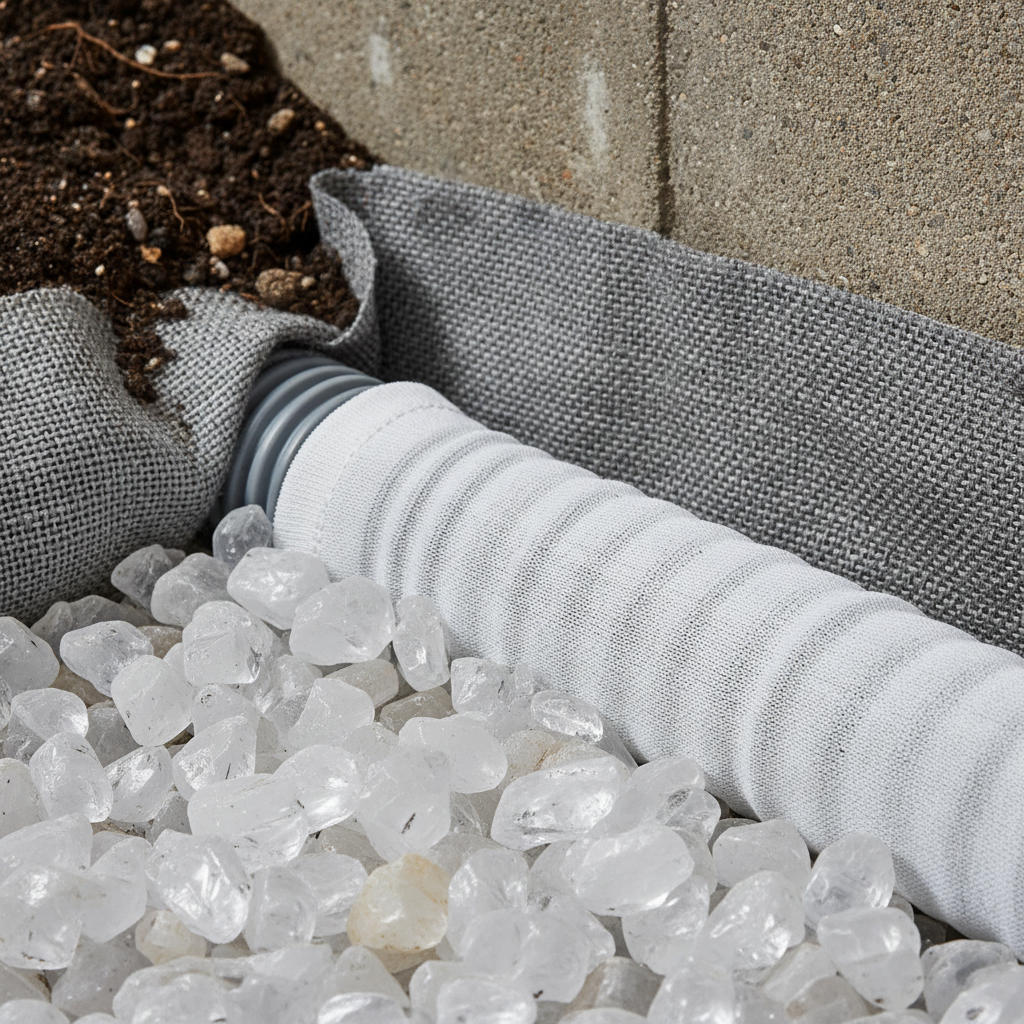
- Geotextile fabric: Separates clear stone from native soils to prevent clogging.
- Discharge: Daylight outlets, weep holes, or tie-in to an approved drain point.
- Surface grading: A slight 2% slope sends runoff away from the wall.
For a deeper dive into structural choices and finishes, see our retaining wall service overview and our landscape design and build guide.
Why Retaining Wall Drainage Matters
Drainage prevents hydrostatic pressure from building up behind the wall. Without controlled water movement, walls bow, lean, and heave—especially through Ontario freeze–thaw cycles. Proper outlets, free-draining backfill, and surface grading reduce risk, extend wall life, and protect nearby patios, lawns, and foundations.
Water weighs about 62.4 pounds per cubic foot. Trapped behind a wall, that weight converts to lateral pressure on your blocks or stones. Add freeze expansion and clay soils that hold moisture, and small mistakes become big problems. Our team designs drainage to move water predictably so your hardscape lasts.
Consequences of poor drainage
- Visible distress: Leaning, bulging, or stair-step cracking.
- Surface damage: Efflorescence, staining, or spalling on blocks.
- Soil loss: Washed-out backfill and sinkholes at the top of the wall.
- Landscape impacts: Soggy lawns, paver settlement, and tripping hazards.
Benefits you’ll notice immediately
- Stable structure: The wall stays plumb and aligned season after season.
- Drier yards: Less pooling on lawns and patios adjacent to the wall.
- Lower upkeep: Fewer repairs and releveling of adjacent interlock.
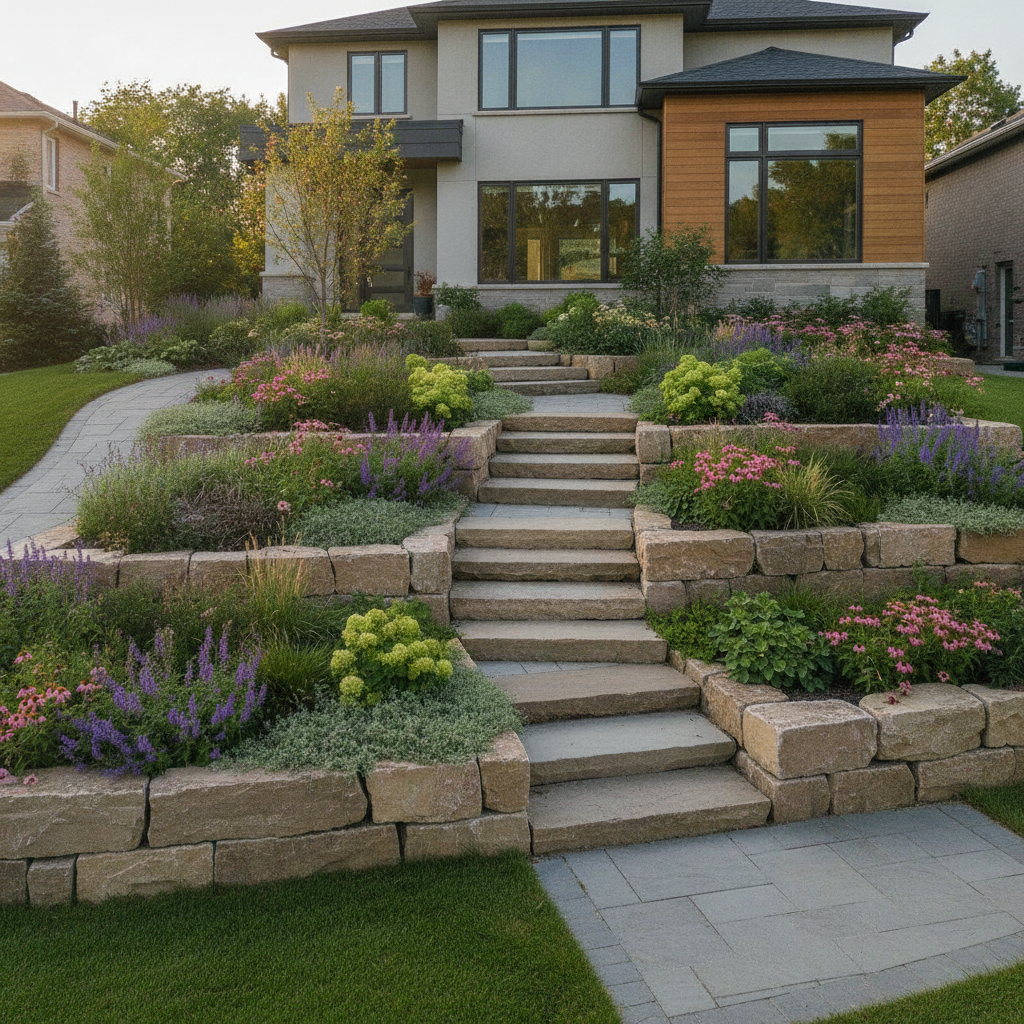
If you’re planning a patio or walkway adjacent to a wall, lining up drainage practices improves the whole system. For a different take on planning hardscape projects, see this practical patio planning advice.
How Retaining Wall Drainage Works
A drain path collects water through free-draining stone and geotextile, sends it to a perforated pipe at the wall’s base, and discharges via outlets or to daylight. At the surface, a modest slope (around 2%) directs runoff away from the wall so water doesn’t re-enter the backfill.
Think in layers: subgrade, base, block or stone, clear stone chimney, fabric, and finishes up top. Each layer must allow water to travel down and out. We maintain consistent pipe slope (about 1% minimum), place outlets 6–10 feet apart, and keep discharge points free and visible.
Drainage components and purpose
Component Typical spec Purpose Base course 4–8 in. compacted aggregate Provides level, load-bearing foundation Backfill (clear stone) 12–24 in. thickness behind wall Allows rapid drainage, reduces pressure Perforated pipe 4 in. with 1% fall Collects water at base and moves it out Geotextile Non-woven separator Prevents fines from clogging stone and pipe Outlets/weep holes Every 6–10 ft Releases water to daylight or drain Surface grading ~2% slope away Sends runoff away from wall capWhen we build walls beside patios or driveways, we coordinate the paver base and edge restraints so water paths don’t conflict. That integration helps avoid settlement lines where structures meet.
Types of Retaining Wall Drainage Systems
Most residential walls use a perforated pipe to daylight paired with clear stone backfill. Alternatives include weep holes for gravity walls, catch-basin tie-ins, and French drains that intercept water upslope. The right choice depends on soil type, wall height, and available discharge points.
Common drainage approaches
- Pipe to daylight: Our default. A 4-inch pipe slopes to a visible outlet. Reliable and serviceable.
- Weep holes: Gaps or sleeves through the face of gravity walls. Useful when outlet runs are short.
- Catch-basin tie-in: Connect to an approved storm point when surface grades can’t reach daylight.
- French drain intercept: Perforated pipe and stone upslope to reduce water reaching the wall.
- Sump-assisted discharge: For low-lying yards only, as a last resort with strict safeguards.
Soils, seasons, and materials
- Clay-rich soils retain water; plan thicker stone backfill and more outlets.
- Freeze–thaw cycles magnify pressure; ensure fabrics and outlets stay unclogged.
- Block systems vs. stone: Segmental block walls often include geogrid; coordinate grid layers with the drain path.
Planning paths, patios, or walkways? Review broader site drainage too. For another perspective on shaping landscape runoff, here’s a concise piece on backyard drainage tips.
Best Practices HR Greenroots Uses on Mississauga Projects
We build drainage as a system: compacted base, 12–24 inches of clear stone, 4-inch perforated pipe with 1% fall, non-woven fabric separation, and outlets every 6–10 feet. We then grade surfaces with about 2% fall away from the wall and verify daylight discharge is clear and visible.
Our standard checklist
- Base prep: Excavate to undisturbed subgrade; compact in 3–4 inch lifts.
- Leveling pad: Screed a 1-inch sand or fine aggregate layer for first course accuracy.
- First course: Set blocks dead-level; check every 3–4 blocks.
- Drain pipe: Lay pipe at heel with 1% slope; protect with sock or surround with fabric.
- Backfill: Use 3/4-inch clear stone to within 6–8 inches of top; compact in lifts.
- Geotextile: Wrap stone to keep fines out; lap seams 12 inches.
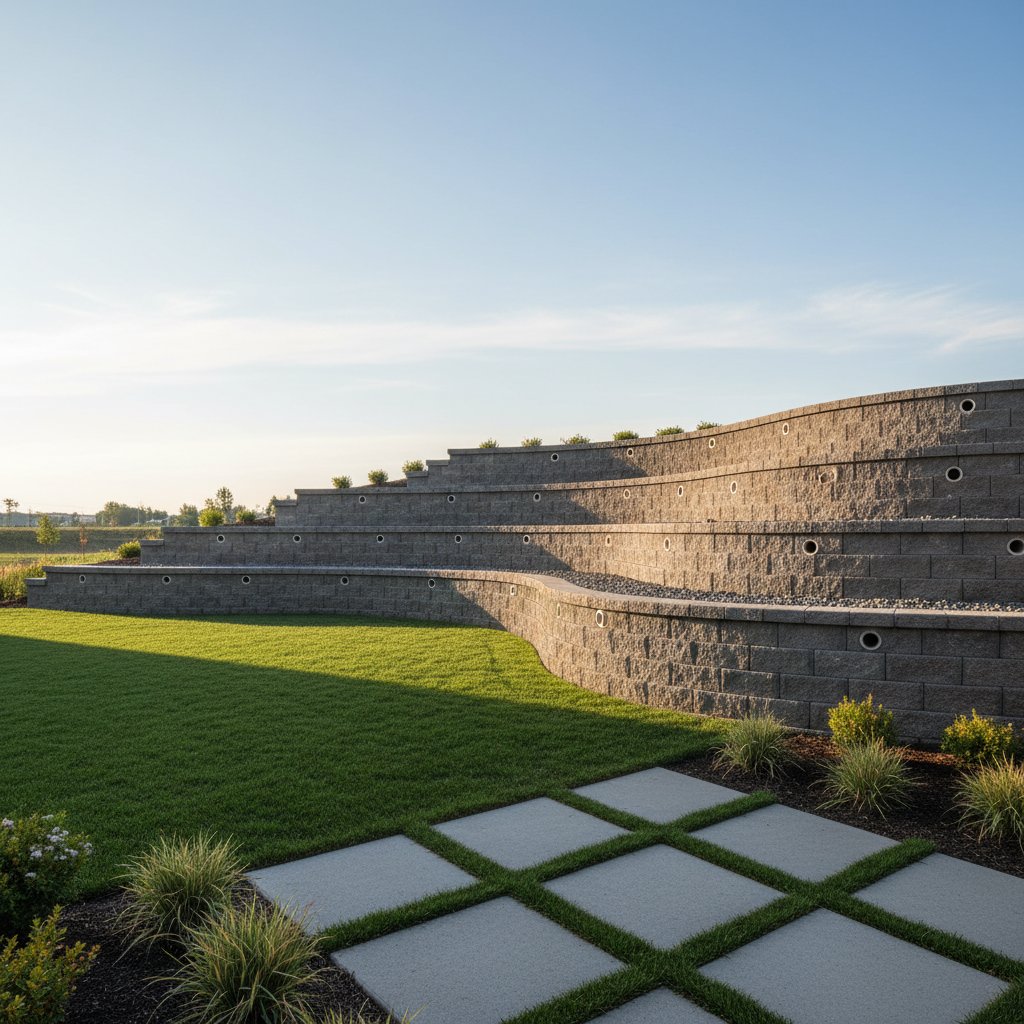
- Outlets: Daylight or weep every 6–10 feet; protect mouths with splash pads.
- Surface finish: Top off with soil/mulch; grade caps to shed water.
Coordination with adjacent features
- Interlocking & pavers: Align drain paths with paver base slopes and edge restraints.
- Lawns: Blend sod grades to avoid water ponding at the wall toe.
- Stone work: Use armour stone steps with under-step drains where needed.
See our approach in context on our retaining wall drainage insights and the broader landscape design and build guide.
Local considerations for Mississauga
- Freeze–thaw swings can be sharp. Schedule wall builds after spring thaw; keep outlets open before first frost near Saigon Park trail low points.
- Summer storms can be intense. Size outlets generously and keep discharge visible around campuses like Lambton College to avoid accidental cover-up.
- Regional Municipality of Peel soils vary. Expect clay pockets; plan thicker stone backfill and extra outlets in slow-draining areas.
Tools and Resources Checklist
You’ll need excavation tools, compaction equipment, measuring and leveling gear, geotextile, clear stone, perforated pipe, fittings, and safety gear. Organize materials before excavation to keep the trench clean and reduce contamination of the free-draining stone layer.
Tools
- Mini-excavator or trenching spade; wheelbarrows for tight sites
- Plate compactor; hand tamper for edges and corners
- 2–4 ft levels, string lines, laser level, and tape measures
- Masonry saw for block cuts; rubber mallets; dead-blow hammers
- Utility knives and shears for geotextile
- PPE: gloves, eye/ear protection, and steel-toe footwear
Materials
- 3/4-inch clear stone for backfill; dense-graded aggregate for base
- 4-inch perforated pipe plus fabric sock or wrap
- Non-woven geotextile for separation and wrapping
- Outlet fittings, grates, and splash pads
- Segmental blocks or armour stone with caps and adhesives
If your wall integrates with a patio or path, pair this list with paver materials so base and drains align. Here’s an external perspective on site design coordination that reinforces planning ahead.
Step-by-Step: How We Install Retaining Wall Drainage
Excavate to plan depth, compact subgrade, place and level the base, set the first course, install perforated pipe at the heel with 1% slope, backfill with clear stone, wrap with geotextile, add outlets every 6–10 feet, then finish caps and grade surfaces to shed water.
- Stake and mark: Confirm wall line, height, and outlet destinations.
- Excavate trench: Allow room for base, block depth, and 12–24 inches of clear stone backfill.
- Compact subgrade: Aim for firm, unyielding soil; correct soft spots.
- Place base aggregate: Compact in 3–4 inch lifts; screed a 1-inch leveling layer.
- Set first course: Dead-level controls the whole wall; take your time.
- Install pipe: Lay 4-inch perforated pipe at the heel with 1% fall toward outlet.
- Backfill with stone: Place 3/4-inch clear stone in lifts; compact lightly with a plate compactor.
- Wrap with fabric: Separate stone from native soils; lap 12 inches at seams.
- Place outlets: Every 6–10 feet or as engineered; protect mouths from blockage.
- Cap and grade: Install caps with adhesive; grade topsoil at ~2% away from wall.
- Final checks: Flush lines if possible; verify water daylights and surfaces shed.
Case Studies and 13 Practical Examples
Real yards rarely match textbook drawings. These Mississauga and GTA examples show how we adapt drainage details—outlet spacing, fabric choices, and tie-ins—to manage clay pockets, tight setbacks, and adjacent patios while keeping water moving away from structures.
Mini case insights
- Downslope daylight: A 36-foot wall near Matheson Blvd used two outlets at 8 and 28 feet. Each had splash pads to stop mulch washouts.
- Clay lens surprise: Mid-dig, we found a dense clay lens. We widened the stone chimney to 24 inches for faster drainage.
- Patio interface: Where the wall met a new paver patio, we ran a shallow interceptor drain upslope to keep the paver base dry.
- Tree root zone: Beside a mature maple, we shifted the outlet path to avoid cutting major roots, then protected with a grate.
- Neighbour grade drop: With a property line close by, we daylighted into a rock-filled splash area to prevent erosion next door.
- Weep-hole retrofit: On a gravity stone wall, we cored discreet weep holes and added a stone-filled trench behind the face.
- Driveway extension: For a widened driveway above a wall, we aligned paver base slope with the wall outlets to avoid water traps.
- French drain assist: In a soggy yard, we intercepted groundwater 10 feet upslope so less reached the wall.
- Geogrid coordination: On a 5-foot terraced wall, we kept grid layers clear of the pipe corridor to maintain flow.
- Winter-ready discharge: We raised outlet mouths 3 inches above snow line and added gravel aprons to minimize ice buildup.
- Sod tie-in: After capping, we feathered topsoil and sod to a 2% fall, eliminating a recurring puddle at the wall toe.
- Mulch migration fix: We used coarser mulch and a discreet stone band above the cap to stop fines from clogging outlets.
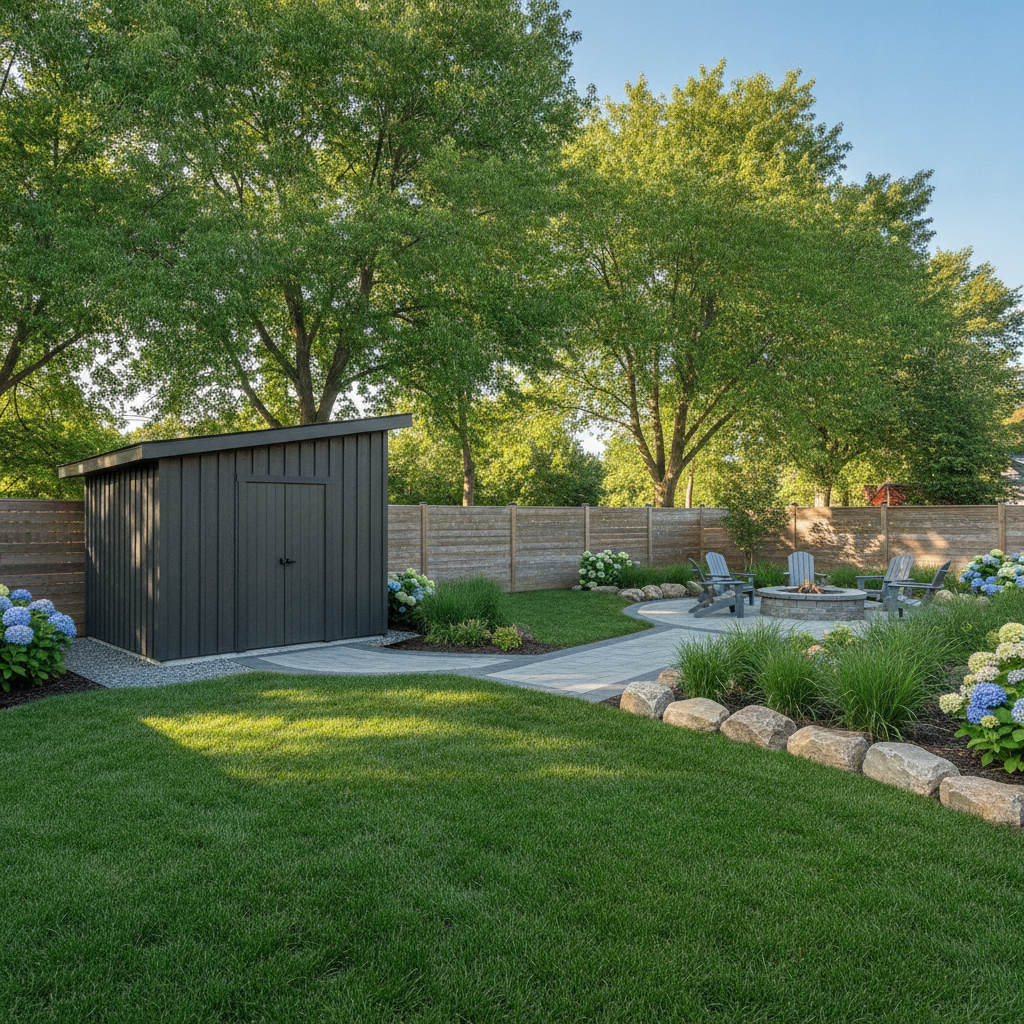
- Shed relocation: A garden shed pad redirected roof runoff; we added a gutter and splash block to keep the wall backfill dry.
For broader planning context around walls, patios, and travel paths, scan our in-depth Mississauga landscape design guide.
Retaining Wall Drainage FAQ
Homeowners ask about pipes, weep holes, gravel types, and how far apart outlets should be. Here are concise answers you can trust and hand to your contractor—or use to check an existing wall for red flags.
Do all retaining walls need a drain pipe?
Most do. A 4-inch perforated pipe at the heel, surrounded by clear stone, reliably lowers hydrostatic pressure. Gravity stone walls with large weep holes sometimes work without a pipe, but pipes are safer for Ontario’s wet seasons and freeze–thaw cycles.
How far apart should outlets or weep holes be?
Plan a visible discharge every 6–10 feet, adjusted for soil and wall length. In heavy clay or longer runs, add more frequent outlets to keep the pipe from running under pressure and to prevent backups during storms.
What gravel should I use behind the wall?
Use 3/4-inch clear (washed) stone. It drains quickly and compacts enough for stability. Avoid mixed fines or recycled fill that can clog the fabric and pipe. Keep 12–24 inches of this stone behind the wall up to about 6–8 inches from the top.
Can I tie the wall drain into my home’s footing drains?
In most cases, no. Keep systems independent to avoid overloading foundation drains or sending silt into them. Discharge to daylight where possible, or to an approved storm point using proper fittings and sediment control.
How do I keep outlets from clogging over time?
Place grates, add small splash pads, and avoid fine mulch directly above outlet paths. Inspect after big storms and each fall cleanup. Keep at least a few inches of air gap at the outlet mouth so snow and leaves don’t seal it.
Conclusion and Next Steps
Successful retaining walls manage water first. Build a layered system—base, clear stone, pipe, fabric, outlets, and grading—and verify that discharge remains visible and free. Coordinate with patios, lawns, and structures so all surfaces shed water predictably away from the wall.
Here are the simplest moves you can make today:
- Walk your wall line after rain and note any pooling or soft soils.
- Find outlet mouths, clear debris, and confirm visible flow to daylight.
- Plan spring or fall upgrades to avoid freeze–thaw surprises.
Key takeaways
- Use 12–24 inches of clear stone and a 4-inch perforated pipe with 1% fall.
- Provide outlets every 6–10 feet and maintain a 2% surface slope away.
- Keep systems independent; don’t overload foundation drains.
- Wrap with non-woven fabric to stop fines from clogging the stone.
Related reading for your project
If you’re mapping a full yard upgrade, pair this retaining wall drainage guide with our service and planning resources. Start with our retaining wall services for structural options, then review coordinated planning in our Mississauga design-build article. For a patio-and-wall combo, skim this external primer on hardscape planning to avoid water traps where features meet.
Need eyes on a tricky slope? Book a site assessment with HR Greenroots Landscaping in Mississauga. We’ll confirm grades, outlets, and wall design, then coordinate pavers, lawns, and stone features so water has a safe path out.