
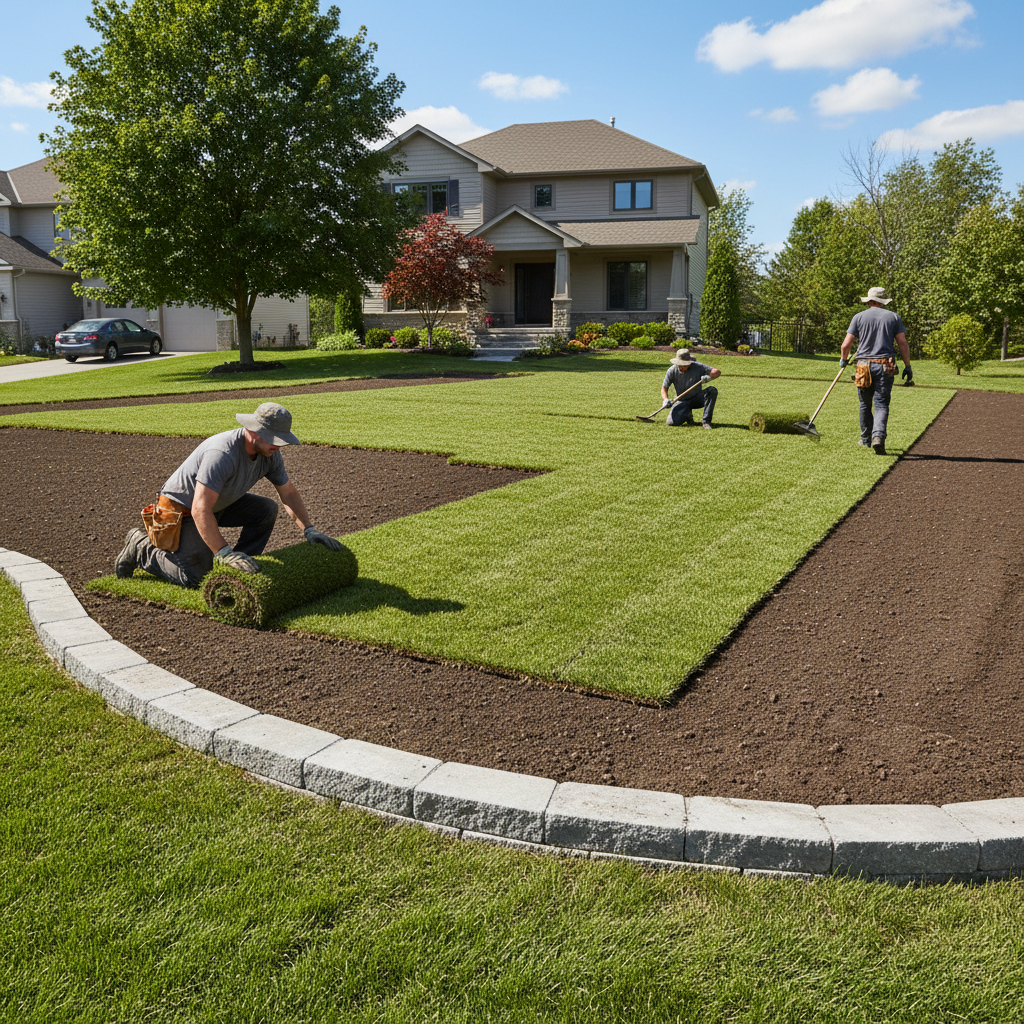
Sod installation mistakes to avoid are the preventable errors that cause new lawns to fail—like poor grading, uneven seams, shallow watering, or mowing too soon. From our Mississauga base at 100 Matheson Blvd E unit 202, HR Greenroots Landscaping installs and maintains sod across the GTA so roots take fast, color holds, and surfaces stay level.
By HR Greenroots Landscaping • Last updated: May 27, 2026
Above-Fold: Hook & Table of Contents
New sod succeeds when soil contact is firm, moisture is consistent, and grade sheds water. This guide shows you how to avoid the most common mistakes—before, during, and after installation—so your Mississauga lawn roots quickly and stays green through the season.
- Quick Summary
- What Counts as a Mistake?
- Why It Matters in Mississauga & Peel
- How Sod Installation Works (Step-by-Step)
- Types of Mistakes to Avoid
- Best Practices That Prevent Failure
- Tools & Resources
- Watering & Mowing Schedule
- Seasonal Timing for Mississauga
- Case Studies
- FAQ
- Key Takeaways & Next Steps
Quick Summary
The biggest sod mistakes are skipping soil prep, laying on uneven grades, leaving gaps, watering inconsistently, and mowing too early. Fix them by testing soil, compacting base lightly, staggering seams, irrigating 2–3 times daily at first, and waiting 10–14 days before the first mow.
- What you’ll learn: top errors, how to prevent them, and a pro install checklist.
- Who it’s for: homeowners and property managers in Mississauga and the GTA.
- Use this when: replacing a patchy lawn or finishing a new build.
- Dig deeper: learn timing in our best time for sod in Mississauga guide.
What Is a “Sod Installation Mistake”?
A sod installation mistake is any decision or action that prevents roots from knitting into soil within 2–3 weeks. Typical slip-ups include poor grading, inadequate base moisture, uneven seams, watering that’s too light or too heavy, and mowing before roots anchor.
In practical terms, a mistake is anything that slows rooting, creates air gaps, or starves new turf of consistent moisture. New sod is a living carpet with shallow roots when delivered. It needs firm soil contact, steady moisture, and stable footing to establish.
- Root contact: Gaps as small as 1/8 inch dry roots and brown seams.
- Moisture window: New sod typically needs short, frequent watering for 7–10 days, then deeper, less frequent cycles by week three.
- Stability: Foot traffic or mowing too soon shears roots and leaves ruts that telegraph through the surface for months.
We see these patterns repeat on first-time DIY jobs. The good news: a few checks before delivery, plus a tight install routine, prevent nearly all failures.
Why Avoiding Sod Mistakes Matters in Mississauga and Peel
Avoiding sod mistakes in Mississauga protects investment and curb appeal through freeze–thaw cycles. In the Regional Municipality of Peel, soil structure and spring rain patterns magnify small errors—proper grading, base moisture, and seam control keep lawns level and healthy.
Mississauga lawns face spring saturation, summer dry spells, and periodic heavy downpours. Small ruts become puddles. High spots scorch first. A level, lightly compacted base with correct slope (about 1–2% away from the house) keeps water moving and roots oxygenated.
- Freeze–thaw: Air pockets under sod can heave in late winter, lifting seams.
- Rain variability: One deep soak can carry away loose topsoil if grading is off by even 1/2 inch across a run.
- Traffic: Side-yard paths compact quickly; without a defined walkway, sod compaction rises within weeks.
Our crews plan for these realities on every Mississauga install—especially where lawns meet driveways, patios, or downspout zones that concentrate runoff. For timing insights, explore our Ontario sod timing guide.
How Sod Installation Works (and Where Mistakes Happen)
Successful sodding follows a sequence: soil test, remove debris, set grade, add topsoil, pre-water, lay staggered seams, roll, and irrigate frequently for 7–10 days. Most failures trace back to missed soil prep, uneven base, poor seam alignment, or irregular watering.
- Assess & test: Identify shade, traffic routes, irrigation coverage, and soil texture. Basic testing informs amendment decisions.
- Strip & clear: Remove old turf, roots, and stones to 2–3 inches. Hidden thatch creates spongy voids.
- Shape grade: Aim 1–2% slope away from structures; feather to fixed edges (walks, curbs) for clean transitions.
- Topsoil & amend: Blend screened topsoil to a uniform 3–4 inches. Rake smooth; light water to settle fine particulates.
- Lay sod tight: Stagger seams like brickwork; butt edges without stretching; trim with a sharp knife for recessed fittings.
- Roll & water: Use a water-filled roller for firm contact, then water to 0.25–0.5 inch immediately.
- Establish schedule: Short, frequent cycles for 7–10 days; taper to deeper, less frequent watering by week three.
Design details matter at transitions. If your new lawn meets a patio or walkway, plan edging. Our sod installation service page shows how we integrate edging and grade checks into every lawn build.

Types of Mistakes to Avoid (Planning, Prep, Install, Care)
Avoid four mistake categories: planning blind spots, poor soil prep, sloppy install technique, and inconsistent aftercare. Address each with a checklist—confirm grade, moisture, tight seams, and a 3-week irrigation plan before the first mow.
Planning blind spots
- No traffic plan: If kids or pets cross the same strip daily, add stepping stones or reroute paths.
- Wrong grass for light: Full-sun turf thins under dense afternoon shade; match sod to the site’s true sun hours.
- Ignoring drainage: Downspouts dumping onto lawns create soggy pockets and algae along seams.
- Missing timing: Hot, windy weeks drive evaporation. Learn seasonal timing in our sod installation timing guide.
Soil preparation lapses
- Shallow topsoil: Less than 3 inches limits rooting depth and drought resilience.
- Compaction extremes: A powdery base dries out; over-compacted soil chokes roots. Aim for “firm but not hard.”
- Skipping pre-wet: Dry dust wicks moisture from new sod; mist the base before the first roll goes down.
- Debris underlay: Remaining roots, thatch, or stones create bumps that telegraph to the surface.
Installation errors
- Stretched rolls: Tugging to close a gap thins the mat and creates future holes.
- Cross seams: Four-corner seams become weak spots; stagger courses like brick.
- Unrolled edges: Without a roller, edges curl and dry first.
- Overhangs on hardscape: Sod draped over pavers dries quickly; cut flush and support edges.
Aftercare mistakes
- Mowing day 5: Blades shear roots that haven’t knitted; wait 10–14 days.
- Deep soak too soon: Early heavy watering can float seams open; use short cycles first.
- Fertilizing immediately: Hot applications can burn tender roots; schedule within recommended windows for your grass type.
- Ignoring wind: Afternoon wind accelerates edge drying; add a brief mid-day mist during heat waves.
Best Practices That Prevent Failure
Best practice is simple: measure grade, build a uniform base, lay tight seams, roll once, then water little and often for the first week. Add walkways in high-traffic strips, trim carefully at edges, and delay mowing until roots resist a gentle tug.
- Confirm slope: 1–2% (about 1/8–1/4 inch per foot) away from foundations.
- Edge control: Use paver or metal edging where sod meets stones to stop creep and gaps.
- Seam standards: No gaps, no overlaps; offset seams 6–12 inches course-to-course.
- Roll then irrigate: Rolling first creates consistent soil contact; water immediately after.
- Irrigation schedule: Days 1–7: 2–3 short cycles daily; Days 8–14: 1–2 deeper cycles; Weeks 3–4: transition to 1–2 deep soakings weekly.
- Traffic design: Add stepping stones or a narrow paver ribbon along desire paths.
- Knife discipline: Use fresh blades for curves and around features so edges don’t fray.
Local considerations for Mississauga
- Spring installs near Saigon Park benefit from erosion control on slopes; add coir blankets on grades steeper than 3%.
- Summer heat spikes call for earlier morning cycles; midday wind increases evaporation significantly.
- Campus-adjacent rentals near Lambton College see heavy foot traffic; define stone pads by gates to avoid rutting.
When lawns border patios, driveways, or walks, clean transitions make or break the finish. Our crews coordinate sod with edging and interlock so surfaces stay even. See how we plan it on our professional sod installation services article.

Tools and Resources (Pro Picks)
Use a soil test kit, long straightedge, water-filled roller, sharp utility knife, oscillating sprinklers, and a hose timer. These tools verify grade, lock seams tight, and keep moisture consistent—three factors that drive fast rooting and a uniform surface.
- Soil test kit: Snapshot pH and organic matter; informs amendments.
- 6–8 ft straightedge or screed board: Finds low/high spots quickly.
- Water-filled roller: Essential for immediate soil-to-root contact.
- Sharp knife & spare blades: Clean cuts at curbs, valve boxes, and trees.
- Sprinkler + timer: Delivers repeatable, short cycles even if you’re off-site.
- Landscape edging: Keeps borders crisp along pavers or garden beds.
Planning a patio or walkway next to your lawn? See complementary ideas in this hardscaping advice for smooth sod-to-stone transitions.
Watering and Mowing Schedule (Weeks 1–4)
Water little and often for the first week, then shift to deeper, less frequent cycles by week three. Do not mow until roots resist a gentle tug—usually day 10–14 in warm weather with good light and drainage.
Week-by-week game plan
- Days 1–3: 2–3 short cycles/day to keep the top 1–2 inches evenly moist. Check under corners daily.
- Days 4–7: 2 cycles/day; lengthen slightly if wind or heat rises. Watch seams for curl or dry lines.
- Days 8–14: 1–2 deeper cycles/day or every other day based on weather. Test moisture with a screwdriver.
- Weeks 3–4: 1–2 deep soakings/week. Encourage roots to chase water down.
First mow checklist
- Perform the tug test; if sod lifts easily, delay mowing.
- Set mower high; remove no more than one-third of blade height.
- Use a sharp blade; dull blades tear and stress turf.
- Avoid tight turns; wheels can twist and shear young roots.
Need personalized guidance? Our Mississauga sod primer outlines watering patterns we use across real projects.
Seasonal Timing for Mississauga (What Changes)
Sod can establish from spring through early fall in Mississauga. Adjust cycles to match weather: spring can be saturated, summer dries fast, and early fall offers stable rooting with cooler nights and consistent rainfall.
Spring
- Pros: Cool temps reduce stress; frequent rain supports rooting.
- Watch for: Puddling on low spots; pause irrigation after large storms.
- Tip: Use coir blankets on steeper slopes to limit erosion.
Summer
- Pros: Warm soil speeds root growth when moisture is steady.
- Watch for: Wind and heat; edges dry first in afternoon sun.
- Tip: Shift to early-morning cycles; add a brief mid-day mist during heat spikes.
Early Fall
- Pros: Cooler nights and regular rain balance moisture demand.
- Watch for: Shorter daylight in shady yards; reduce cycles gradually.
- Tip: Plan final mow heights to protect crowns before frost.
Working around other upgrades? Review driveway and patio planning ideas here: landscape design ideas that pair well with lawn refreshes.
Case Studies: Real Mississauga & GTA Lawns
Three quick case notes show how small changes prevent big problems: correcting a driveway-side hollow, protecting seams at a shade line, and adding a walkway where traffic rutted sod. Each fix improved rooting within two weeks and stabilized surface grade.
Driveway-side hollow fixed with base rebuild
A Mississauga bungalow had a 1-inch depression along the interlocking driveway. We stripped 15 feet, rebuilt with 3 inches of screened topsoil, straightedged to the paver edge, rolled, then irrigated in short cycles. Seams stayed tight and puddling disappeared in the first storm.
Shade line seam protection in North York
On an east-facing yard, 11 a.m.–3 p.m. shade kept seams damp. We staggered seams away from the line, trimmed cleanly around trees, and shifted watering to earlier mornings with a light noon mist. Root resistance improved by day 10.
Side-yard path redesign in Mississauga
Students cut across a 36-inch strip beside a rental. Weekly ruts reappeared. We installed a stepping-stone ribbon set flush with sod grade and tightened irrigation coverage. Traffic consolidated to stones; turf filled in and held.
For more local examples and timing notes, explore our Ontario timing walkthrough.
FAQ: Sod Installation Mistakes to Avoid
New sod thrives when you prepare soil, lay tight seams, roll once, and water consistently for 2–3 weeks. Most problems trace to skipped prep, uneven grade, gaps, and mowing too early. The answers below address the questions we get most in the GTA.
How soon should I water after laying sod?
Start watering immediately after rolling the first section. In the first 7–10 days, use short cycles 2–3 times daily to keep roots moist without flooding. Verify penetration by lifting a corner: the top 1–2 inches of soil should feel damp, not muddy.
When is it safe to mow new sod?
Wait until roots resist a gentle tug—usually 10–14 days in warm weather. Set the mower high and use a sharp blade. Mowing too soon shears tender roots and can leave tire ruts that take weeks to fade.
How do I keep seams from drying out?
Butt seams tightly without stretching, roll once, and water immediately. In hot, windy conditions, a brief mid-day mist prevents edges from curling. Avoid heavy soaks early on—too much water can float seams open.
Do I need to fertilize right away?
No. New sod typically benefits from a starter fertilizer applied per product guidance, but avoid hot applications in the first week. Prioritize rooting with consistent moisture; schedule nutrient support within recommended windows for your grass type.
Key Takeaways and Next Steps
Prep right, lay tight, water light (at first), and wait to mow. Those four habits prevent 90% of failures. If you’re short on time or tools, book a design–build consultation to align grading, edging, and irrigation with your lawn’s long-term needs.
- Measure grade with a straightedge and aim for 1–2% slope.
- Use a roller. It’s the simplest insurance against air gaps.
- Water 2–3 short cycles daily for the first week; taper by week three.
- Don’t mow until roots resist a light tug.
- Add paths where feet already travel to stop future ruts.
Want a pro finish? See our professional sod services overview or book an on-site consultation from our Mississauga team.
Related Lawn & Landscape Topics
A healthy lawn depends on the surrounding hardscape and drainage. If you’re planning interlocking, edging, or fence work, coordinate these elements before sod so grades, runoff, and traffic patterns support long-term turf health.
- Planning a refresh? Review Mississauga timing to choose the right week.
- Finishing a new build? Our sod installation service integrates grade, edging, and irrigation.
- Designing paths and patios? See this backyard transformation guide for layout inspiration that pairs with lawn zones.
Free 10‑minute lawn planning call: If you’re in Mississauga or the GTA, we’ll review sun, slope, and irrigation and give you a right-sized game plan. No pressure—just practical steps to protect your new lawn.


