Sod installation timing is the practice of scheduling sod laying when soil and weather favor fast rooting—mainly spring and early fall in Mississauga and the GTA. Target soil at 50–65°F, mild air, and steady moisture. The right window cuts water use, reduces stress, and speeds establishment by weeks.
By HR Greenroots Landscaping • hrgreenrootslandscaping.com • Last updated: April 12, 2026
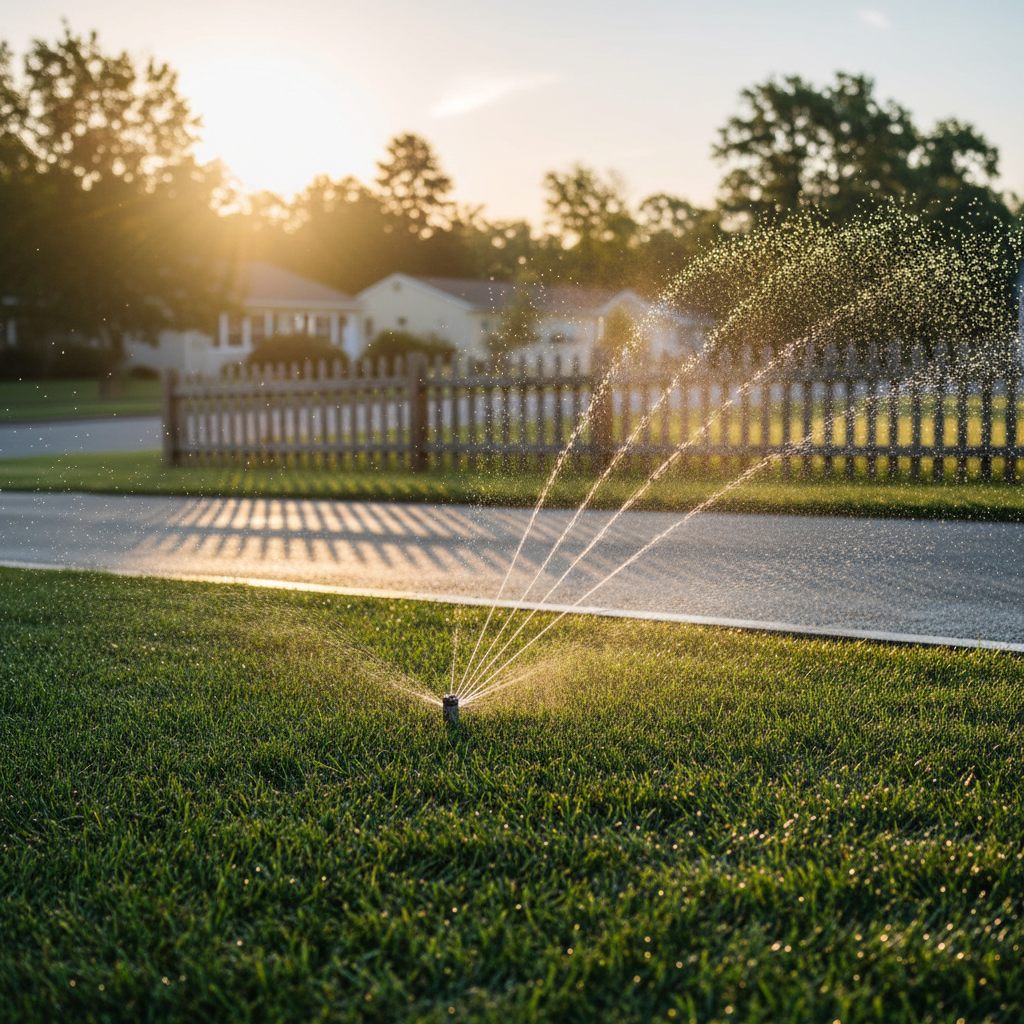
Above the Fold: Hook + Contents
Plan your sod for a weather window, not a free weekend. Use soil temperature, a 10-day forecast, and site readiness to choose the best week. This complete guide delivers a timing playbook, seasonal comparison table, buying checklist, and nine GTA examples so you can act with confidence.
- What sod installation timing means in practical terms
- Why timing matters for water, roots, and curb appeal
- How timing works (soil, weather, watering)
- Best times in Mississauga and across the GTA
- Step-by-step plan to pick your exact week
- Spring vs summer vs fall comparison
- Buying guide and tools we actually use
- Real GTA case examples from HR Greenroots projects
Quick Answer
In Mississauga, the best sod installation timing is mid-April to early June and late August to mid-October when soil holds near 50–65°F and light rains are common. From our base at 100 Matheson Blvd E unit 202, HR Greenroots Landscaping schedules sod to align with these cool, moist stretches for faster rooting and less watering.
Summary
Install cool-season sod when soil is 50–65°F, daytime highs are 55–75°F, and a stable, mild forecast is expected. Fall offers the strongest rooting; spring is a close second. Avoid heat spikes and late hard freezes. Prep the base so sod meets moist, graded soil on day one.
- Primary GTA windows: mid-April–early June; late August–mid-October
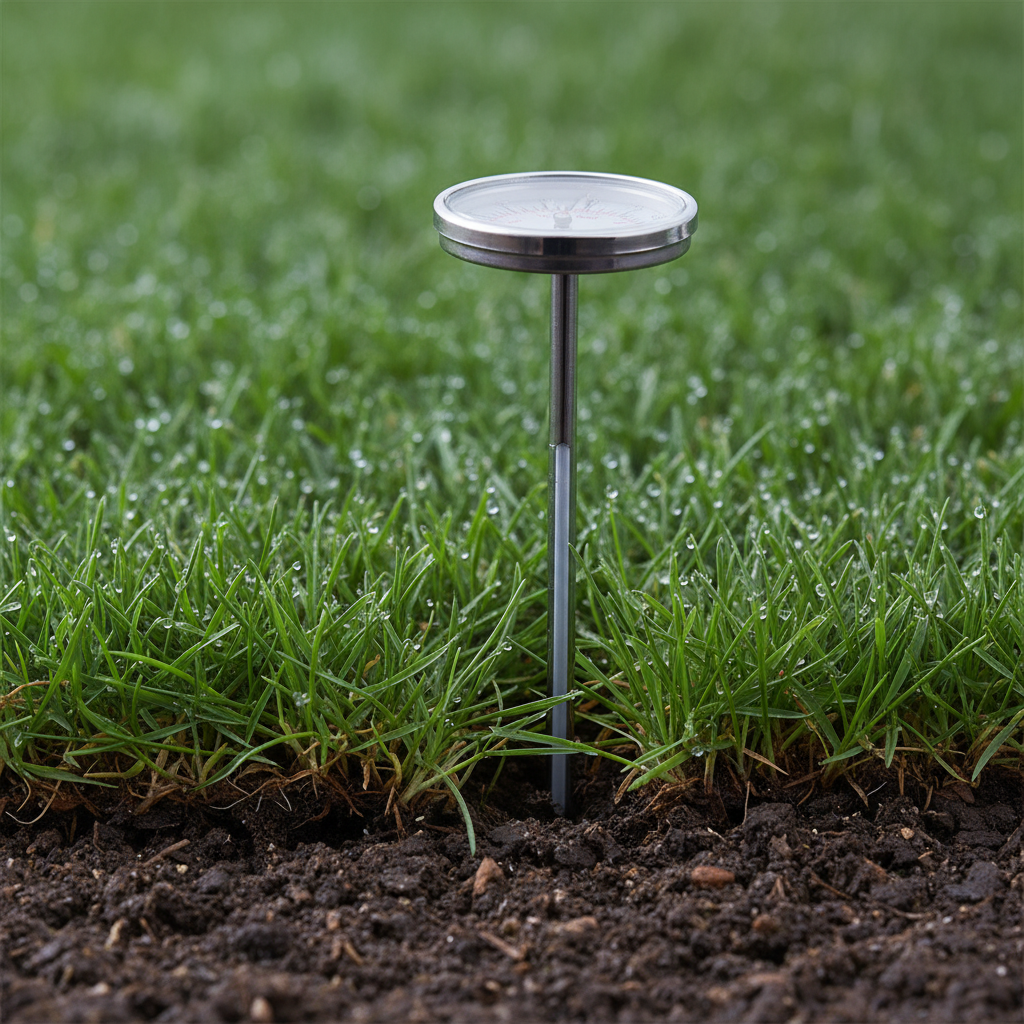
- Soil thermometer: verify 50–65°F at 3–4 inches depth
- Forecast: choose a 10-day stretch without heat waves or severe storms
- Water plan: ensure 10–14 days of reliable irrigation
- Site readiness: base graded, edges defined, fresh-cut sod reserved
Local Tips
- Tip 1: Microclimates near Lake Ontario can run cooler. If you’re south of the 401 or near Port Credit, expect spring soil to warm a week later than north Mississauga along Eglinton or Britannia.
- Tip 2: Aim installs midweek to avoid weekend watering restrictions or event traffic along Hurontario St (Highway 10). A calm, mild 10-day run beats any calendar slot.
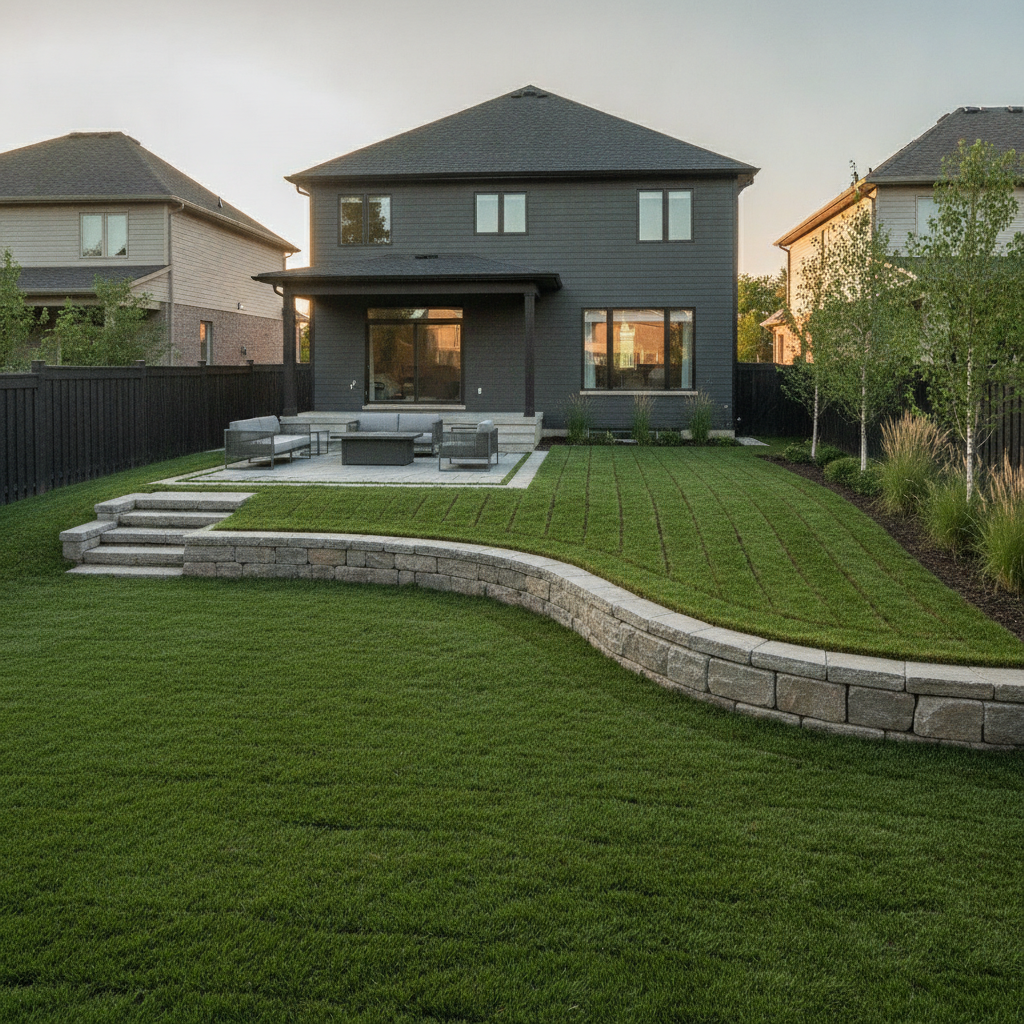
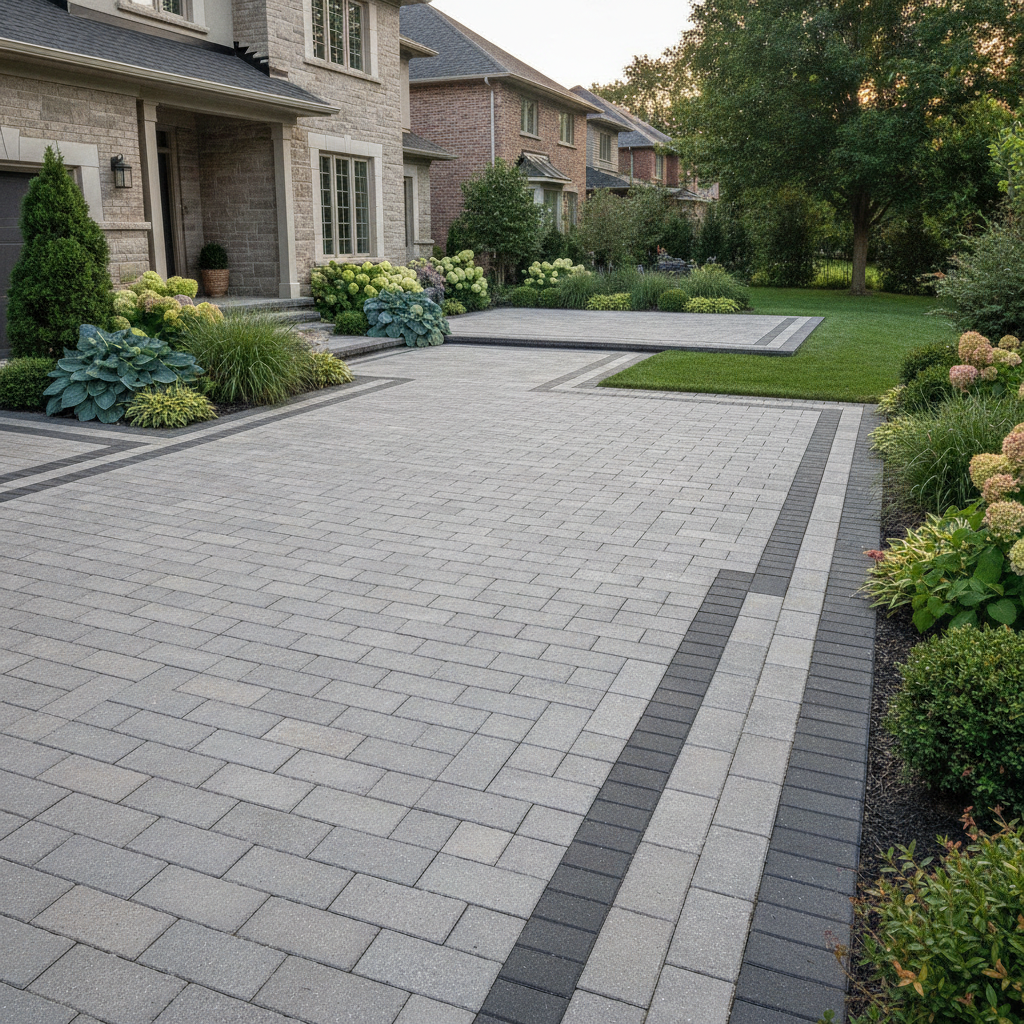
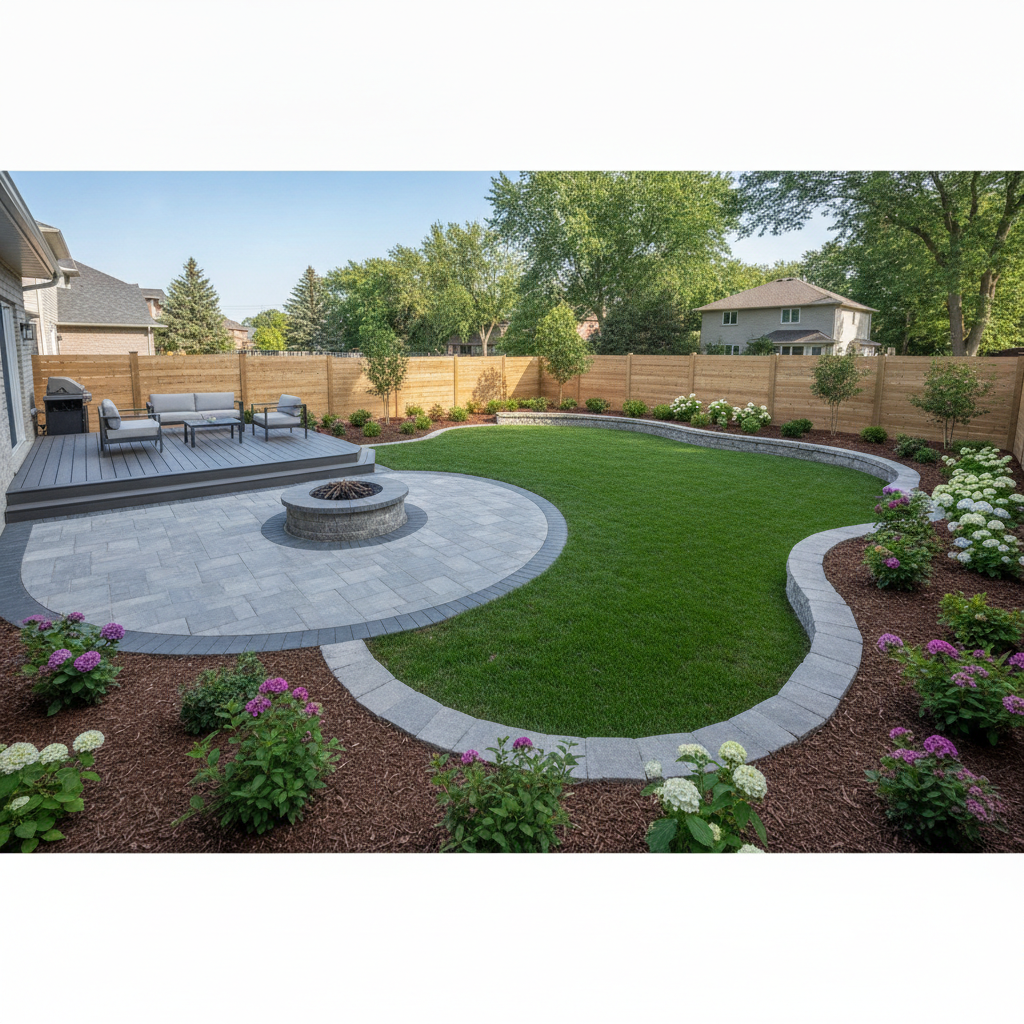
- Tip 3: If you’re pairing new sod with interlocking pavers or a driveway extension, stage base compaction and edging first. We coordinate crews so lawn edges don’t dry while hardscapes are finished.
IMPORTANT: Conditions shift fast across the GTA. We confirm soil temperature and the forecast the morning sod is delivered.
What Is Sod Installation Timing?
Sod installation timing is choosing a weather-and-soil window that accelerates rooting and reduces stress. In the GTA, cool-season turf thrives when soil holds 50–65°F and light rainfall supports steady moisture. Aligning delivery and install with that window improves survival and appearance.
- Definition: Matching sod delivery and laying to soil temperature, air temps, and moisture conditions that favor root growth.
- Core variables: Soil temperature, daytime highs/lows, rain pattern, wind, and on-site irrigation capacity.
- Ontario turf reality: Kentucky bluegrass, perennial ryegrass, and fescues are cool-season grasses that root best in shoulder seasons.
- Why it matters: Biology beats scheduling—roots don’t care about weekends.
In our experience across Mississauga, verifying subgrade moisture and temperature before accepting sod delivery often trims several days off the heavy-watering phase.
Why Sod Installation Timing Matters
Timing sets the baseline for water demand, survival, and speed to use. Install in cool, moist windows and roots anchor within 10–14 days; install in heat and irrigation needs can double while stress rises. Smart timing protects your investment and reduces maintenance.
- Water efficiency: Cooler air and periodic rainfall often cut supplemental irrigation needs significantly during establishment.
- Faster rooting: With proper timing, cool-season sod commonly knits in 10–14 days, supporting earlier first mows.
- Lower stress: Reduced evapotranspiration prevents wilt, edge shrinkage, and seam gaps.
- Cleaner look: Even color and tighter seams elevate curb appeal—especially important for front yard upgrades.
- Weed suppression: Quick canopy closure shades soil and limits weed intrusion.
We routinely see late-August installs in Mississauga carry strong root mass into winter, which pays off the following spring.
How Sod Timing Works: Soil, Weather, Water
Pick your week by measuring soil temp, screening a 10-day forecast, and confirming irrigation access. The sweet spot is 50–65°F soil, highs 55–75°F, light wind, and periodic rain. Prepare the base to grade, then lay sod within 24 hours of delivery for rapid rooting.
Soil Temperature Targets
- Probe depth: 3–4 inches; take morning readings for consistency.
- Targets: 50–65°F drives cool-season root growth without heat stress.
- Action thresholds: Below ~45°F, rooting slows; above ~75°F, stress increases and watering ramps up.
Forecast Filters
- 10-day screen: Favor highs 55–75°F with no extreme storms or heat spikes.
- Wind: Strong winds desiccate seams; water edges promptly and roll tight.
- Rain pattern: Light, frequent rainfall reduces supplemental watering and evens soil moisture.
Water Access & Plan
- Irrigation check: Hoses, sprinklers, or zones tested the day before install.
- Immediate soak: Water right after laying to wet the top 4–6 inches of soil.
- Establishment: Keep the surface moist for 3 days; then deepen, reduce frequency, and encourage deeper roots.
Best Times of Year in Mississauga & the GTA
For GTA cool-season sod, the most reliable windows are mid-April to early June and late August to mid-October. These periods align with 50–65°F soil and moderate rainfall, enabling quick rooting and lower water use. Avoid peak summer heat and late fall hard freezes.
Season Window (GTA) Pros Watchouts Spring Mid-Apr – Early Jun Cool air, moist soil, fast green-up Late frosts; heavy spring rains can delay work Summer Late Jun – Mid Aug Warm soil, rapid top growth Heat stress, higher watering demand, possible water bans Fall Late Aug – Mid Oct Best rooting, fewer weeds, supportive rain Early cold snaps; shorter daylight windows Late Fall Late Oct – Nov Possible with protection Freeze risk; slow establishment; limited daylight- In lake-influenced pockets, spring warms later and fall stays milder a bit longer.
- North-facing yards behave “cooler” than south exposures; adjust by a week.
- Pair sod with landscape design and build sequencing to keep edges moist.
Step-by-Step: Pick the Right Week
Follow a 10-day method: measure soil temp, filter the forecast, confirm irrigation, schedule sod to arrive within 24 hours of base prep, and install early in the week. This gives five workdays for watering and adjustments before the weekend.
- Measure soil temp: Morning reading at 3–4 inches (target 50–65°F).
- Check 10-day forecast: Look for highs 55–75°F, light winds, light rain.
- Prep base: Rough grade, amend as needed, final grade, and roll.
- Edge control: Define paver borders or crisp soil edges to prevent creep.
- Book delivery: Aim for the coolest day; lay sod within 24 hours of arrival.
- Immediate watering: Soak to 4–6 inches; check seams and corners.
- First 72 hours: Keep surface moist; avoid foot traffic.
- Days 4–10: Reduce frequency, increase depth; mow by the one-third rule.
- Days 10–14: Roots knit; transition to a normal schedule.
Spring vs Summer vs Fall: A Practical Comparison
Fall delivers the best rooting and lowest watering; spring is close with quick green-up. Summer works if irrigation is strong and monitored daily. Choose the window that fits your exposure and watering capacity.
Criteria Spring Summer Fall Rooting speed High Moderate (heat stress) Very high Water demand Moderate High Low–Moderate Weed pressure Moderate High Low Risk factors Late frost Heat/water bans Early cold snap Best for Fast curb appeal Irrigated yards Long-term performance- Shaded lots: Prefer spring to maximize light before full leaf-out.
- Hardscape-adjacent sod: Choose spring/fall to avoid baking near stone work.
- High-traffic areas: Fall timing builds strong roots for next spring’s use.
Buying Guide: Sod, Supplier, and Service
Buy fresh-cut, cool-season sod fit for Ontario, verify delivery timing, and inspect rolls. Prioritize dense turf, uniform color, tight seams at install, and a clear watering plan. A coordinated design-build team keeps grades true and edges crisp.
- Freshness: Delivered within 24 hours of harvest; shade pallets if staging.
- Blend: Kentucky bluegrass/fescue/rye for cool-season resilience and color.
- Base prep: 3–4 inches of quality topsoil, finish-graded away from foundations.
- Edges: Interlocking pavers or clean soil edges to prevent edge lift.
- Coordination: Install, roll, water, and post-care guidance on the same day.
Tools & Resources
Use a soil thermometer, moisture meter, roller, sharp knives, and even-coverage sprinklers. Track the forecast and rainfall so you water enough—but not too much. On larger sites, audit zones to avoid dry edges and overwatered centers.
- Soil thermometer: 3–4 inch probe to confirm 50–65°F.
- Moisture checks: Meter or hand-feel to 4–6 inches depth.
- Roller: Eliminates air pockets; improves sod-to-soil contact.
- Sprinklers: Oscillating or rotary for uniform coverage.
- Rain gauge: Verify roughly one inch of water per week including rainfall.
Best Practices for Timing Success
Lock in timing with a ready site, fresh delivery, and immediate deep watering. Shade pallets, lay in a running bond, stagger seams, and roll twice. Water lightly 2–3 times daily for the first 3 days, then deepen and reduce frequency.
- Staging: Keep pallets shaded; don’t let sod bake on a driveway.
- Seams: Tight contact—no overlaps or gaps; trim with sharp knives.
- Rolling: Once immediately, again 24 hours later.
- Traffic: Limit for 10–14 days; first mow at ~4 inches blade height.
- Watering arc: Early frequent mists; then deeper intervals to train roots.
GTA Case Examples (9 Scenarios)
We adapt timing to microclimate, exposure, and irrigation capacity. These nine GTA scenarios show how a forecast-first plan plus strong base prep yields consistent establishment and better-looking lawns.
- Mississauga bungalow: Late-August install; tight seams; fall rains lowered watering—great winter carryover.
- Brampton new build: Spring window; clay subsoil regraded; 3–4 inches of topsoil improved drainage and rooting.
- Etobicoke slope: Small retaining wall stabilized grade; fall sod timed after a cool front improved footing and rooting.
- Pool surround (GTA): Paired sod with interlocking pavers; spring install avoided heat reflecting off stone.
- Commercial plaza: Weekday install; irrigation audit prevented hot dry edges along asphalt.
- Shaded north yard: Spring install before canopy leaf-out captured extra light for faster knitting.
- Driveway extension frontage: New curb edge matched to sod; fall window kept edges from baking.
- Backyard refresh with mulch beds: Spring timing and clear edging reduced weed intrusion.
- Garden suite build-out: Final grading then fall sod; seasonal rains minimized manual watering.
FAQ
These quick answers cover the timing questions we hear most in Mississauga and across the GTA. Use them to align weather windows, watering, and site prep for a smoother install.
When should I install sod in Mississauga?
Mid-April to early June and late August to mid-October are the most reliable windows for cool-season sod. Aim for 50–65°F soil and mild forecasts. Measure soil temps and screen a 10-day forecast before booking delivery.
How long before new sod is usable?
With proper timing and watering, roots typically knit in 10–14 days. Limit traffic during that period. First mow when the grass reaches about 4 inches, removing no more than one-third of the blade height.
Can I lay sod in summer?
Yes—if you can water consistently. Install early morning, water immediately, and monitor edges closely for the first 72 hours. Expect higher irrigation demand and be ready to mist hot edges in the afternoon.
What if a cold snap is coming?
Pause delivery if a hard freeze is forecast. Cool, above-freezing temperatures are fine, but sustained freezing slows establishment. In late fall, protect edges and avoid traffic until rooting improves.
Do I need to fertilize at install?
A light starter can help on nutrient-poor subgrades. Focus first on contact, moisture, and rolling. In our maintenance plans, we delay heavier feeding until the lawn is actively growing and roots have knitted.
Conclusion
The best sod installation timing in the GTA aligns cool soil, mild air, and a stable 10-day forecast with a ready site and reliable irrigation. When biology and build sequencing work together, you get faster rooting, lower water use, and a smoother path to a finished-looking yard.
- Match delivery to a cool, moist window—don’t fight heat or freeze risk.
- Verify soil temperature at 3–4 inches; 50–65°F is the sweet spot.
- Stage base prep, edging, rolling, and watering as one coordinated plan.
- Prioritize fall for strongest roots; spring is a solid runner-up.
Here’s the thing: when sod, soil, and schedule align, lawns establish faster and look better. That’s the goal of every HR Greenroots install in Mississauga and across our landscaping GTA projects.
Key Takeaways
Time sod to cool soil (50–65°F), mild highs (55–75°F), and a predictable 10-day forecast. Prep the base, lay within 24 hours of delivery, water immediately, and taper over two weeks. Fall wins for roots; spring wins for quick green-up.
- Primary keyword to remember: sod installation timing drives rooting speed.
- Use a soil thermometer and a 10-day forecast—simple tools, big impact.
- Coordinate sod with interlocking pavers, decks, and fencing to protect edges.
- Water plan matters as much as delivery timing—set it before you start.
Related Articles
Strengthen your project plan by pairing sod timing with smart hardscape sequencing, edging, and seasonal maintenance. A cohesive landscape design and build approach protects new lawns and elevates curb appeal.
- Landscape design and build sequencing for new lawns
- Interlocking pavers next to turf: base prep and edge control
- Retaining wall drainage so sod stays even and dry
- Mulching and garden beds that reduce lawn maintenance