
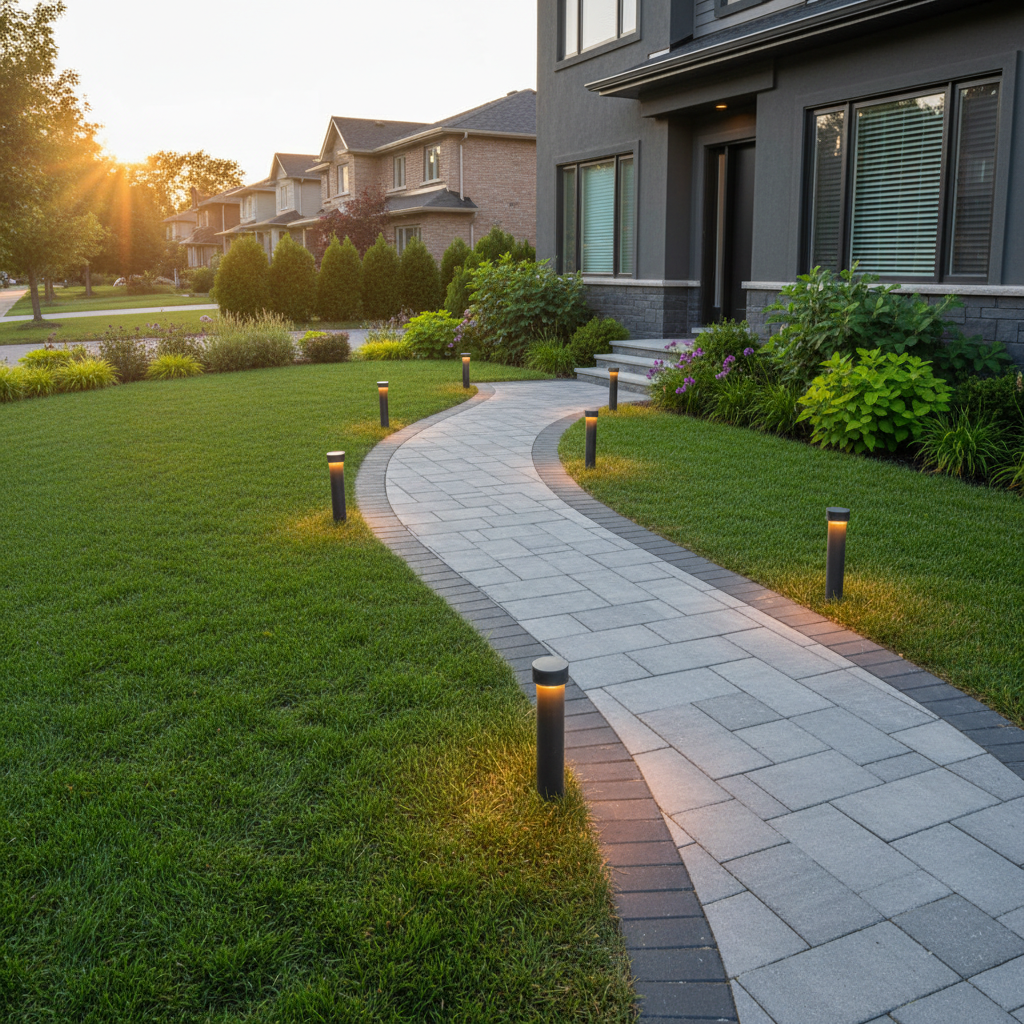
Mississauga front yard transformation ideas are the practical design, build, and planting moves that turn a tired frontage into a safe, attractive, low‑maintenance entry. From our 100 Matheson Blvd E unit 202 location, HR Greenroots Landscaping plans and installs sod, interlocking, fencing, and planting layers that boost curb appeal while meeting local conditions and regulations.
By HR Greenroots Landscaping • Last updated: May 31, 2026
Start Here: Plan Your 2026 Project
Start your Mississauga front yard upgrade by clarifying use cases, setting constraints, and choosing durable materials that fit Ontario’s freeze–thaw cycles. Then sequence work: grading and drainage, hardscapes, planting, and final detail. A simple plan avoids rework, protects budgets, and delivers curb appeal that lasts.
This complete guide blends inspiration with proven field practices from our design–build crews in Mississauga and across the GTA. You’ll learn what works in our climate, the mistakes to avoid, and how to stage work so every dollar pays you back in longevity and usability.
- Exact definition of “front yard transformation” and why it matters
- A step-by-step build sequence that prevents costly do‑overs
- Mississauga‑ready ideas for sod, interlocking, retaining walls, fencing, and planting
- 12 common mistakes to avoid in 2026
- Local tips, seasonal timing, and quick compliance pointers
Overview
A successful Mississauga front yard transformation combines resilient hardscapes, right‑sized planting, and drainage that handles storms. The winning formula: fix grades first, build with compacted bases, choose Ontario‑tough plants, and finish with clean edges. Results show up instantly in curb appeal and hold up for years.
Here’s the high‑level picture we use on projects in the Regional Municipality of Peel: grading first, then walkways and driveway edges, then lawn and planting layers. That order prevents damage to finished elements and keeps your frontage tidy during construction.
What Is a Front Yard Transformation?
A front yard transformation is a coordinated redesign of the space from curb to door that improves circulation, safety, planting health, and curb appeal. It merges grading, hardscapes, sod or turf alternatives, and planting into one plan so the entry feels intentional and easy to maintain.
At HR Greenroots Landscaping, this often includes a new interlocking walkway with proper base, premium sod or an alternative lawn, layered shrubs and perennials, low‑voltage lighting, and tidy edges. We document the plan so maintenance stays simple after day one.
Why It Matters in Mississauga
In Mississauga and the Regional Municipality of Peel, freeze–thaw, heavy spring rains, and clay‑leaning soils stress front yards. Upgrades that prioritize drainage, base prep, and Ontario‑appropriate plants prevent heaving, puddles, and die‑off—protecting curb appeal and resale value.
Frontage is your first impression—and a safety zone. Good design improves sightlines, reduces slip risk, streamlines snow clearing, and directs water away from foundations. That’s why our plans pair slope correction, compacted aggregate bases, and plant palettes that thrive in our microclimate.
Local considerations for Mississauga
- Snow and plow splash: favor salt‑tolerant groundcovers near the street and keep edges tight for easier shoveling on school‑run mornings.
- Seasonal timing: schedule base work and sod installs during shoulder seasons for better compaction and rooting; avoid peak heat waves.
- Site context: near Saigon Park or Lambton College, foot traffic and shade patterns vary—design walk widths and plant mixes accordingly.
How a Front Yard Transformation Works (Step‑by‑Step)
The best build sequence is: assess and measure, set grades and drainage, install sub‑bases, build interlocking and edges, place retaining structures, run lighting sleeves, then plant and sod. This order protects finishes, speeds inspections, and reduces change orders.
- Needs + measurements: Document slopes, entry paths, parking, utilities, and shade. Mark must‑haves (stroller‑friendly path, extra parking pad, privacy).
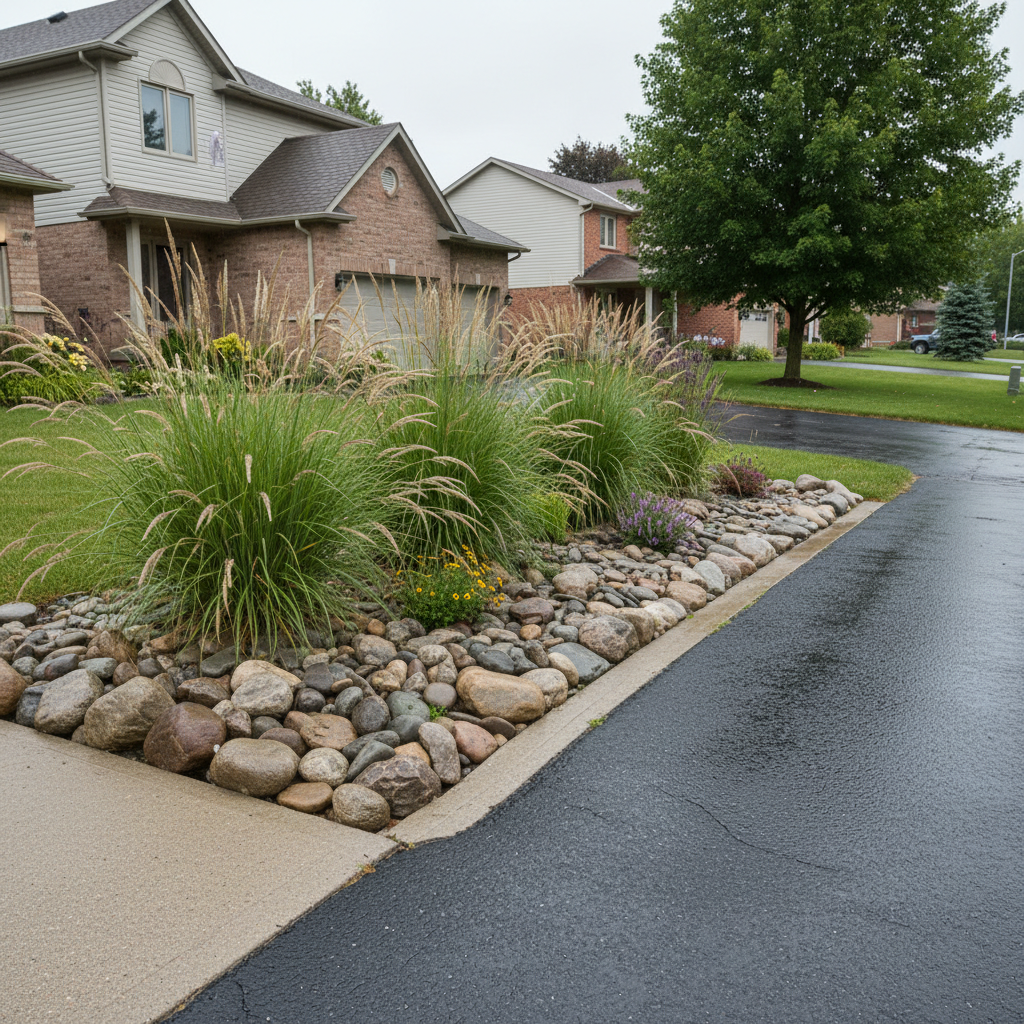
- Drainage plan: Confirm where water should go; add swales, a discreet curb cut, or a shallow rain garden out front if the site suits it.
- Excavation + base: Remove organics; install compacted aggregate (multiple lifts) under walkways and driveway borders.
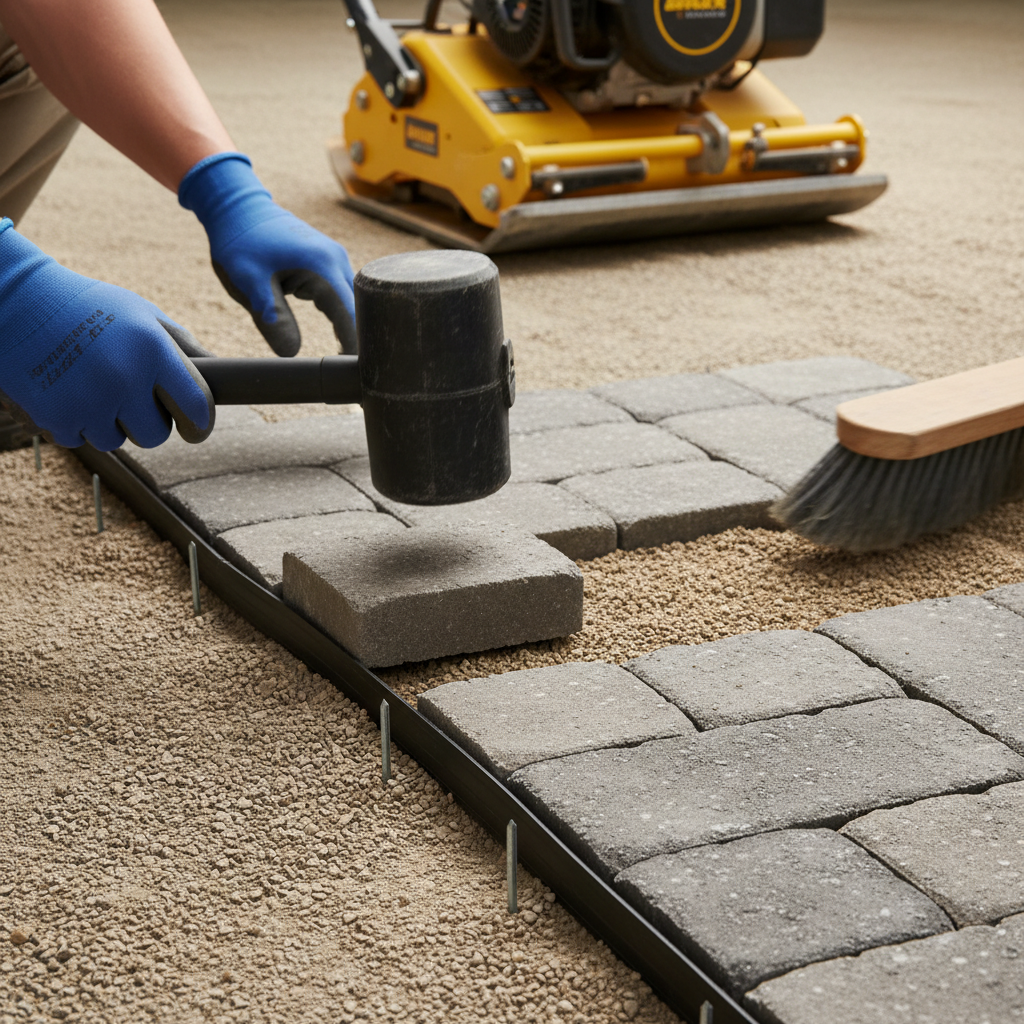
- Interlocking & pavers: Lay pavers on screening; lock with restraints; sweep polymeric sand; vibrate to seat.
- Retaining/armour stone: Build walls or stone features for level changes; backfill with free‑draining material.
- Conduit + lighting: Pull low‑voltage lines and sleeve crossings now to avoid trenching finished sod later.
- Planting + sod: Amend, set plants by layer (canopy/shrubs/perennials), install premium sod last, water‑in thoroughly.
- Edge control + tidy: Add crisp edges, top up mulch, and set wayfinding lighting before final walkthrough.
Types of Front Yard Upgrades (Ideas that Work in Mississauga)
High‑return front yard upgrades include interlocking walkways, premium sod with clean edges, low‑voltage lighting, privacy fencing, and native plant layers. In Mississauga, prioritize drainage‑smart features and materials that handle freeze–thaw for better longevity and curb appeal.
Entry paths and walkways
Interlocking paths define circulation and frame planting. Our crews emphasize strong bases and edge control so the surface stays level through winter.
- Paver patterns: Herringbone at entries for interlock strength; running bond for visual elongation.
- Widths: Target 48–60 inches for two‑person comfort and mobility devices.
- Transitions: Integrate a flush threshold at the step for winter shoveling.
- Internal link: See our landscape design and build guide for path placement rules.
Driveway edges and extensions
Bordering with pavers creates crisp edges and helps contain gravel or asphalt. Where frontage is tight, a modest extension can ease parking without overpowering the facade.
- Containment: Concrete or aluminum restraints prevent creep and trip edges.
- Drainage: Keep slopes 2% away from structures to shed water.
- Internal link: Explore slope correction solutions before you widen.
Sod and lawn alternatives
Premium sod offers instant green and erosion control. Some sites benefit from fescue mixes, micro‑clover, or reduced‑mow ecoturf near the boulevard.
Lawn option Best for Maintenance Notes Premium Kentucky bluegrass sod Quick curb appeal Moderate Great with irrigation start‑up after install Fescue blend Partial shade Lower Handles summer stress well Micro‑clover mix Pollinator support Low Stays greener in drought, fewer inputsFor pros and cons of lawn replacement, browse our Mississauga lawn replacement options.
Planting layers (Ontario‑ready)
We group plants by role—structure shrubs, seasonal color perennials, groundcovers for weed suppression—to reduce upkeep while keeping interest from April through frost.
- Street‑side palette: Salt‑aware, wind‑tolerant choices near the curb.
- Foundation mix: Four‑season structure with selective evergreens.
- Pollinator drift: Sunny pockets that read tidy from the street.
Retaining walls and armour stone
Retaining solves grade conflicts and frames entries. Armour stone steps add presence and durability.
- Base + drainage: Free‑draining backfill, weep or drain tile, and geogrid as specified.
- Cap stability: Adhesive and proper overhang for clean shadow lines.
- Internal link: Learn when to call a maintenance‑minded pro.
Privacy fencing that complements the facade
Front privacy is subtle—think side returns, screens around stoops, or low garden fencing that signals threshold without blocking light.
- Lines and sight: Keep sightlines clear for driveways and sidewalks.
- Material rhythm: Echo front door or trim tones.
- Internal link: Review privacy fence options.
Lighting for safety and warmth
Low‑voltage path and step lighting improves safety and extends evening use without glare. We pre‑sleeve runs before sod.
Storm‑smart features
Rain gardens, small swales, and permeable borders reduce puddling at the curb and ease stress on municipal systems.
Best Practices and the 12 Costly Mistakes to Avoid
Avoid rework by sequencing correctly, compacting bases, respecting drainage, and selecting plants for Ontario conditions. The most expensive errors come from skipping base prep, setting wrong slopes, and installing finishes before heavy work is complete.
Field‑tested best practices
- Compact in lifts: Multiple passes per layer deliver a base that resists heave.
- Lock edges: Restraints prevent paver drift and trip edges.
- Plant in layers: Structure first, then seasonal color, then groundcovers.
- Finish with edges: Steel, aluminum, or paver soldier courses sharpen lines.
The 12 common mistakes (and fixes)
- Skipping a grading plan → Fix by setting target slopes and catch points before any build.
- Under‑compacting base → Compact each lift; don’t rely on a single thick layer.
- Wrong walkway width → Plan 48–60 inches for comfort and accessibility.
- Paver creep without restraints → Install edge restraint with spikes at proper intervals.
- Planting into poor soil → Amend selectively; avoid over‑amending that leads to perched water.
- Mulch volcanoes at trees → Keep flare visible; volcanoes invite rot.
- Blocking sightlines with tall screens → Step fence heights and maintain driver visibility.
- Sod without irrigation plan → Stage watering and schedule the first mow by blade height, not calendar.
- Lighting as an afterthought → Sleeve before sod; avoid trenching finished turf.
- Ignoring snow operations → Leave snow dump zones and stout edges where shovels hit first.
- Over‑planting the boulevard → Keep it durable and low to survive plows and salt splash.
- Rushing the final clean → Edge, sweep, and seal (when appropriate) for a professional finish.
We’ve seen projects fail when one shortcut cascades into others. Build slow and right; it’s faster than redoing work after the first winter.
Tools, Materials, and Resources
Successful front yard projects rely on compaction equipment, free‑draining aggregates, paver restraints, polymeric sand, and low‑voltage lighting components. Pair the right tools with a staged plan, and the install moves quickly without damaging finished work.
- Compaction: Plate compactor, hand tamper for edges, and lift‑by‑lift moisture control.
- Base materials: Well‑graded aggregate for strength, bedding sand for seating.
- Paver specifics: Spacer‑lug pavers for consistent joints; polymeric sand to lock.
- Planting kit: Sharp spade, pruners, biodegradable twine, and proper mulch.
- Lighting: Transformer, waterproof connectors, warm LED fixtures.
For design inspiration outside Mississauga, see these perspective pieces on suburban curb appeal and backyard transitions in nearby regions: an Ajax backyard transformation overview and a primer on landscaping best practices. If you’re preparing a home for the market, this Mississauga homebuyer guide highlights how first impressions influence tours.
Case Studies and Local Examples
Three quick Mississauga scenarios show how sequence, materials, and planting layers pay off: a walkway upgrade for safety, a slope fix with armour stone, and a sod‑plus‑screening refresh for instant curb appeal. Each follows the same build logic and avoids common pitfalls.
- Safety‑first entry (Central Mississauga): We replaced a narrow, heaved slab with a 54‑inch interlocking path, compacted in lifts and edged tight. Result: smooth stroller access, cleaner snow clearing, and fewer puddles at the stoop.
- Subtle slope correction (near Eglinton corridor): Low armour stone tier with drain tile reshaped a soggy side yard, keeping water off the driveway. Planting used salt‑aware evergreens and perennials.
- Instant green refresh (City Center area): Premium sod, a simple pollinator drift, and warm step lights modernized a dated facade without moving the driveway. Clean edges made weekly upkeep easy.
Want more examples and build logic? Our article on fence installation mistakes shows how sequencing and sightlines matter along property edges.
Frequently Asked Questions
Homeowners ask about timing, materials, sequencing, and maintenance. The short answers: build in the right order, compact bases, choose Ontario‑ready plants, and keep edges crisp. Below are quick, direct responses you can act on.
What’s the right order to upgrade a front yard?
Assess drainage, set grades, install bases, build interlocking and any retaining, sleeve lighting, then plant and sod. This sequence prevents damage to finishes and keeps water moving away from structures.
How wide should my front walkway be?
Plan for 48–60 inches so two people can pass comfortably and mobility devices have room. At steps, keep transitions flush for safe winter shoveling.
Do I need a retaining wall for a small slope?
Not always. Minor grade tweaks, swales, or a single course of armour stone often solve puddling. If soil movement is visible, a structured wall with drainage is the durable fix.
What plants hold up near salted streets?
Use salt‑aware, wind‑tolerant shrubs and resilient groundcovers along the boulevard. Keep taller, more delicate perennials closer to the house where they’re shielded from splash and wind.
Key Takeaways
Sequence work, respect drainage, and build with strong bases. Choose plants and materials that match Mississauga’s climate. Tidy edges and lighting finish the look and make upkeep easy.
- Fix grades first, then build hardscapes, then plant and sod.
- Compact in lifts and lock edges to prevent heave and creep.
- Pick Ontario‑ready plants; keep salt‑tolerant choices at the street.
- Pre‑sleeve lighting to avoid trenching finished turf.
Conclusion and Next Steps
A front yard transformation succeeds when planning drives sequence and materials. If you address drainage, base strength, and planting layers first, your curb appeal will look sharp on day one and season after season.
Ready to map out your frontage? Our design–build team in Mississauga can assess grades, right‑size the scope, and deliver a build plan that avoids rework. For deeper dives, read our pieces on seasonal maintenance planning and fence mistakes to avoid.
Free planning call: Book a quick assessment with HR Greenroots Landscaping to confirm drainage, walkway alignment, and planting layers before you break ground.


