Mississauga armour stone landscaping is the design and installation of natural quarry stone for retaining walls, steps, borders, and features. It delivers long-lasting structure, drainage, and curb appeal suited to Ontario freeze–thaw cycles. When planned and built correctly, it reduces yard maintenance and solves slope and soil challenges common across Mississauga neighborhoods.
By HR Greenroots Landscaping • Last updated: 2026-07-04
At a Glance: Armour Stone Landscaping in Mississauga
Armour stone creates durable walls, steps, borders, and seating that handle Ontario’s freeze–thaw cycles. In Mississauga, success depends on base prep, drainage, batter (wall lean), and proper stone sizing. A design–build approach aligns structure, planting, and maintenance so your yard looks intentional on day one and stays low-maintenance for years.
Here’s a quick orientation so you can scan, decide, and plan with confidence.
- What armour stone is and where it works best in Mississauga yards
- Why natural stone solves slope, drainage, and circulation issues
- Step-by-step process our team follows from layout to final compaction
- Best practices for base, geotextile, drain lines, and wall batter
- Eleven real-world ideas: walls, steps, borders, terraces, and seats
- Maintenance rhythm for snow, spring runoff, and summer heat
What Is Armour Stone Landscaping?
Armour stone landscaping uses large, natural stone blocks to retain soil, create steps, define edges, and add sculptural features. The material’s mass provides stability, while joints allow drainage—ideal for Mississauga’s clay soils and freeze–thaw cycles. Correct base prep and stone sizing are the difference between seasonal shifting and decades of performance.
Armour stone is quarried limestone, dolostone, or granite cut into rectangular or natural-face blocks. It’s heavy, durable, and visually grounded.
- Core uses: retaining walls, garden terraces, steps, seating boulders, property borders.
- Why it works: weight + open joints help manage water; stone resists salt and de-icing.
- Design vibe: natural, timeless, and upscale without feeling overbuilt.
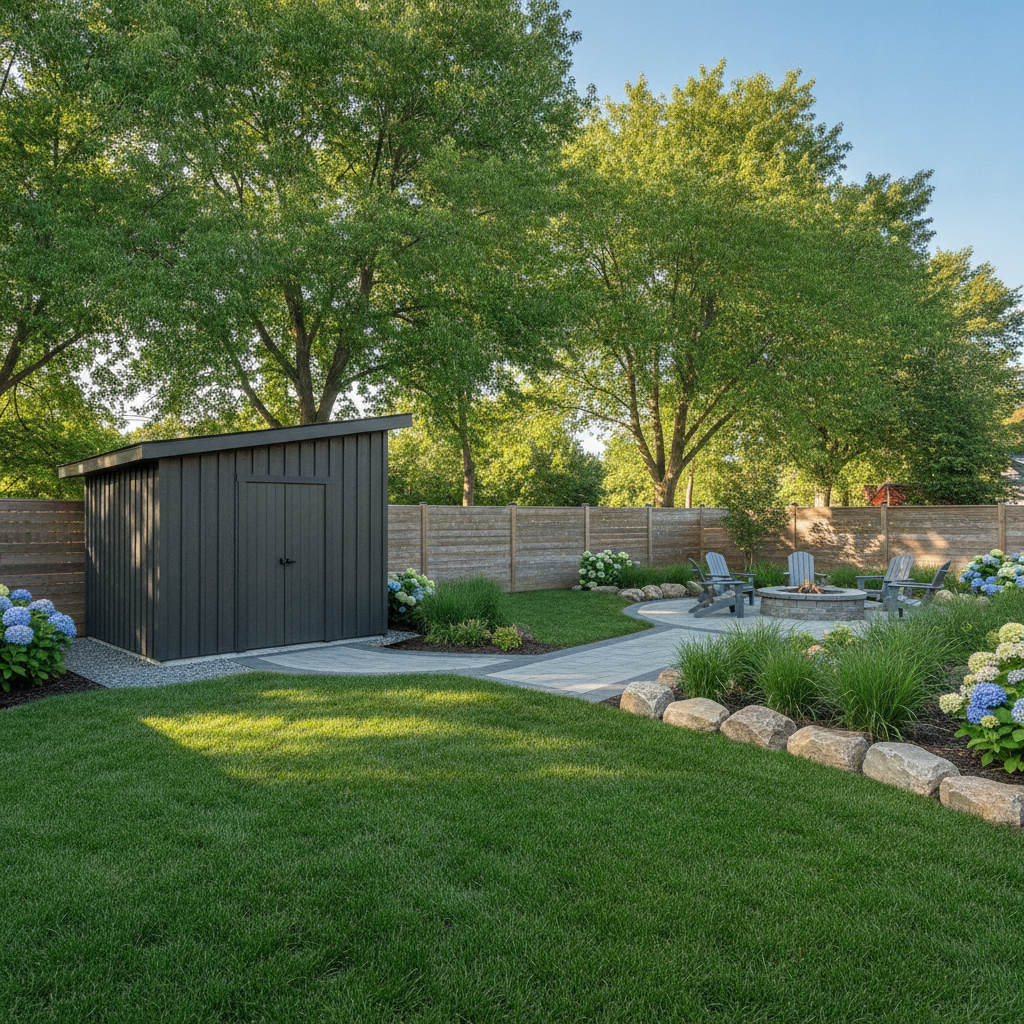
In our experience across Mississauga neighborhoods, armour stone solves three problems at once: it holds grade, routes water, and organizes movement. That’s why we often integrate it with cohesive landscape design and planting layers for a complete, low-maintenance layout.
Why Armour Stone Matters in Mississauga
Mississauga yards face freeze–thaw, spring runoff, and clay subsoils. Armour stone adds gravity-based retention and permeable joints, reducing heave, washouts, and mud zones. It also pairs well with interlocking pavers and structured planting to improve curb appeal and everyday usability without constant upkeep.
Local site realities shape material choices. Here’s what we plan for on Mississauga projects:
- Freeze–thaw cycling: repeated heave demands compacted granular base and lean-in (batter).
- Clay-heavy subsoils: slow drainage; use geotextile and 3/4" clear stone backfill to prevent fines migration.
- Spring runoff: route water behind walls with a 4" perforated drain line wrapped in fabric and daylighted.
- Traffic & use: steps and paths should pair with properly prepared interlocking pavers to keep surfaces stable.
We also factor snow storage, salt exposure, and sightlines. Natural stone tolerates salt better than many composites, and its mass absorbs incidental bumps from snow clearing. The results: cleaner edges, safer footing, and a front that looks “finished” year round.
How Armour Stone Installation Works (Step-by-Step)
A durable armour stone build follows a strict sequence: survey and layout, excavation, geotextile, compacted base, first-course leveling, backfill with clear stone and drain line, add courses with 1:6 batter, cap/finish, and final compaction. Each step manages water and movement so the wall resists heave and settlement.
Site planning and layout
- Confirm wall line, heights, and transitions to steps or pavers.
- Mark utilities; protect trees and drainage paths.
- Pre-visualize movement: driveway widenings, shed access, or patio circulation.
Excavation and base
- Excavate to firm subgrade, allowing room for base and drainage (often 12–18" below finished grade).
- Install woven geotextile to separate fines from base aggregate.
- Place 6–8" of well-compacted granular A or similar; verify with a plate compactor in 2–3 lifts.
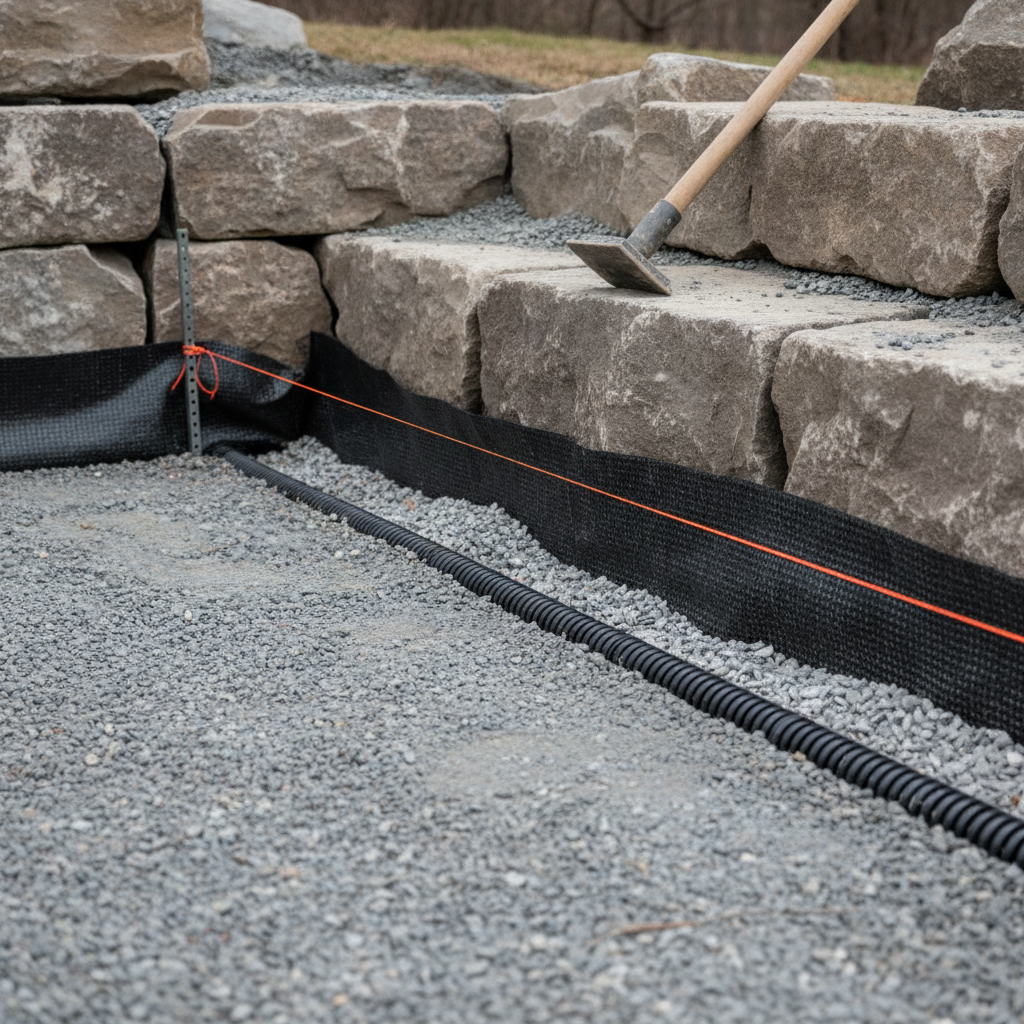
First course and drainage
- Set the first course dead-level on screeded bedding stone; spend time here—it defines everything else.
- Backfill with 3/4" clear stone and install a 4" perforated drain line wrapped in fabric to daylight.
- Check front-to-back lean: target roughly 1:6 batter for stability.
Subsequent courses and finishes
- Stagger joints and blend heights; pinning is optional but mass + batter usually suffice for low walls.
- Integrate step risers at 6–7" for comfortable footing; treads 12–14"+ where space allows.
- Transition cleanly into adjacent landscaping with edging and mulch to control weeds.
Pro tip: Always finish with final compaction of backfill and adjacent surfaces. This locks edges, reduces first-season settlement, and keeps joints consistent through winter.
Types of Armour Stone Features (11 Ideas)
Armour stone adapts to many roles: retaining walls, raised beds, steps, seating, borders, terraces, culvert headwalls, mailbox plinths, address planters, fire pit surrounds, and pool-side edges. Mixing heights and orientations creates rhythm while solving grade changes and circulation in tight Mississauga lots.
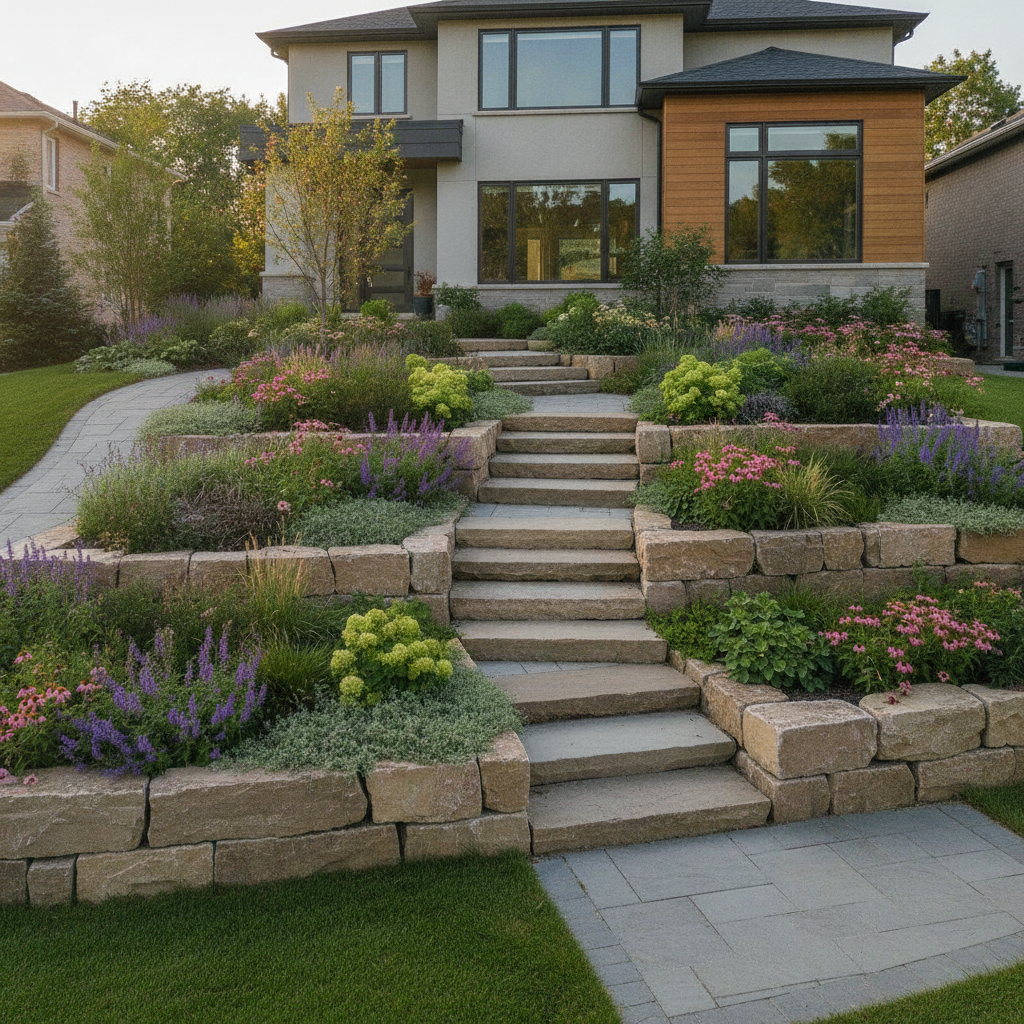
- Front retaining wall: define elevation changes and widen usable frontage.
- Raised garden beds: warm soil faster in spring; pair with mulch for low upkeep.
- Broad stone steps: 6–7" risers with deep treads improve safety.
- Seating boulders: casual seats near a fire pit or play area.
- Property border: low line that guides snow clearing and mowing.
- Tiered terraces: carve slopes into usable platforms.
- Culvert/headwall: stabilize and frame driveway entries.
- Mailbox plinth: durable base that resists winter impact.
- Address planter: showcase house numbers with seasonal color.
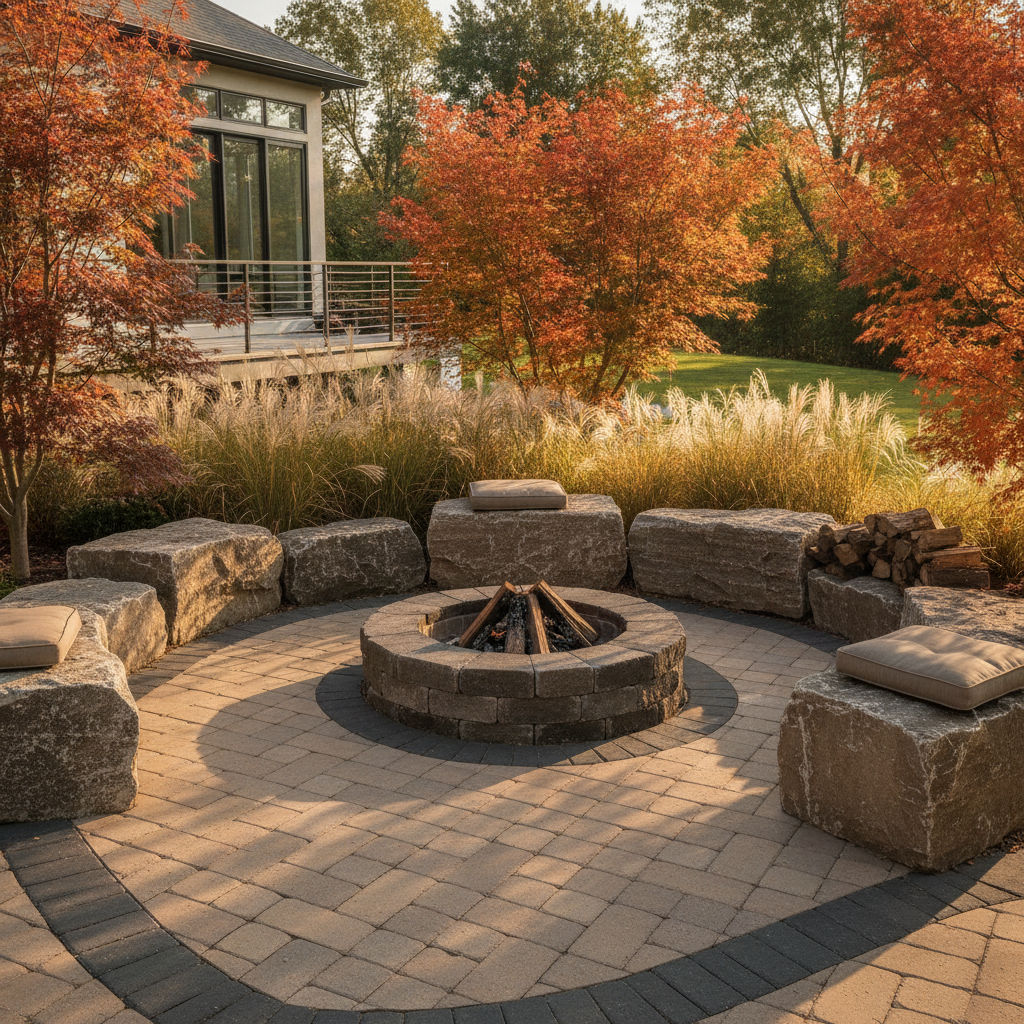
- Fire pit surround: integrates with stone accents up front or in the back.
- Poolside edging: transitions cleanly into interlock and stone features.
We often combine a 24–36" wall with integrated steps leading to a patio, then soften edges with shrubs and ornamental grasses. The result is a space that feels larger because circulation is obvious and slopes are tamed.
Best Practices for Durability and Safety
Longevity comes from the unseen layers: separate soils with geotextile, compact granular base in lifts, backfill with clear stone, add a 4" drain line to daylight, and build with 1:6 batter. Keep step risers near 6–7" and edges pinned or locked by mass and interlock where needed.
Technical checklist
- Geotextile behind and beneath wall zones to stop fines migration.
- Compaction in 2–3 lifts with a plate compactor; confirm firm, even support.
- Backfill with 3/4" clear stone; avoid fine-laden soils right behind walls.
- Drain line: 4" perforated pipe, fabric-wrapped, with a positive outlet.
- Batter: approximate 1" of lean per 6" of height for stability.
- Step ergonomics: 6–7" riser, 12–14" tread (or deeper if space allows).
- Edge control: tie into adjacent surfaces with clean, compacted borders.
Safety and usability
- Rounded arrises reduce trip risk on seating stones.
- Night lighting along steps increases comfort in winter’s early dusk.
- Snow storage paths should not load pressure on the top course.
Here’s the thing: many failures trace back to base prep and water. When we control those, stone mass does the heavy lifting—season after season.
Armour Stone vs Alternatives: Quick Comparison
Choose armour stone when you want natural character, high mass, and permeable joints. Modular block favors uniform looks and engineered height, while timber suits temporary edges. In Mississauga, stone’s durability and salt tolerance make it a strong long-term choice for front yards and high-visibility areas.
Feature Armour Stone Modular Block Timber Durability Excellent; resists salt and impact Very good; uniform units Fair; degrades over time Drainage Permeable joints; easy to vent Engineered with geogrid, drains Poor; can trap moisture Aesthetics Natural and timeless Clean, modern, uniform Rustic/temporary Height capability Low to moderate without engineering Moderate to high with engineering Low Maintenance Low; inspect joints seasonally Low–moderate Moderate–highIf you’re weighing a block system beside your driveway or patio, browse our approach to retaining wall planning to see how base prep and drainage compare.
Tools and Planning Resources
Plan with a measured sketch, grade notes, and a cut/fill estimate. Use a 2–4' level, string lines, and a plate compactor. For drainage, spec a 4" perforated line and 3/4" clear stone. Pair stone work with interlock, sod, fencing, and sheds to complete access and storage needs.
- Layout kit: stakes, string lines, 2–4' level, marking paint.
- Excavation/compaction: shovel, mini-excavator where needed, plate compactor.
- Drainage: geotextile fabric, 4" perf pipe, 3/4" clear stone.
- Finish integration: tie into landscaping services like sod, interlocking pavers, and mulch.
- Design notes: step riser/tread targets, wall heights, batter, and lighting.
If you enjoy reading checklists, this regional planning piece on hardscaping offers helpful context for measuring and staging work; see a practical planning guide for patios and walkways. For broader inspiration across GTA yards, explore seasonal design ideas and backyard transformations.
Mississauga homeowners: If your yard has slope, pooling water, or tight access, book a quick on-site assessment. We’ll right-size scope, confirm base and drainage, and align stone, interlock, and planting so the space stays easy to care for.
Case Studies: Mississauga Yards, Real Results
Across Mississauga, armour stone walls and steps solve grade, drainage, and access issues while improving curb appeal. By pairing stone with interlocking pavers, sod, and structured planting, we create clear movement and low-maintenance beds that hold up to winter snow and summer traffic.
Front yard grade fix near Saigon Park
A sloped front made parking and shoveling awkward. We built a 30" armour stone wall with integrated steps, tied into an interlocking walkway, then refreshed beds with mulch. Snow clearing is simpler, and cars sit level—no more rutting the lawn.
Backyard terrace by St Clair College @ Acumen Mississauga Campus
The lot dropped quickly off the patio door. We carved two terraces with stone seating edges around a fire feature, then added a paver surface. Planting layers now block wind, and the family uses the yard nightly from May to October.
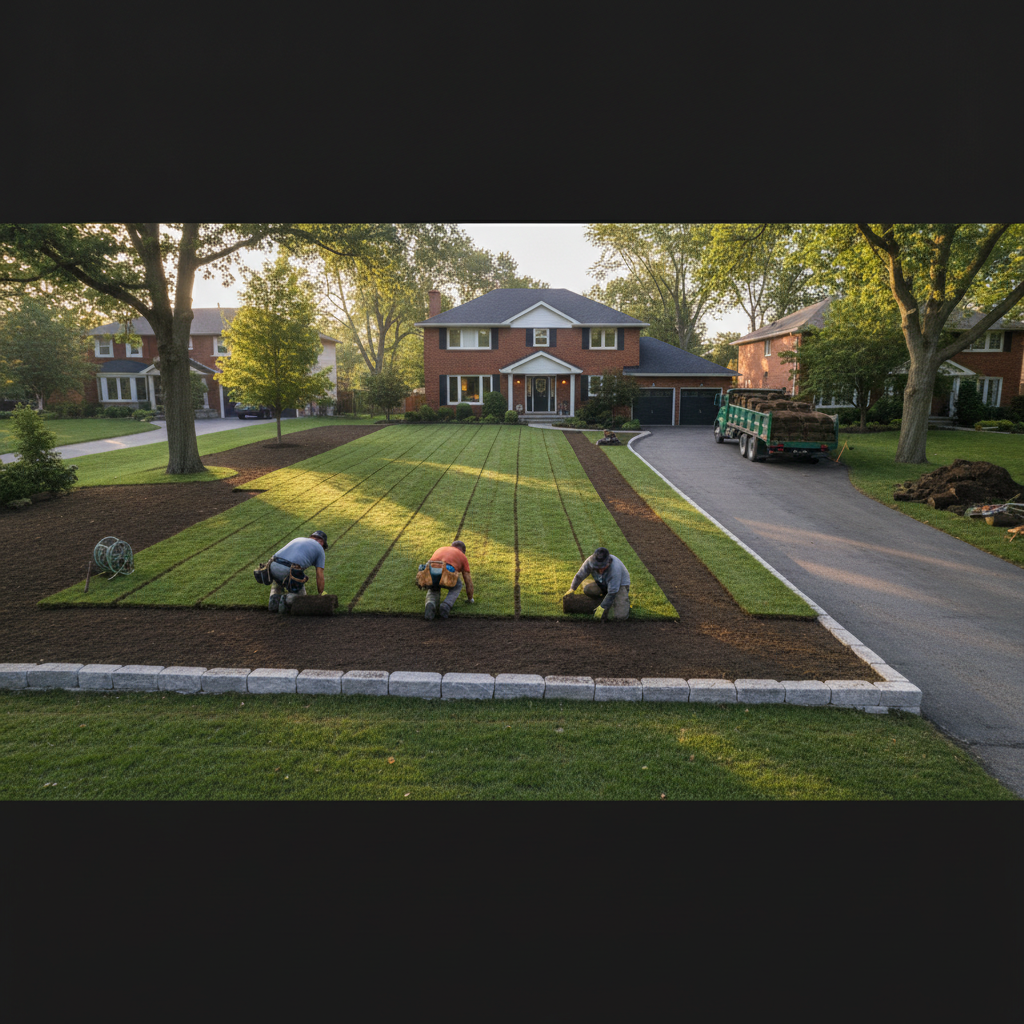
Corner lot visibility upgrade
Street-side beds looked messy and were hard to mow. Low armour stone borders defined the edge, and we installed premium sod. Now the mower tracks true, mulch stays put, and the corner finally reads as “intentional.”
Local considerations for Mississauga
- Plan snow storage paths that won’t overload the wall’s top course, especially along routes to and from Saigon Park.
- Allow spring build windows to compact dry base layers; saturated clay slows compaction near thaw.
- Coordinate access for stone delivery in tight drives near St Clair College @ Acumen Mississauga Campus; staging prevents lawn damage.
Maintenance and Seasonal Care
Keep armour stone low-maintenance with simple habits: clear debris from joints, inspect drains seasonally, re-top mulch, and touch up polymeric jointing on adjacent pavers. Manage snow loads and salt, and prune plantings to preserve sightlines for steps and driveways.
- Spring: check outlets for the drain line; re-level minor shifts with bedding stone.
- Summer: edge and mulch to suppress weeds; water new plantings deeply, less often.
- Fall: cut back perennials and remove leaves from steps and borders.
- Winter: avoid piling heavy snow on top courses; use salt sparingly where possible.
Well-built stone rarely needs intervention. What matters most is protecting drainage paths and keeping adjacent surfaces compact and edged so weeds don’t creep into joints.
Step-by-Step Planning Checklist
Successful projects start with a clear scope: measure grades, pick feature types, confirm access, and phase adjacent work like interlock, sod, fencing, or sheds. Document heights, step counts, and outlets for water. Then schedule work windows aligned to weather and site readiness.
- Measure length, height, and slopes; note downspouts and low spots.
- Select features: wall, steps, seating, borders, or terraces.
- Plan tie-ins to pavers, sod, design, or sheds.
- Confirm access for stone delivery and spoil removal.
- Sketch section details: base depth, geotextile, clear stone backfill, and drain line.
- Set riser/tread counts for steps; align landings to doors and gates.
- Schedule around wet springs or heat waves; compact only when materials are workable.
If any of these steps feel fuzzy, that’s normal. We handle this sequencing daily and document each layer so the build stays predictable.
How Our Design–Build Process Works
We start with an on-site assessment, align goals and grades, then design integrated stone, interlock, and planting. Our crews handle excavation, base, drainage, stone placement, and finishing. Finally, we walk you through maintenance so your yard stays sharp without constant work.
- Consult: listen to pain points—slope, pooling, tight parking, clutter.
- Plan: right-size scope and sequence with drawings and notes.
- Build: prep base, install drainage, set stone and steps, finish edges.
- Maintain: set a simple care rhythm for mulch, edging, and seasonal checks.
This integrates our core services—design and build, landscaping services, and stone work—so results look cohesive and last.
Mississauga Armour Stone Landscaping: FAQ
Most questions center on wall height, drainage, tie-ins to pavers or sod, and winter performance. The short version: build for water first, compact in lifts, lean the wall slightly, and design connections to adjacent surfaces. That’s how armour stone stays level and good-looking through Ontario seasons.
How high can an armour stone wall be without engineering?
Low to moderate heights are common in residential yards when built with proper base, drainage, and batter. For tall walls or walls supporting driveways or structures, consult a qualified professional for engineered design and approvals.
Do I need a drain behind a short wall?
Yes. Even short walls benefit from a 4" perforated drain line wrapped in fabric and vented to daylight. It relieves hydrostatic pressure, reduces freeze–thaw impacts, and keeps joints from clogging with fines over time.
How do armour stone steps connect to interlocking pavers?
We establish stable step risers first, then blend into a compacted paver base. Edges are contained with clean borders and polymeric jointing where appropriate, creating a smooth, safe transition that resists movement.
What maintenance does armour stone need in winter?
Use salt judiciously, avoid stacking heavy snow on top courses, and keep step treads clear of packed ice. In spring, check the drain outlet and touch up adjacent paver joints to prevent water from settling near the wall base.
Conclusion and Next Steps
Armour stone is a smart, durable solution for Mississauga yards. When you control base, drainage, and tie-ins to pavers and planting, stone features stay level, safe, and sharp-looking through every season. The easiest path is a coordinated design–build approach that plans long-term maintenance from day one.
- Key takeaways: manage water first, compact in lifts, lean walls slightly, and integrate finishes.
- Next step: walk your yard and note slopes, water paths, and circulation pinch points.
- When ready: schedule an on-site consultation so we can right-size your scope and timeline.
Want to explore related planning topics? Our team regularly shares insights on retaining walls, interlocking layouts, and planting structure for Mississauga properties—especially helpful if you’re coordinating multiple upgrades in one season.