Stone work ideas for curb appeal are proven ways to use natural or engineered stone to shape entry paths, steps, edging, and low walls that guide visitors and frame your architecture. From our Mississauga office at 100 Matheson Blvd E unit 202, we design-build durable stone features that look intentional day one and withstand Ontario’s freeze–thaw.
By HR Greenroots Landscaping • Last updated: May 13, 2026
Summary & Overview
This complete guide turns stone work ideas for curb appeal into an actionable plan. You’ll learn what stone curb appeal really means, why it matters, how we build it to last in Ontario, 17 design-ready ideas, essential specs, and simple upkeep—all tailored to Mississauga properties.
Use this overview to scan, then dive deeper where you need details.
- Definition, benefits, and how stone supports curb appeal
- Step-by-step build sequence that survives freeze–thaw
- Seventeen front-yard feature ideas with real use cases
- Local best practices for Mississauga and Peel
- Tools, materials, and maintenance tips that work
- FAQ answers for quick decision-making
What Is Stone Work for Curb Appeal?
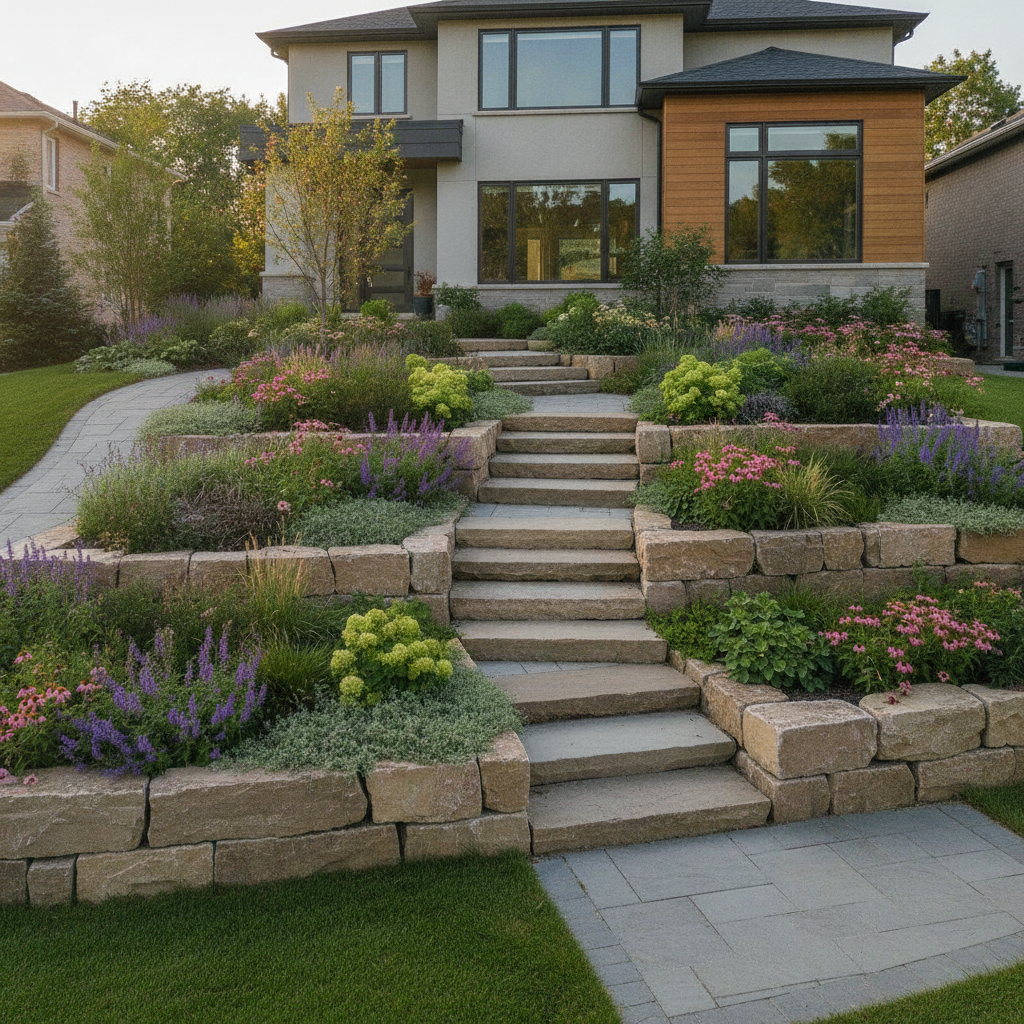
Stone work for curb appeal is the strategic use of pavers, cut stone, and boulders to shape entries, guide foot traffic, define beds, and add texture. The right mix strengthens first impressions, improves safety, and reduces maintenance while tying your driveway, walkway, and porch into a cohesive whole.
In our experience across Mississauga and the GTA, curb appeal starts at the street line and finishes at your door. Stone creates the crisp edges and durable surfaces that lawns and mulch can’t provide alone.
- Circulation first: Front walks 42–48 inches wide reduce shoulder rub and improve flow.
- Defined edges: Natural stone or paver edging holds mulch and keeps mowing lines straight.
- Elevation handling: Steps and low retaining walls tackle slope without awkward ramps.
- Four-season texture: Stone reads well in spring greens, summer color, and winter snow.
Here’s the thing—curb appeal isn’t only about looks. It’s about movement, safety, and upkeep. When those align, the street view feels finished every day of the year.
Why Stone Elevates First Impressions
Stone elevates first impressions by adding structure, traction, and visual rhythm. In Mississauga and the Regional Municipality of Peel, durable stone details resist salt, manage runoff, and keep edges crisp—so your home looks cared-for in January as reliably as it does in July.
Why does this matter? First, stone reads as quality. Second, it solves recurring problems—messy mulch lines, icy steps, muddy paths—without weekly labor. Third, it connects architecture, planting, and pavement into one picture.
- Perceived value: A coordinated entry path and landing can make a home feel newer.
- Safety: Textured pavers and nosed treads improve sure-footing in wet or snowy conditions.
- Lower upkeep: Proper edge control reduces mulch spill and keeps sod edges intact.
- Storm-smart: Graded bases and permeable options reduce puddles at the door.
We often pair interlocking pavers with armour stone accents. That balance of fine pattern and bold massing gives your frontage a focal point—without overwhelming planting.
How Professional Stone Work Gets Built (Step-by-Step)
Quality stone work follows a proven sequence: site assessment, layout, excavation, layered base with compaction, edge restraints, precise laying, joint stabilization, and final protection. This workflow delivers consistent alignment, drainage, and durability in Ontario’s freeze–thaw climate.
Here’s our standard front-entry workflow. It’s fast, predictable, and tailored to local soils and winters.
- On-site assessment: Check grades, downspout discharge, and traffic paths; set a target elevation for the landing.
- Layout & material selection: Choose interlocking pavers, natural stone, or armour stone that complements the facade.
- Excavation: Remove organics; excavate to allow base thickness appropriate for use (often 6–12 inches).
- Base installation: Use Granular A in lifts compacted to a dense, stable layer; top with high-performance bedding (HPB).
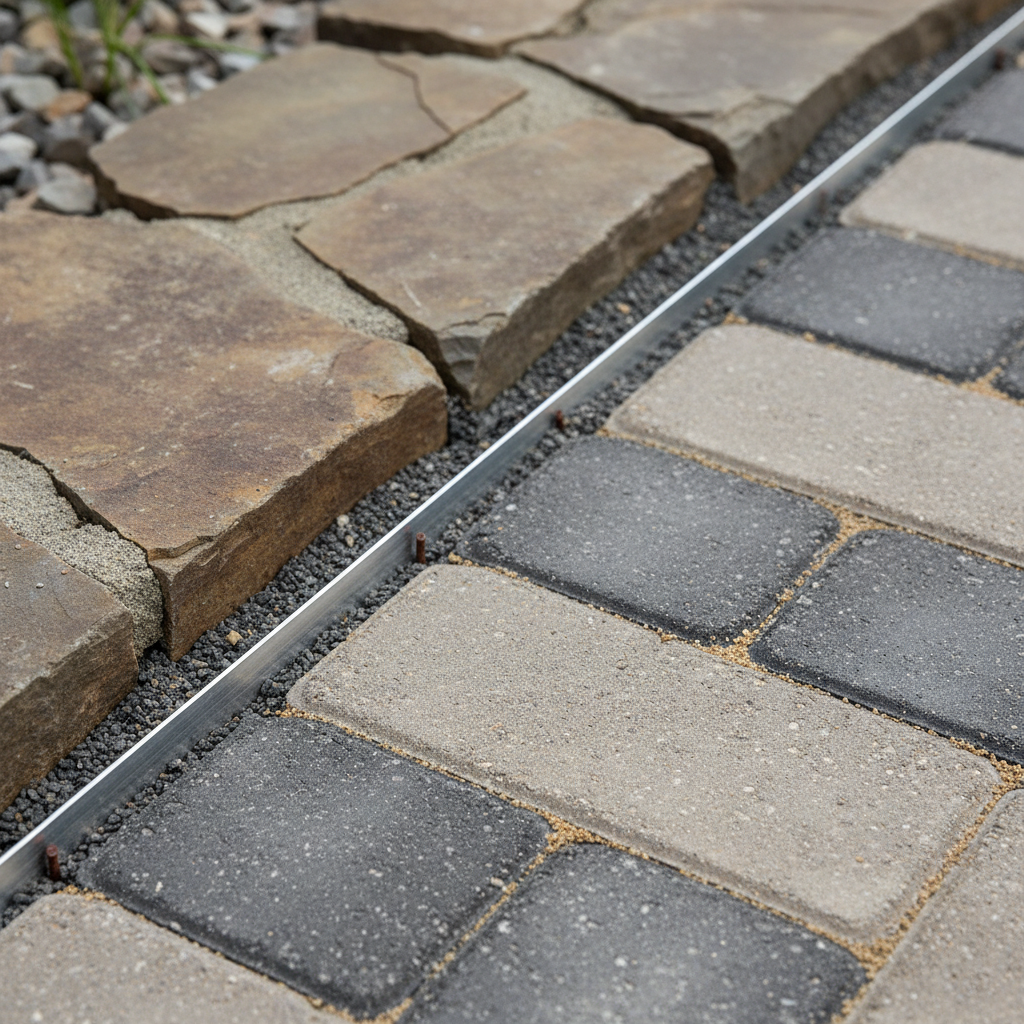
- Edge control: Install aluminum or concrete edge restraints anchored into the compacted base—not just the bedding.
- Laying pattern: Dry-lay pavers or set natural stone; keep joints consistent; cut cleanly at edges.
- Joint stabilization: Sweep polymeric sand into joints; activate per manufacturer directions for weather.
- Protection: Where appropriate, seal surfaces; set final grades for positive drainage away from the house.
Most misalignments come from weak base prep or missing edge restraints. Solve those and your walkway tracks straight for years.
17 Stone Work Ideas That Add Curb Appeal Fast
Use these seventeen stone-forward ideas to organize space, add texture, and frame your entry. Each idea balances day-one appearance with long-term upkeep, so your frontage looks clean after rain, freeze–thaw, and weekly mowing.
Pick two or three that solve your biggest pain points, then connect them with planting and lighting.
- Wider front walkway: Go 42–48 inches with a contrasting soldier course for definition.
- Flared landing: Expand at the porch to 6–8 feet wide for comfort and packages.
- Armour stone steps: Use textured nosings for traction and a natural look on slopes.
- Ribbon driveway edges: Add a contrasting paver band to strengthen the street view.
- Driveway apron: A different texture at the sidewalk signals the entrance and reduces cracking transitions.
- Natural stone bed edging: Stop mulch migration and protect turf edges from trimmer burn.
- Low retaining wall: Correct minor grade changes and frame lawn panels cleanly.
- Boulder accents: Pair two or three stones with evergreens to anchor beds.
- Steppable side path: Flat stones from the sidewalk to porch create a charming secondary route.
- Inlay feature: Echo window geometry with a paver medallion or herringbone panel.
- Seating ledge: Cap a knee-high wall for a quick perch near the entry.
- Stone-clad planters: Veneer boxes near the door for four-season color.
- Gate threshold: A small paver pad prevents ruts where people and carts pass.
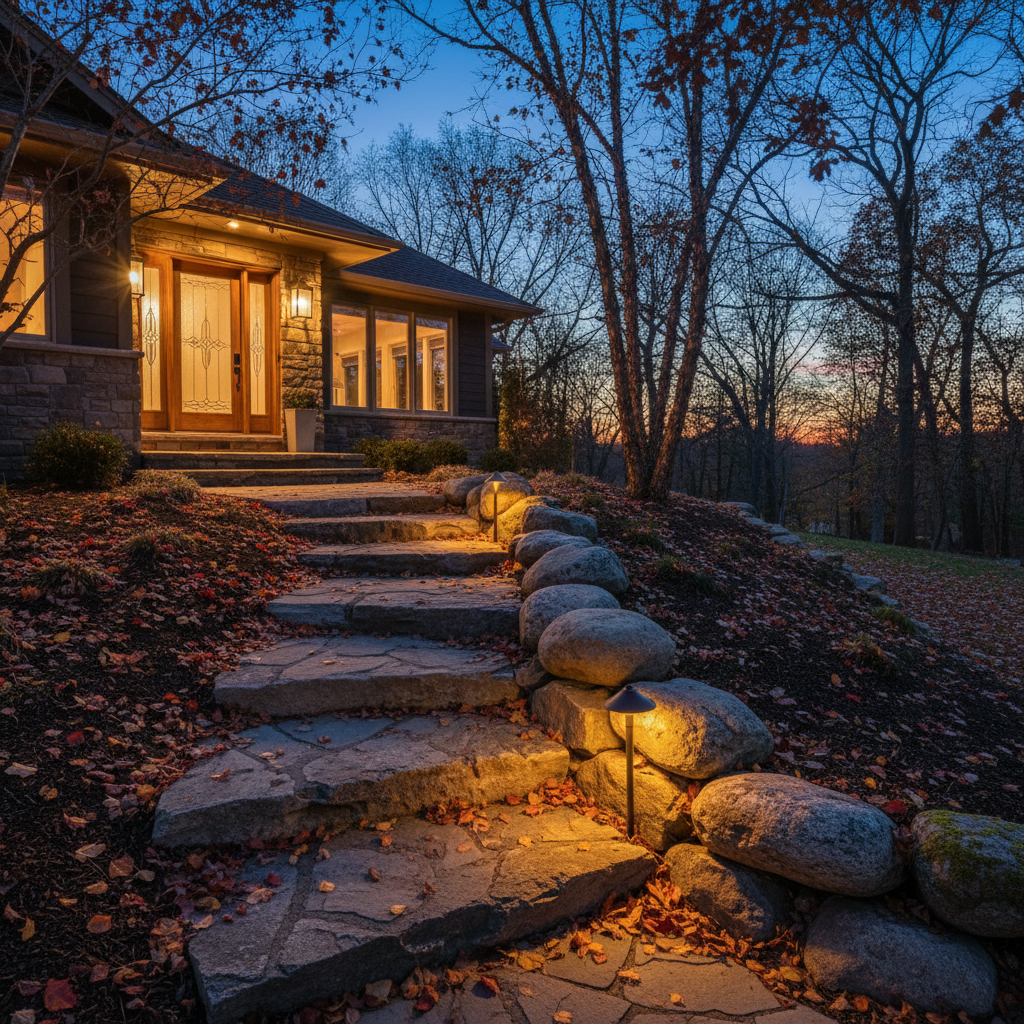
- Lighting integration: LED riser lights and low-glare path lights extend evening use.
- Permeable banding: Swap a strip to permeable pavers to reduce puddles.
- Clean mowing strip: A tight paver edge against sod keeps the mower deck honest.
- Porch step reface: Stone cladding unifies aged concrete with new hardscape.
Want help tying two or more of these together? Our landscape design and build process creates one coherent plan, then executes it with clean base prep and scheduling.
Design Principles & Best Practices (Mississauga + Peel)
Best-practice stone design in Mississauga sets clear movement, balances mass with planting, and respects drainage. We design for 1–2% walkway slope away from structures, use freeze–thaw rated materials, and anchor edges into the base so lines stay crisp through winter.
Local reality check: snow, salt, and spring thaw test every detail. Build for them and you’ll love how your frontage looks on tough days—not just sunny ones.
- Set the main line: Align the front walk with either the door or key window axis, then add a gentle flare at the landing.
- Keep sightlines clean: Use shrubs at knee height near steps; save taller plants for the corners.
- Balance mass: One or two armour stones per bed are usually enough—let plants soften the rest.
- Drainage first: Ensure downspouts discharge beyond hardscape; add discreet channel drains where needed.
- Durability cues: Favor ASTM-rated pavers and sealed natural stone at high-salt zones.
Local considerations for Mississauga
- Choose freeze–thaw friendly pavers and activate polymeric sand to curb spring washout.
- Target builds from late spring to early fall for reliable compaction and curing windows.
- Near EPIC College of Technology or Saigon Park, plan material staging to avoid daytime congestion.
If you’re unsure how these details tie together, our Mississauga landscaping services article outlines our end-to-end, maintenance-minded approach.
Materials, Tools, and Specs We Trust
For long-lasting curb appeal, use compacted Granular A base, HPB bedding, geotextile separation, and aluminum or concrete edge restraints anchored into the base. Pair polymeric sand and compatible sealers with freeze–thaw rated pavers or stone to maintain color, traction, and tight joints.
We’ve installed thousands of square feet of pavers and natural stone across Southern Ontario. The right materials make the work last; the wrong ones fail early.
- Base & bedding: Granular A in compacted lifts; HPB for drainage and precise leveling.
- Separation & stability: Non-woven geotextile under base; landscape fabric in beds, not under pavers.
- Edge restraints: Staked aluminum or concrete curbs anchored into the base layer.
- Joint material: Polymeric sand matched to joint width; sweep and activate carefully.
- Sealers: Only where appropriate; breathable, salt-tolerant products protect color and ease cleaning.
For step nosings, we prioritize textured stone or pavers with beveled edges. It’s a small detail that pays off every icy morning.
Comparison: Stone Options for Curb Appeal
Choose materials by balancing look, durability, traction, and maintenance. Interlocking pavers offer precision and pattern; natural stone brings character; poured concrete is seamless but less modular; decorative gravel is quick and permeable for side paths.
Material Best with Freeze–thaw durability Traction Maintenance Notes Interlocking pavers Modern/Transitional facades Excellent when base and edges are right High (textured surfaces) Low; re-level individual units if needed Predictable patterns; easy repairs Natural stone (flag, steps) Traditional/Naturalized landscapes High when sealed and detailed High (textured grain) Low–Medium; occasional sealing Unique character; heavier handling Poured concrete Contemporary minimalism Medium; watch for cracking Medium; add broom finish Low; cracks require section repair Seamless look; limited pattern Decorative gravel Side paths, low-traffic zones High (permeable) Medium; can shift underfoot Medium; rake to refresh Fast install; great for drainageIf you’re debating between two looks, we can mark out full-scale footprints on-site. Seeing the geometry on your actual frontage speeds decisions and avoids second-guessing.
Seasonal Maintenance That Protects Your Investment
Stone curb appeal holds up with simple routines: gentle snow removal, spring polymeric sand touch-ups, periodic rinsing, and edge checks. Fast, seasonal attention prevents small issues—like joint washout or weed ingress—from becoming visible lines that distract from your entry.
Maintenance should be predictable, not a surprise. Here’s a tight program our clients like.
- Winter: Use plastic shovels on pavers; avoid spiked tools; choose salt-tolerant de-icers as needed.
- Spring: Rinse surfaces; top-up polymeric sand where joints opened; inspect edge restraints.
- Summer: Spot-clean spills; trim plantings to maintain clear sightlines to steps and lights.
- Fall: Final rinse; check slopes and drains; prune for snow load; confirm lights work.
We design with maintenance in mind—from mowing strips to plant choice—so routine care is quick. If you prefer, we can schedule seasonal refreshes as part of a long-term plan.
Common Mistakes (and What We Do Instead)
Most stone curb appeal failures trace to weak bases, missing edge restraints, poor drainage, and overcomplicated patterns. We prioritize compaction, anchored edges, positive slopes, and clear geometry so your front entry feels intentional and stays aligned year after year.
Here are pitfalls we see—and the alternative we build.
- Too narrow walks: Anything under 36 inches feels cramped; we aim 42–48 inches.
- Edge stakes in bedding: Edges must anchor into compacted base for real holding power.
- Ignoring downspouts: Re-route discharge beyond paths; add discreet drains at low points.
- Over-patterning: One field pattern plus one border is usually enough; let plants add variety.
- No nosings on steps: Textured nosings boost traction on frosty mornings.
Small corrections—like an added soldier course or apron—often produce outsized improvements without a full rebuild.
Case Snapshots: Mississauga Fronts We’ve Transformed
These brief scenarios show how targeted stone details solved real curb appeal issues: tight entries, heaving walks, and awkward slopes. Note how each solution ties movement, edging, and planting together for a clean, lasting result.
Heaving walkway to welcoming entry
A detached home had a 30-inch, heaving concrete walk. We rebuilt to a 48-inch paver path with a contrasting edge and a flared landing. A two-course retaining wall corrected slope, and LED risers improved night safety. The front now reads organized from street to door.
Narrow frontage that felt crowded
An infill frontage felt pinched between driveway and porch. We added a darker driveway apron to widen the read, then ran a bold soldier course along the new 42-inch walk. A single armour stone in each bed anchored the corners—no visual clutter.
Steep stoop with winter slip risk
A high stoop created a steep first step. We reworked into three armour-stone treads with textured nosings, widened the landing, and layered evergreen shrubs. Winter approach is steadier, and the entry finally matches the home’s character.
Should You DIY or Hire a Pro?
DIY can work for small edging or a short path, but front entries and steps merit pro-grade base prep, drainage planning, and cutting accuracy. If curb appeal is mission-critical, a design-build crew delivers predictable alignment, speed, and warranty-backed workmanship.
Consider DIY for a weekend mowing strip or a small gravel side path. For anything that touches the main entry, intersects drainage, or manages slope—bring in a crew with compaction equipment and layout experience.
- DIY-friendly: Short edging runs, simple gravel paths, small planter veneers.
- Pro-recommended: Front steps, retaining walls, integrated lighting, major walkways.
- Hybrid: We handle base and layout; you complete planting or mulch refresh.
For deeper background on layout decisions and prep considerations, this pre-hardscaping checklist walks through common planning points you’ll encounter.
Our Design–Build Process (Mississauga)
We scope on-site, align on movement and materials, mark full-scale geometry, then build with strong bases and clean edges. The handoff includes maintenance guidelines so your stone work ideas for curb appeal stay crisp through every season.
Here’s how we keep your project moving and your frontage accessible during work.
- Consultation: Walk the site, measure slopes, note traffic lines and problem spots.
- Concept & palette: Confirm patterns, borders, and stone tones that complement your facade.
- Staging plan: Set material drops and access so the neighborhood stays tidy.
- Build: Excavate, install base, set edges, lay stone, stabilize joints, add lighting.
- Finish: Clean up, review care steps, schedule any seasonal touch-back.
If your frontage also needs lawn refresh or bed cleanup, we can integrate sod installation and mulching in one schedule so the reveal looks complete.
Free Frontage Walk-Through (Soft CTA)
If you’re in Mississauga or nearby, schedule a quick on-site walk-through. We’ll map two or three high-impact moves—often a wider walk, defined landing, and crisp edging—that upgrade curb appeal without overbuilding.
Prefer to start with inspiration? This step-by-step patio example shows layout, base layers, and cuts similar to a front entry build. Or browse our own Mississauga landscaping overview to see how we phase projects.
Tools and Learning Resources
You don’t need a contractor’s shop to make good choices. A measuring tape, line level, and a few layout stakes help visualize widths and flares. From there, photos and full-scale markings speed decisions on patterns, borders, lighting, and planting.
- Layout kit: Tape, stakes, string line, landscape paint for full-scale outlines.
- Surface sampler: Gather two or three paver options; compare in sun and shade.
- Night scan: Walk with temporary lights to test riser and path placements.
- Reference builds: See an entry path planning example to preview typical sequencing.
Simple tools and a short list of photos can clarify more than hours of abstract discussion. We aim to make those decisions quick and confident on-site.
Frequently Asked Questions
These quick answers address what most Mississauga homeowners ask us about curb-appeal stone work: permits, longevity, winter care, and how many ideas to combine for best results.
How many stone features should I combine for a small front yard?
Two or three coordinated moves usually deliver the best result. A wider walkway, a defined landing, and crisp bed edging create clear movement and tidy lines without visual clutter.
Do I need a permit for a low retaining wall?
Many low garden walls don’t require permits, but taller walls or drainage changes can. We verify local requirements and engineer when heights or loads demand it.
What’s the ideal width for a front walkway?
Aim for 42–48 inches so two people can pass comfortably. Widen to 6–8 feet at the landing for packages and pauses without stepping into beds or onto lawn.
Can stone work handle winter salt and freeze–thaw?
Yes—when you choose freeze–thaw rated materials, compact the base correctly, and manage drainage. Textured surfaces improve traction, and compatible sealers help protect color in high-salt zones.
Key Takeaways & Conclusion
Stone work ideas for curb appeal work best when they solve movement and maintenance together. Start with path width and landing comfort, add crisp edging, and address slope. The result is a front entry that looks organized every day—no extra weekend chores required.
- Start with movement: Right-size the main walk and landing.
- Control edges: Anchor restraints into the base for crisp lines.
- Balance massing: Let plants soften stone; avoid over-patterning.
- Plan for winter: Favor textured surfaces and positive drainage.
Ready to turn inspiration into a plan? Book a quick, no-pressure walk-through in Mississauga. We’ll map the two or three moves that will matter most on your frontage—and build them right the first time.