A mulch refresh schedule is a planned cadence for topping up, fluffing, and edging mulch to maintain a consistent 2–3 inch layer and clean bed lines. In Mississauga’s climate, this typically means a spring recharge and a lighter fall top-up. Done right, it suppresses weeds, stabilizes moisture, and keeps curb appeal sharp without constant weekend work.
By HR Greenroots Landscaping • Last updated: 2026-04-20
Quick Summary
Refresh mulch twice a year in Ontario—major top-up in spring, light top-up in fall—while maintaining a 2–3 inch depth and crisp edges. Fluff compacted areas, pull mulch off trunks, and spot-weed monthly. This routine preserves moisture, controls weeds, and protects soil while keeping interlock, sod, and plantings looking intentional.
Here’s the reality: a tidy yard isn’t luck—it’s maintenance planned into your calendar. Our Mississauga crews weave mulch into broader care: edging against interlocking, protecting new sod, and defining movement around decks, fences, and sheds. Use this guide to design a mulch refresh schedule that fits your beds, time, and seasonal windows.
- What “mulch refresh schedule” means and why it matters
- How often to top up in Mississauga and the GTA
- Depth targets, edging tactics, and bed-by-bed timing
- Mulch types, pros/cons, and where each performs best
- Tools, checklists, and a printable calendar framework
- Mini case examples from Ontario properties
What Is a Mulch Refresh Schedule?
A mulch refresh schedule is a recurring plan to restore mulch depth, color, and function across the season. It standardizes when you top up, fluff compacted zones, recut edges, and pull mulch off trunks. The goal: maintain a consistent 2–3 inch layer for weed suppression, moisture regulation, and all-season curb appeal.
Think of mulch as both a finish and a protective system. It shades soil, slows evaporation, and blocks light that seeds need to germinate. Over time, mulch decomposes, fades, and shifts—especially at bed edges and high-traffic routes—so a refresh plan keeps performance steady rather than reactive.
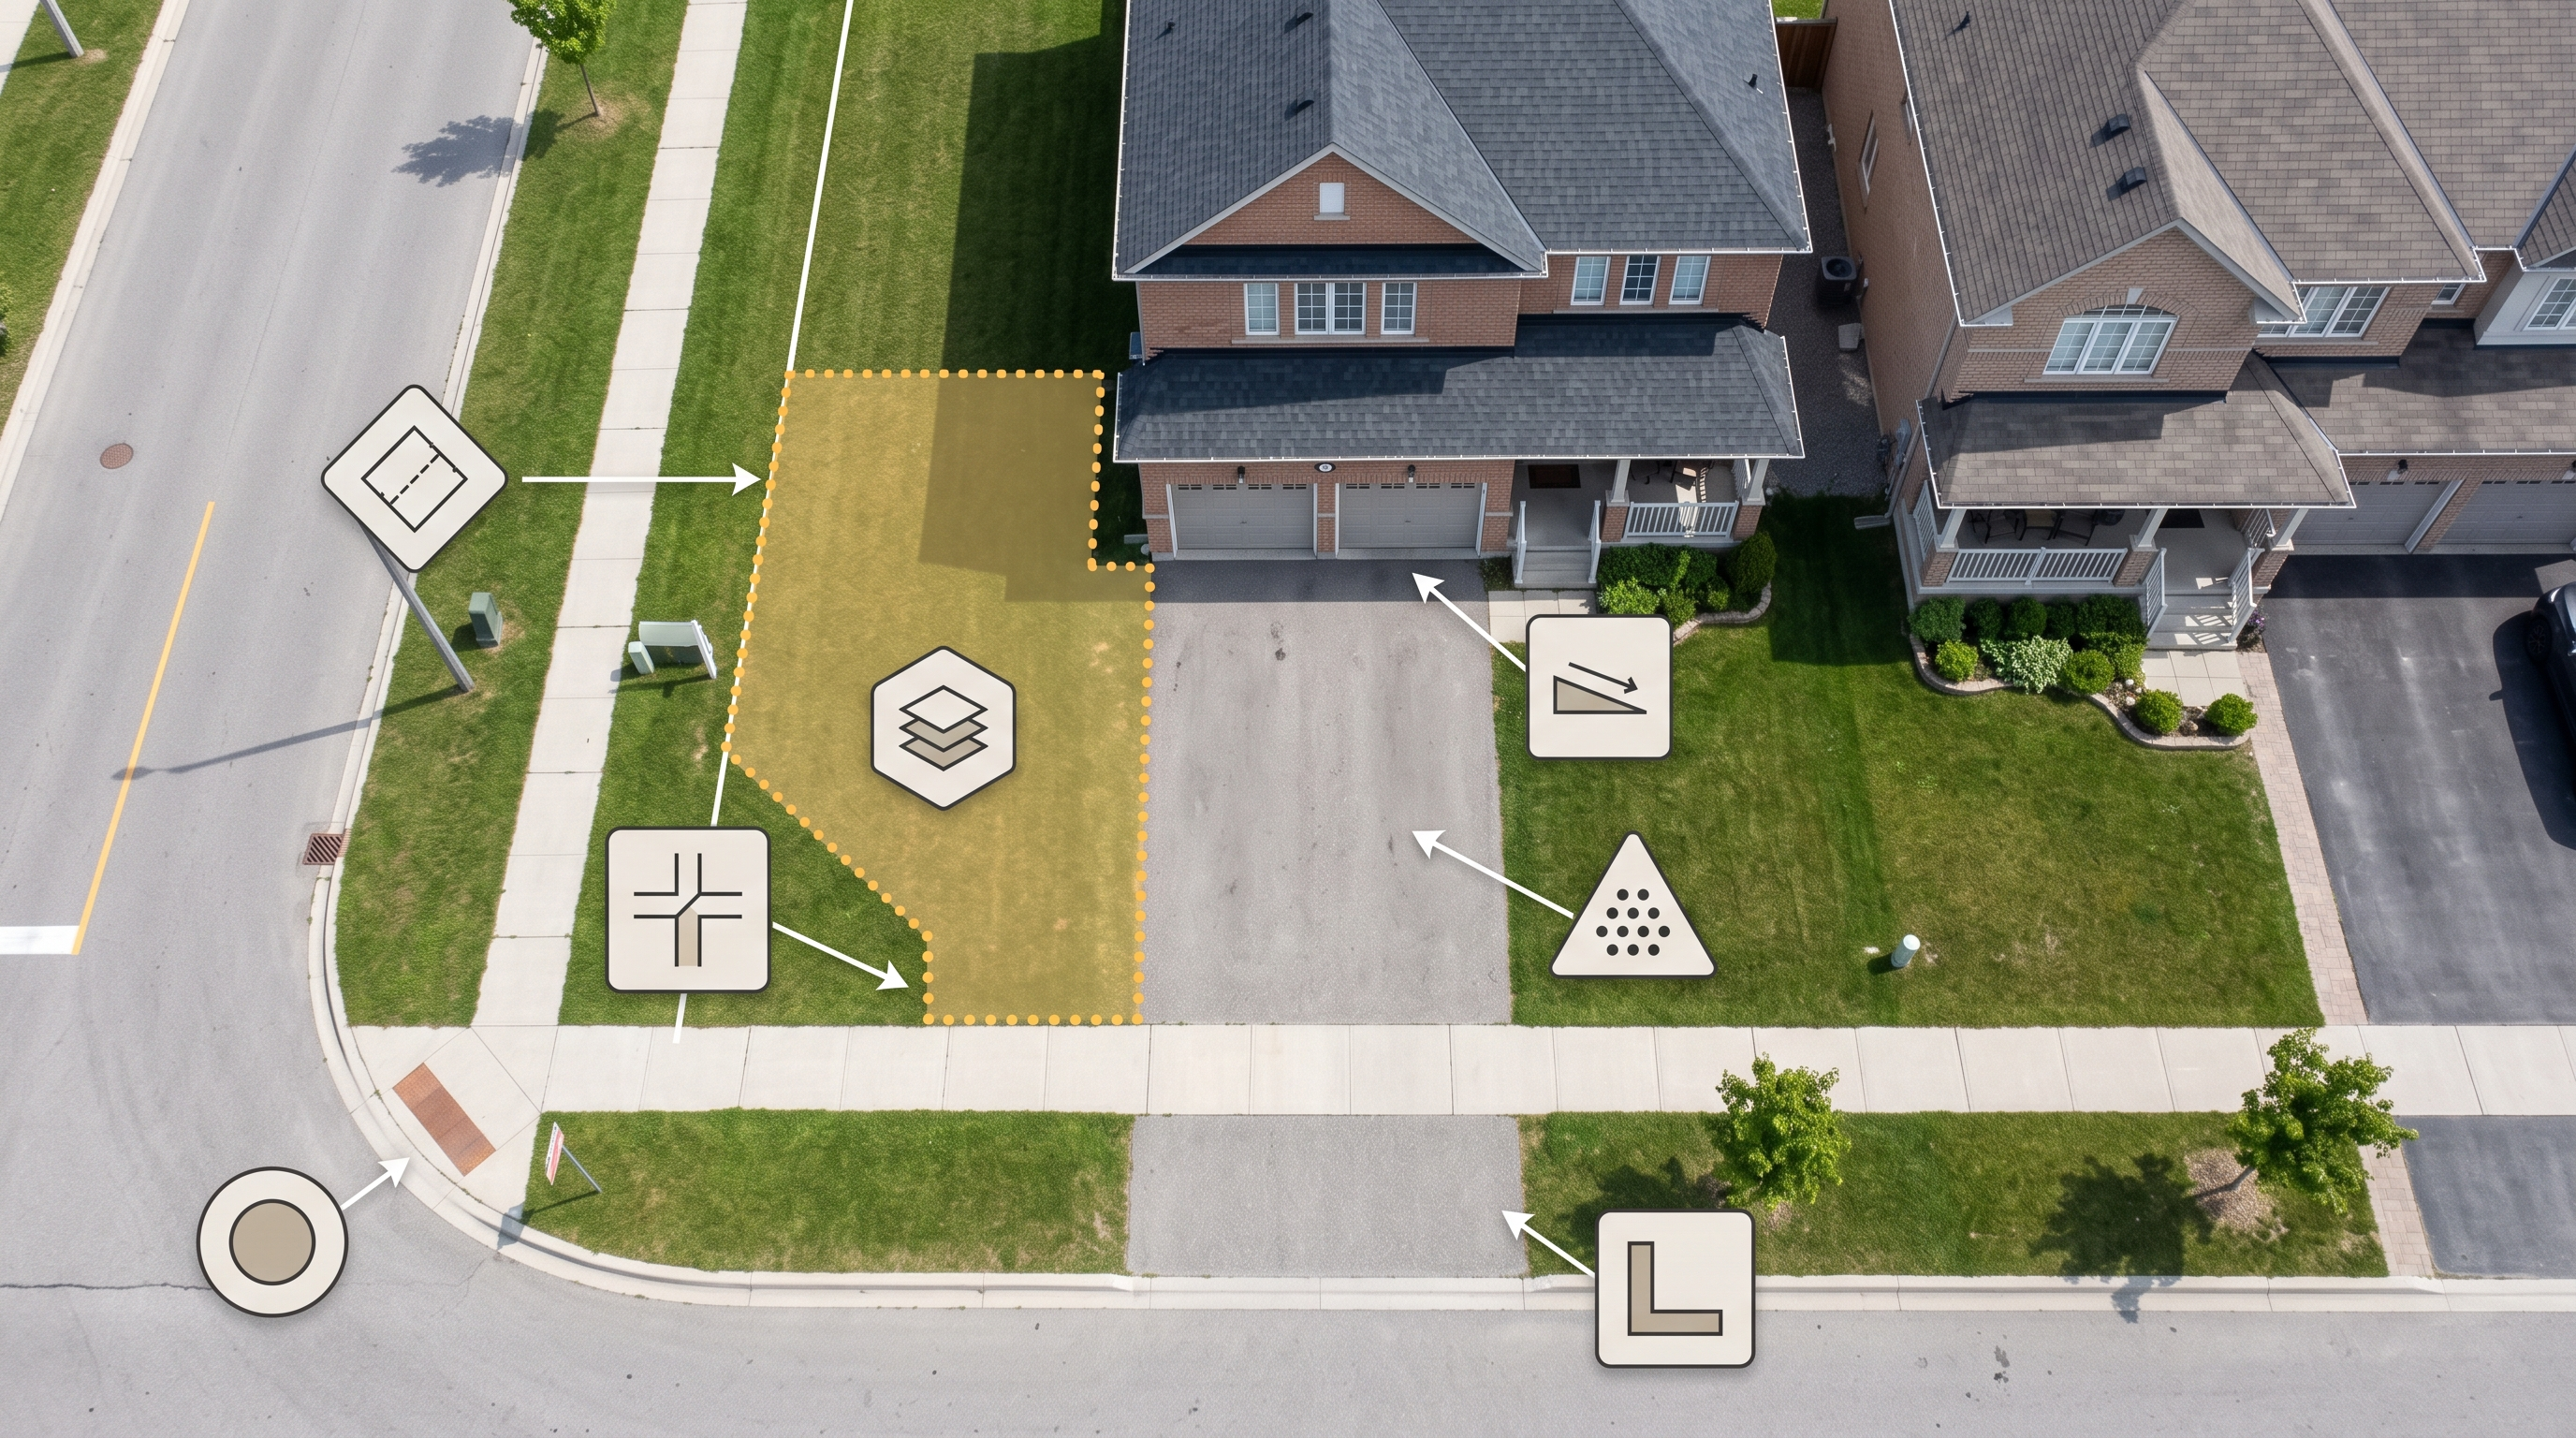
- Depth: Aim for 2–3 inches; more than 3 can smother roots or invite pests, less than 2 loses weed control.
- Zones: Prioritize front beds, entries by interlocking, and new plantings; they carry the most visual load.
- Edge integrity: Recut or press edges to prevent spillover onto pavers, sod, or gravel paths.
- Tree safety: Create a donut-shaped gap around trunks; bark should breathe.
We weave this work into design-build projects across Mississauga: after Interlocking & Pavers installations, mulch crispness emphasizes clean lines; after Sod Installation, mulch ring buffers mower scuff and watering overspray.
Why a Schedule Matters (Curb Appeal, Weeds, and Water)
Scheduling mulch refreshes locks in consistent weed suppression and moisture balance while keeping beds visually sharp. Planned touchpoints prevent thin spots, edge collapse onto pavers, and trunk mulching. The result: healthier root zones, fewer weeding sessions, and stronger curb appeal all season.
Without a cadence, most beds slowly lose 20–40% of visual volume through settling and decomposition within a year. You see it first where foot traffic, wind, or splash-back erodes edges. Then weeds sneak in. A simple spring-and-fall plan stops that slide and shortens weekend chores.
- Weed pressure: A consistent layer blocks light; thin spots invite annuals like crabgrass and chickweed.
- Moisture swings: Unmulched soil dries faster in summer wind; mulch evens out irrigation and rainfall patterns.
- Edge control: Defined borders prevent migration onto interlocking, sod, or stone work.
- Safety: Pull mulch off trunks and siding to reduce rot and pest harborage.
On Mississauga properties with Retaining Walls and Stone Work, well-timed mulch refreshes also limit fines washing from beds onto hardscapes during storms.
How the Schedule Works in Mississauga’s Climate
In the GTA, plan a spring recharge (April–May) to reset depth and edges, then a fall top-up (September–October) before freeze-thaw. Spot-fluff monthly in summer, and re-edge high-visibility beds after big rains. Keep mulch 2–3 inches deep and clear of trunks, siding, and deck posts.
We design refresh calendars to match plant growth and weather windows, not just the calendar. Spring resets support new growth and early weed control. Fall touch-ups insulate perennials, cover exposed irrigation lines, and stabilize slopes near driveways or steps.
- Early spring: Clean leaves, reshape edges, measure thin zones, top up to 2–3 inches.
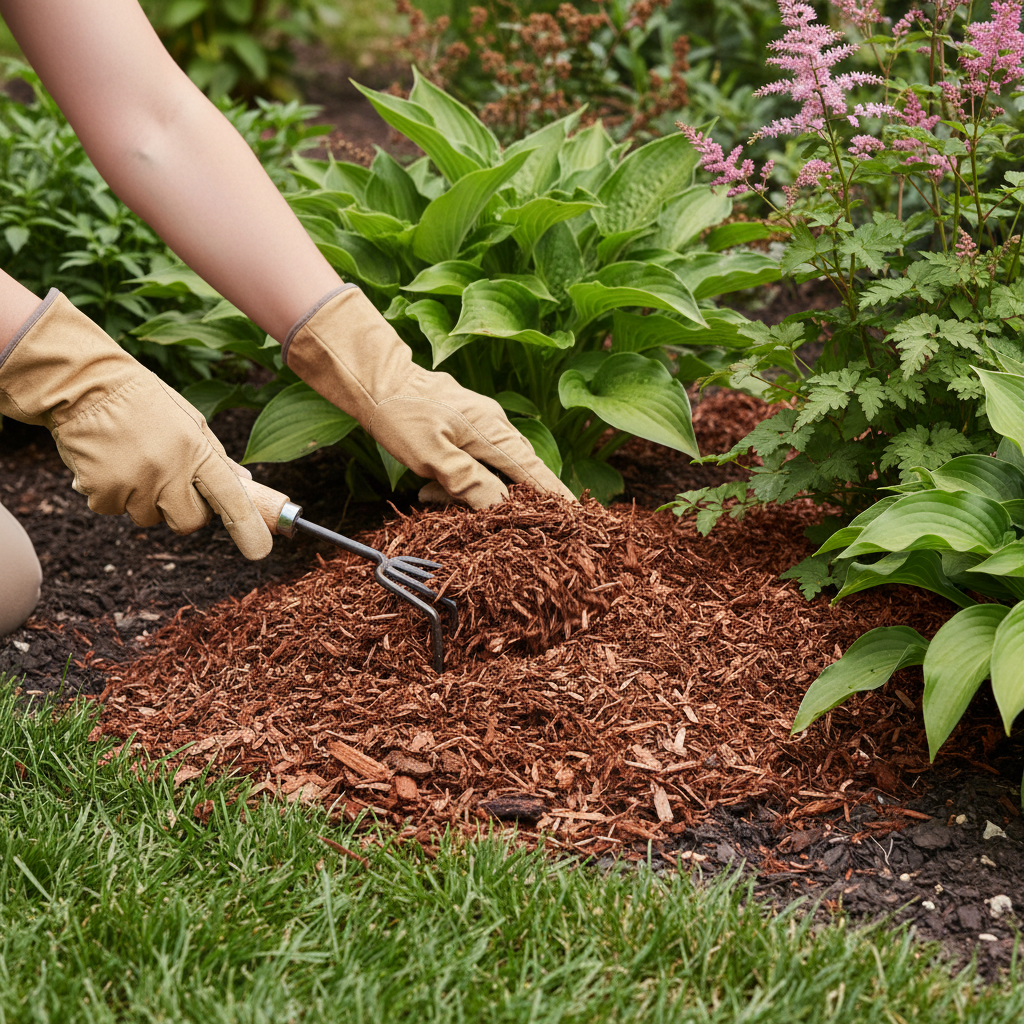
- Late spring: Fluff compacted mulch around new plantings to improve air and water infiltration.
- Mid-summer: Monthly five-minute scan per bed; pull weeds before they seed.
- Early fall: Light top-up in traffic-prone areas; re-establish edges near interlocking.
- Late fall: Final rake to shed standing water; ensure mulch is off trunks before snow.
Where decks or fences create rain shadows, we often recommend spot checks after dry spells to confirm mulch still protects roots closest to posts and footings.
Mulch Types and Approaches (Where Each Wins)
Choose mulch based on bed goals: shredded hardwood for general beds and slopes, cedar where longevity and scent matter, dyed mulch for short-term color pop, and stone/gravel in drainage or high-splash areas. Match type to refresh frequency: faster-decomposing mulches need more frequent top-ups.
Not all mulch behaves the same. Texture, wood species, and dye affect decomposition rate, color hold, and stability on slopes. Here’s a practical comparison for Ontario beds we maintain.
Mulch Type Best Use Refresh Cadence Notes Shredded Hardwood General beds, mild slopes Spring + light fall top-up Interlocks well; good weed suppression Cedar Perennial beds, near seating Annual top-up (holds color longer) Aromatic; moderates pests; slower decay Dyed Brown/Black High-visibility frontage Annual top-up; color fade mid-season Color pop; watch stain on pavers Pine Bark Nuggets Large shrub beds Annual; faster movement on slopes Good texture; can migrate in heavy rain Compost/Leaf Mold Veg plots, soil building Seasonal as needed Nutrient rich; compacts without fluffing Stone/Gravel Drainage bands, splash zones Rake twice a year Permanent; weed fabric often requiredOn properties with Pool Surrounds or heavy splash areas, we prefer stone bands at the base of walls or Retaining Wall steps, transitioning to organic mulch beyond the splash line.
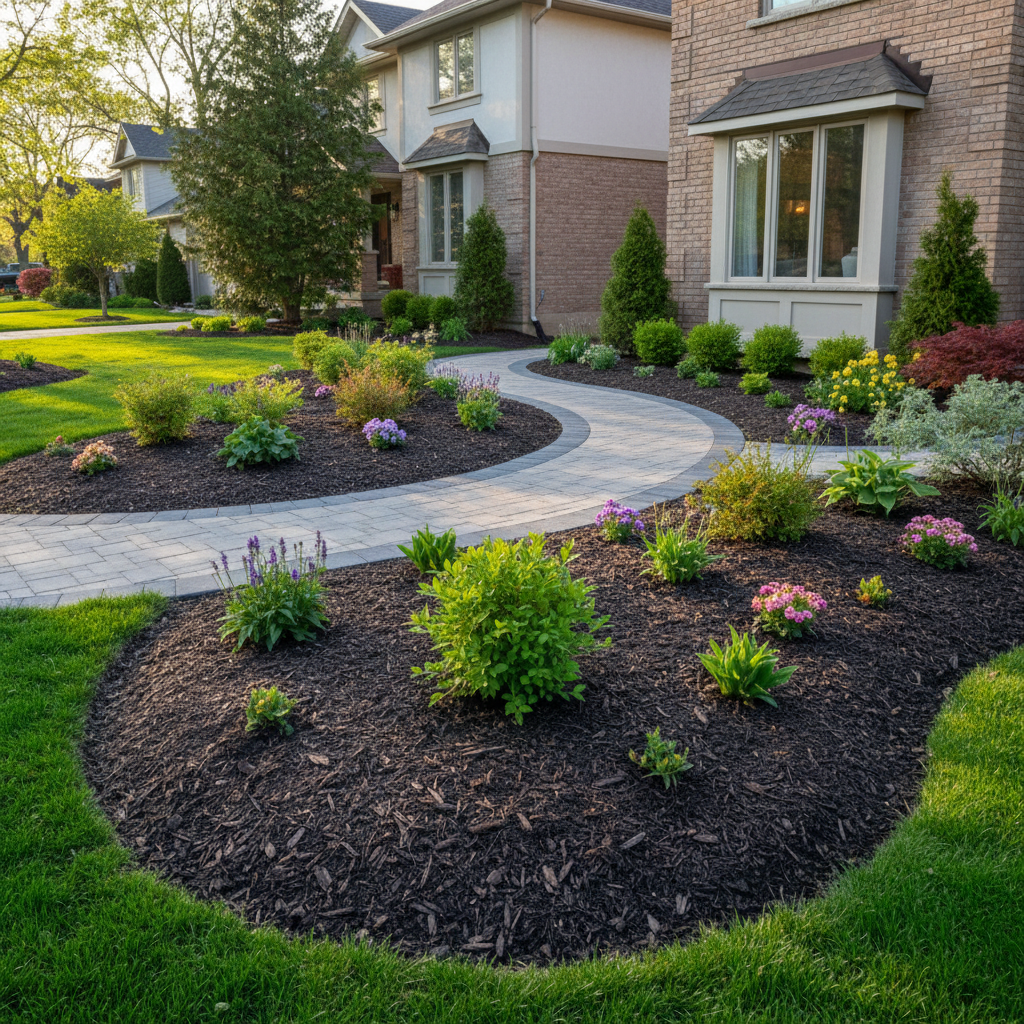
Best Practices: Depth, Edging, and Clean Execution
Keep mulch 2–3 inches deep, never against trunks, and edge beds so mulch sits slightly below adjacent surfaces. Fluff compacted zones, break crusting after storms, and sweep stray chips off interlocking the same day to prevent staining or slippery spots.
In our experience across the GTA, crisp edges make the biggest visual difference for the least effort. A well-cut edge also traps mulch during downpours and snowmelt.
- Depth control: Measure with a trowel. If you’re below 2 inches, plan a top-up; above 3, pull back.
- Edge geometry: Keep the mulch surface 0.5–1 inch below paver or sod, so runoff doesn’t float chips.
- Trunk clearance: Maintain a bare-soil ring the width of a dinner plate around trunks.
- Water first: Hydrate dry soil before adding mulch; it reduces wicking and dust.
- Post-storm check: Walk edges after flash rain; repair low spots before they widen.
When we install Interlocking & Pavers walkways, we align mulch grade to paver edge height. That 0.5–1 inch drop looks tailored and keeps chips off joints.
Tools and Resources (Crew-Tested)
You don’t need a trailer of equipment—just a wheelbarrow, scoop shovel, hand rake, edging spade, and a stiff broom for pavers. Add landscape fabric scissors for stone bands and a hose wand for quick soak-ins. Keep a depth gauge or trowel handy for spot checks.
We favor simple, durable tools that encourage you to do the quick fixes when you notice them. Five minutes with a hand rake and broom after a storm beats a full re-edge later.
- Transport: Wheelbarrow, tarp, five-gallon buckets for tight access.
- Placement: Scoop shovel, mulch fork for loose, hand rake for finish.
- Edges: Half-moon edger or square spade; lawn shears for stray grass runners.
- Surfaces: Stiff broom for interlocking; leaf blower on low for broad areas.
- Safety: Gloves, eye protection, and knee pads; organize piles away from drive lanes.
Planning tools matter too. We map bed zones in our Landscape Design plans so refreshes follow a logical path—front entry and corners first, utility areas last.
Designing Your Mulch Refresh Calendar
Build a twice-yearly cadence: spring reset and fall top-up. Layer monthly five-minute scans and after-storm touchups. Sequence by visibility—front beds and entries first—then by vulnerability: slopes, splash zones, and new plantings where depth thins fastest.
Give your schedule “anchor dates,” then flex around weather. In Mississauga, mid-to-late April typically opens the spring window; a late September to early October top-up preps for freeze-thaw. Here’s a simple framework.
- April–May: Full reset, edge cut, target 2–3 inches throughout.
- June–August: Monthly scans; fluff compacted zones and sweep pavers.
- September–October: Light top-up; reinforce slopes and entry beds.
- Storm protocol: Inspect edges and drains within 24 hours of big rains.
Pair the refresh with other maintenance: after Sod Installation, mulch rings around trees limit mower nicks; after Fence Installation, mulch bands reduce line trimmer scuff.
Local considerations for Mississauga
- Spring swings can be sharp; wait until soil is workable and consistent daytime temps hold above freezing to avoid compaction underfoot.
- Summer wind across open lots dries edges faster; scan south and west exposures monthly for thinning near interlocking.
- Freeze–thaw heaves edges; schedule a quick re-edge on high-visibility frontage before winter holiday decor goes up.
Bed-by-Bed Timing and Tactics
Prioritize high-visibility and high-traffic beds first, then stabilize slopes and splash zones. Around decks, fences, and sheds, check shading patterns and adjust depth. Near pavers and driveways, maintain a 0.5–1 inch drop from hard surface to mulch for clean transitions.
Every property has “fast-thin” zones. These are spots where rain, wind, footfall, or watering patterns erode mulch faster than the rest. Target them during monthly scans.
- Front entry beds: Keep color and texture fresh; dyed options can work here if you accept annual color top-ups.
- Slopes and berms: Choose shredded textures that lock together; re-edge after downpours.
- Deck borders: Dry shadows can crust; fluff lightly to restore infiltration.
- Fence lines: Mulch bands reduce string-trimmer damage; check for drift under panels.
- Garden sheds: Establish a gravel drip band at the roof edge, then transition to mulch.
For beds next to Driveway Extensions or Walkways, keep sweep tools close; chips on pavers are easiest to remove the same day.
Common Mulch Mistakes to Avoid
Avoid volcano mulching against trunks, overfilling beyond 3 inches, using fine compost alone in windy beds, and skipping edge maintenance. Don’t lay dyed mulch right before heavy rain on new pavers. Always sweep or rinse pavers the day you refresh adjacent beds.
We see the same issues repeat across new installations and refreshes. Most are easy to fix with small habit changes.
- Trunk contact: Pull back mulch to expose the flare; it lowers rot and pest risks.
- Thickness creep: Annual top-ups without measurement cause slow overfill; check depth at several spots.
- One-texture everywhere: Use stone or gravel near heavy splash, not wood chips right against walls.
- Edge amnesia: Crisp edges buy you weeks of tidiness; skipping them costs time later.
- Color timing: Dyed options look best when applied during dry spells; give them time to set.
Mini Case Examples from Ontario Properties
Frontage beds responded best to shredded hardwood at 2–3 inches with strict edge control; color-dyed beds needed annual color top-ups; stone bands near splash zones reduced cleanup. Monthly five-minute scans kept weeds minimal and edges intact across varied sites.
Mississauga bungalow with new Interlocking & Pavers: We set hardwood mulch 0.75 inches below paver edge, recut bed geometry, and scheduled a light fall touch-up. Result: stray chips dropped, and weekly sweeping took under two minutes.
GTA sloped yard with Retaining Walls: We swapped loose bark for shredded hardwood, added mini check-edges on contour, and built a small gravel splash band under a downspout. Edges held through summer storms, and mulch stayed put.
Family yard with Deck Services and Fence Installation: We established mulch bands to reduce string-trimmer contact, then set a quarterly five-minute edge check. Scuffs disappeared and mower lines stayed clean.

Step-by-Step Refresh Process (Field-Tested)
Clear debris, recut edges, water dry soil, place mulch to 2–3 inches, fluff compacted zones, and sweep adjacent hardscapes the same day. Finish with a quick trunk check to expose the flare and a final walk-through for thin patches or migration risks.
- Prep: Leaf and litter removal; mark irrigation heads; cover drains.
- Edges: Cut a clean V-groove; set mulch grade slightly below pavers or sod.
- Hydrate: Pre-wet dry beds so new mulch doesn’t wick moisture from roots.
- Place: Start farthest from the exit; work toward your wheelbarrow route.
- Finish: Fluff lightly; pull back from trunks; sweep pavers and steps.
For stone bands as splash guards, install fabric only where appropriate, cut cleanly around plant stems, and top with angular gravel that resists rolling.
Integrating Mulch with Design–Build Projects
Plan mulch with the hardscape and planting layout from day one. Align grades to paver edges, choose textures to match wind and slope, and design stone splash bands where needed. A coordinated plan reduces maintenance and keeps the whole space looking finished longer.
Our design packages specify mulch type, initial depth, and edge details alongside Stone Work, Sod Installation, and planting layers. That clarity speeds spring refreshes and avoids edge do-overs after new interlocking or driveway widening.
- Grades and transitions: Set mulch elevations during layout to avoid retro cutting later.
- Material pairing: Shredded textures near slopes, stone near splash, cedar near seating.
- Access paths: Leave a discreet wheelbarrow route for easy annual top-ups.
When Garden Shed placement is part of the plan, we design gravel drip lines first, then tie surrounding beds into a mulch palette that fits the yard’s visual story.
Should You DIY or Book a Service?
DIY works for small beds with simple edges and access. Book a service when slopes, long frontages, interlocking borders, or mature trees complicate depth and cleanup. A professional crew refreshes faster, manages edge geometry, and coordinates with irrigation and plant health.
We refresh thousands of square feet each season across Mississauga and the GTA. Homeowners who value tidy edges, protected pavers, and efficient execution often prefer a coordinated crew day—especially when mulch touch-ups coincide with seasonal plant care or minor hardscape maintenance.
- DIY-ready: Compact beds, few obstacles, easy wheelbarrow access.
- Call a crew: Slopes, big corners, dyed mulch near new pavers, or complex circulation.
- Bundle work: Align mulch with pruning, irrigation checks, and light interlock repairs.
Free 10-Minute Bed Assessment (Soft CTA)
Need a second set of eyes? We can walk your beds, flag thin zones, and outline a practical schedule. It’s a quick, no-pressure assessment that maps your next best steps and timing windows for the GTA climate.
Want a pro to design your mulch refresh schedule around interlocking, sod, retaining walls, or new plantings? Our team builds maintenance into the design from day one so spaces stay sharp through the seasons. Reach out to coordinate timing with your spring or fall projects.
Frequently Asked Questions
Most beds in Mississauga do best with two refreshes per year, 2–3 inches of depth, and crisp edges. Keep mulch off trunks, sweep chips off pavers immediately, and choose textures that match slope, wind, and splash. Below, quick answers to common questions.
How often should I refresh mulch in Mississauga?
Plan a spring reset and a lighter fall top-up. Spring restores depth and edges after winter; fall stabilizes soil for freeze–thaw and covers exposed irrigation or root zones. Do quick monthly scans in summer to fluff compacted areas and spot-weed before seeds set.
What mulch depth is best for weed control?
Maintain 2–3 inches. Less than 2 inches allows light to reach weed seeds; more than 3 can smother roots and hold excess moisture. Measure at several spots, not just the edges, and pull mulch away from trunks to expose the root flare.
Should I use dyed mulch or natural mulch?
Use dyed mulch when you want a strong, maintained color in front beds and entries. Expect annual top-ups to preserve color. Natural shredded hardwood blends well across most beds, interlocks tightly on slopes, and typically needs a spring reset with only a light fall touch-up.
How do I keep mulch off my interlocking pavers?
Set the mulch grade 0.5–1 inch below the paver edge and recut a V-groove bed edge. Place mulch carefully, then sweep chips the same day. During storms, check for migration at corners and drain lines and repair thin spots before they widen.
Is fabric necessary under mulch?
Fabric isn’t needed under organic mulch in most garden beds and can interfere with soil health. It makes sense beneath stone bands used for drainage or splash protection. If you use fabric with stone, cut cleanly around plant stems and anchor edges well.
Key Takeaways
Set a twice-yearly cadence, hold 2–3 inches of depth, protect edges near pavers and sod, and tailor mulch type to slope and splash conditions. Five-minute monthly scans prevent big weekend repairs and keep Mississauga beds looking intentional year-round.
- Twice a year beats random touch-ups; anchor dates and adjust for weather.
- Depth discipline (2–3 inches) is the fastest way to cut weeds.
- Edges first: neat geometry multiplies the visual impact.
- Match texture to site: shredded for slopes, stone for splash, cedar for seating.
- Bundle with other care to save time—sod checks, interlock sweeping, pruning.
Conclusion: Your Practical Mulch Refresh Schedule
A smart mulch refresh schedule is simple: spring reset, fall top-up, and quick monthly scans. Maintain 2–3 inches, protect edges, and keep trunks clear. Plan by visibility and vulnerability, and you’ll preserve plant health, reduce weeding, and keep curb appeal dialed in.
Ready to lock in a plan that works with your interlocking, sod, and planting layout? We organize mulch refreshes within full landscape design–build projects so the whole property reads clean from day one—and stays that way.
Next step: Book a Mississauga consultation. We’ll map your beds, set your calendar, and align touch-ups with your seasonal maintenance windows. Prefer DIY? Use this guide as your checklist, then call us if a slope, wall, or paver edge needs a pro’s hand.
Looking for broader design inspiration as you plan your beds and edges? Explore practical ideas in these regional overviews from established landscapers: Durham Region landscape design ideas, a focused note on interlocking in Ontario, and Ajax-specific backyard transformation tips. Use them to spark layout thinking, then tailor your mulch plan to Mississauga conditions.