A landscape project checklist is a step-by-step plan that sequences design decisions, utility locates, grading, base preparation, and installation for sod, pavers, decks, fences, retaining walls, and planting. In Mississauga and the GTA, using a clear checklist reduces rework, shortens timelines, and keeps crews, materials, and inspections aligned from day one.
By HR Greenroots Landscaping • Last updated: May 9, 2026
At a Glance: What This Guide Covers
This guide packages a practical landscape project checklist you can follow from idea to final sweep. You’ll see step-by-step workflows, tools and materials, buying tips, comparisons, and local considerations for Mississauga and the GTA—so you can plan smarter, avoid common pitfalls, and finish with a durable, low-maintenance outdoor space.
Use this as your working playbook. It reflects how our design–build team sequences real projects across Mississauga and Southern Ontario, from concept and layout to base prep, installation, and maintenance handoff.
- Clear definitions: what a landscape project checklist is and how to use it
- Why checklists prevent mistakes and shorten timelines
- Step-by-step workflow that mirrors professional sequencing
- Project-specific checklists for sod, interlocking, decks, fences, walls, sheds, and beds
- Comparison table: DIY vs. pro, pavers vs. concrete, wood vs. composite
- Tools/resources and a concise buying guide
- Local considerations for Mississauga and the GTA
Table of contents
- What is a landscape project checklist?
- Why a checklist matters for Mississauga & the GTA
- How a pro checklist works (step-by-step)
- Types of projects and mini-checklists
- Comparisons you’ll actually use
- Best practices and common mistakes
- Tools, materials, and resources
- Mini case studies and examples
- Buying guide: choosing materials and features
- FAQ
- Conclusion and next steps
What Is a Landscape Project Checklist?
A landscape project checklist is a structured sequence of tasks that align design, permits, utility locates, drainage plans, base preparation, and installation. It keeps crews, materials, and inspections moving in the right order, lowering rework and delays while improving durability and finish quality.
Think of it as your control panel. It clarifies scope, assigns responsibilities, and locks in the order of operations—before shovels hit the ground.
- Why it matters: Landscaping includes multiple trades, inspections, and weather windows. A written sequence minimizes downtime and material waste.
- What’s included: Site assessment, utility locates, drainage and grading, base prep specifications, installation steps, cleanup, and maintenance handoff.
- Who uses it: Homeowners orchestrating DIY tasks, and design–build teams like ours managing full-scope projects across Mississauga and the GTA.
- When to build it: During concept planning—well before orders, excavation, or booking crews.
In our experience, projects with a documented checklist see fewer schedule slips and cleaner finishes. Even simple lawns and garden beds benefit from planned grading, edge control, and a defined handoff for seasonal maintenance.
Why a Checklist Matters for Mississauga & the GTA
Checklist-driven projects finish faster and with fewer callbacks. In freeze–thaw climates like the GTA, sequencing drainage, base depth, and edge control is essential. A written plan keeps slope (near 2%), compaction, and curing windows on track so your patio, lawn, and walls last.
Here’s the thing—our region’s freeze–thaw cycle magnifies small mistakes. Water that can’t shed off a patio or lawn becomes heave, pooling, and settlement. A basic slope target of about 2% (roughly 1/4 inch per foot) away from structures helps protect foundations and surfaces.
- Base depths are non-negotiable: Typical interlocking patios need about 4–6 inches of compacted base; driveways often require 8–12 inches.
- Compaction rules: Compact in thin lifts (2 inches or less) to improve density and reduce future settlement.
- Curing and rooting windows: Polymeric sand often needs a 24-hour dry window; new sod usually roots in 2–3 weeks with steady moisture.
- Plant selection by zone: Mississauga typically aligns with Zone 6a–6b conditions; right-size your species list to match winter lows and spring swings.
We plan every HR Greenroots project with drainage first, then structure. That means grading and base prep come before any finish materials. It’s the difference between a patio that moves and one that stays true for years.
How a Pro Checklist Works (Step-by-Step)
A pro landscape checklist runs in stages: discovery, site assessment, utility locates, concept design, drainage and grading plan, base preparation, installation, finishing, and maintenance handoff. Each task locks prerequisites before moving ahead, reducing surprises and rework.
Use the sequence below to organize your own landscape project checklist. We mirror this flow on design–build jobs across Mississauga and the GTA.
- Discovery and goals: Define must-haves (usable patio, extra parking, privacy) and maintenance preferences.
- Site assessment: Measure slopes, note water paths, identify sun/shade, and flag problem soils or roots.
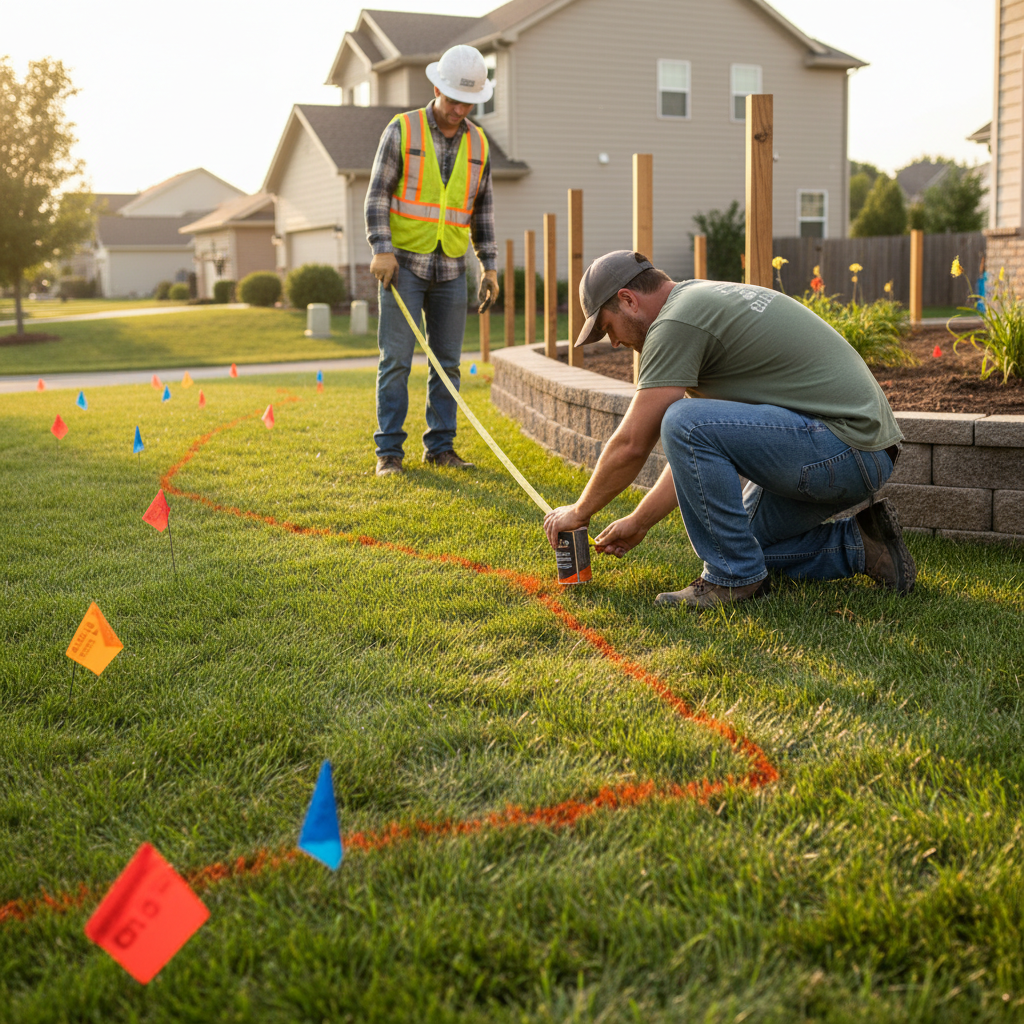
- Utility locates: Request underground utility markings before any digging. Book early to protect schedule reliability.
- Concept and layout: Establish circulation and zones. Align garden beds, shed, or deck with real movement paths.
- Drainage and grading plan: Target about 2% slope away from structures; plan swales or permeable details where runoff concentrates.
- Base preparation: Excavate to required depth plus bedding layer. Add geotextile over unstable soils; compact base in 2-inch lifts.
- Installation: Set pavers on screeded bedding sand; install edge restraints; sweep polymeric sand after cuts. For sod, fine-grade, roll, and water-in immediately.
- Structural elements: Build decks and fences square and level; set posts below frost depth; confirm retaining wall base and drainage stone.
- Finishing details: Install edging, mulch beds 2–3 inches, and soft-wash surfaces. Sweep again after polymeric sand has set.
- Handoff and maintenance: Provide watering schedule, joint sand care, and seasonal cleanup plan.
- Document and photograph: Record base depths, compaction passes, and materials used. Keep for warranty and future upgrades.
Want the full, design-forward version of this sequence? See our integrated process in the landscape design and build guide we use across Mississauga homes.
Types of Projects and Mini-Checklists
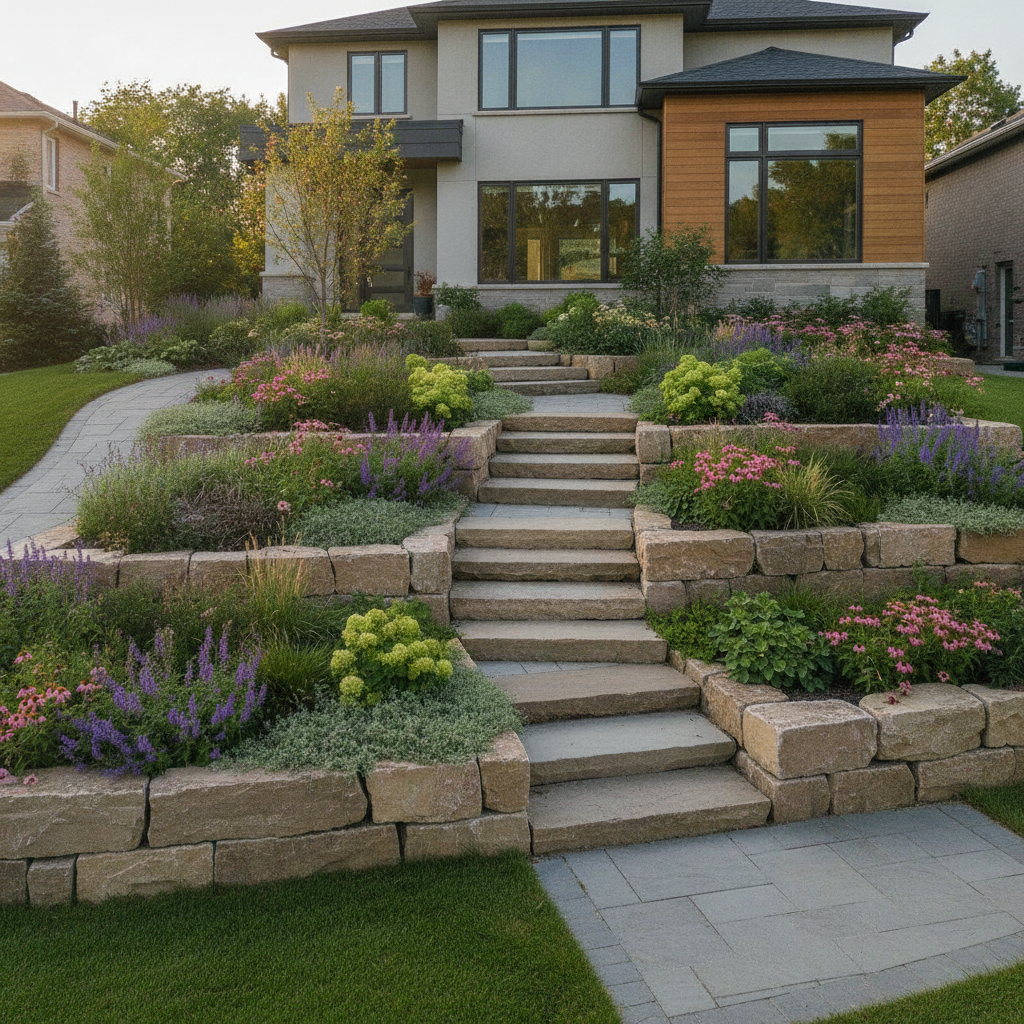
Different outdoor projects share the same backbone—drainage, base prep, and edge control—but their critical steps vary. Use these mini-checklists to right-size planning for sod, patios, driveways, decks, fences, retaining walls, sheds, and garden beds.
Sod installation
- Strip and remove 1–2 inches of old turf and thatch; correct low spots first.
- Set final grade with a 2% fall away from structures; topsoil 3–4 inches.
- Roll before and after sod; water immediately and daily for 10–14 days.
- Delay the first mow until sod tugs firm (usually 2–3 weeks).
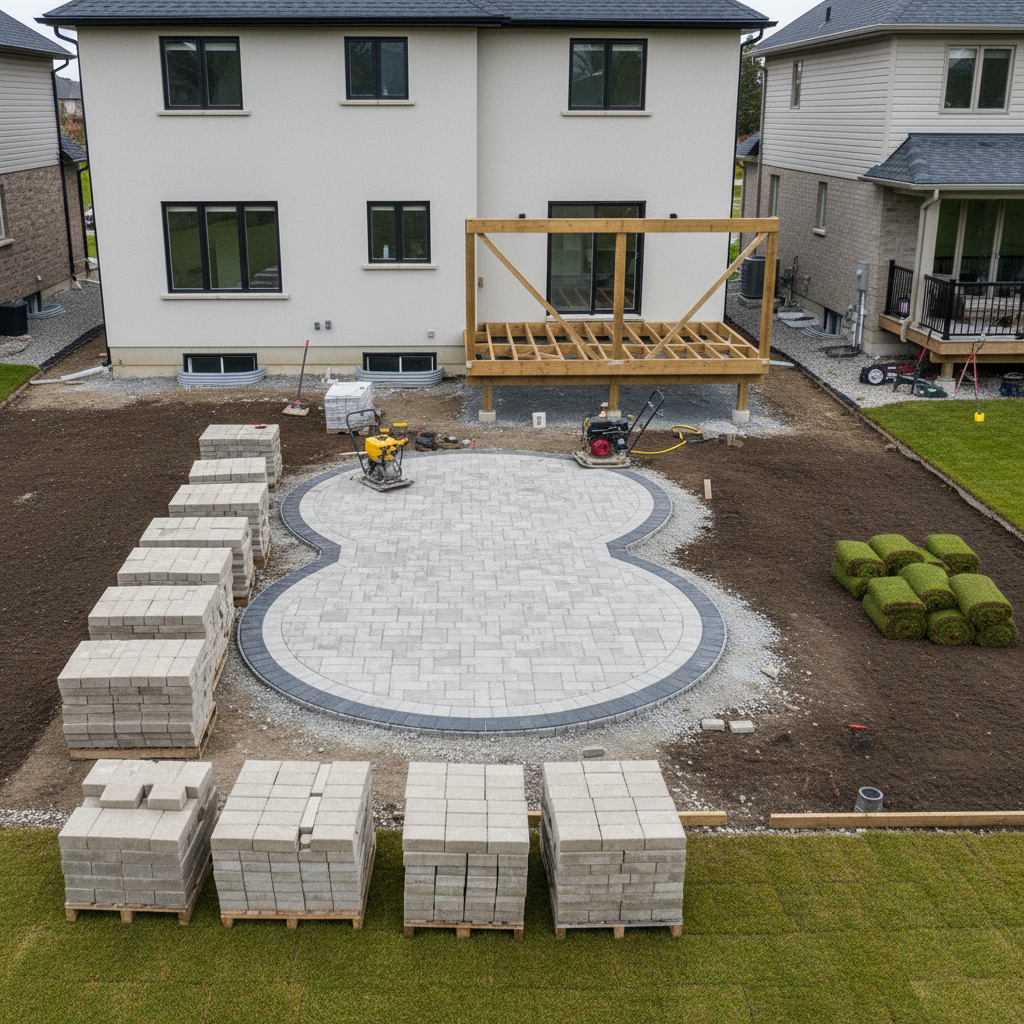
Interlocking patios and walkways
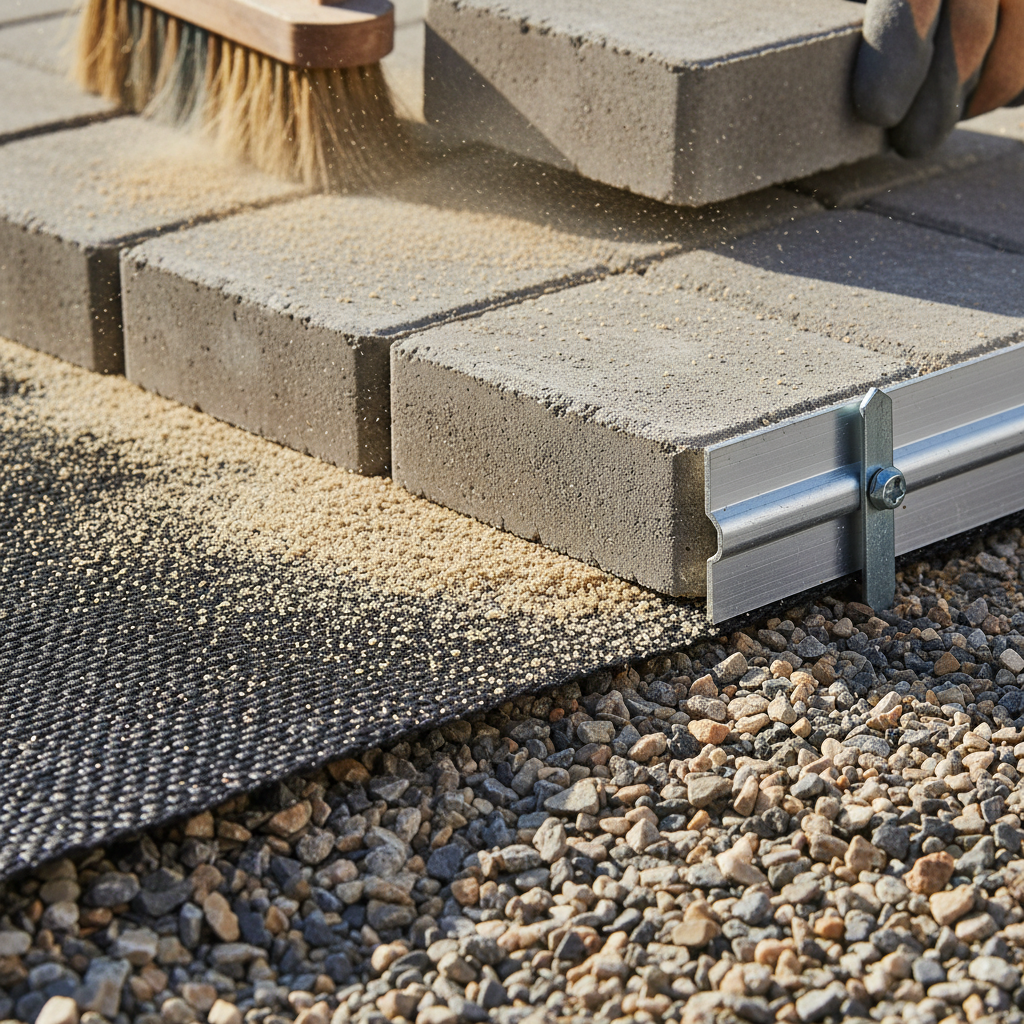
- Excavate to base + bedding + paver thickness; add geotextile on weak subgrade.
- Compact base in 2-inch lifts to reach 4–6 inches (patio) or as specified.
- Set aluminum edge restraints; aim 2% slope; cut pavers tight at borders.
- Sweep polymeric sand; mist lightly; protect from rain 24 hours.
Interlocking driveways
- Expect 8–12 inches of compacted base; confirm subgrade stability.
- Use thicker pavers or appropriate vehicular-rated products.
- Check driveway apron alignment to roadway pitch to prevent puddling.
Deck services
- Plan post depth to local frost line; verify beam and joist spans for loads.
- Flash ledger to prevent water intrusion; leave ventilation gaps at skirting.
- Choose fasteners compatible with treated lumber or composite boards.
Fence installation
- Mark property lines clearly; set consistent post spacing and heights.
- Embed posts below frost depth; crown concrete to shed water.
- For privacy fencing, stagger boards or use board-on-board patterns for coverage.
Retaining walls
- Excavate to a stable subgrade; add compacted base and leveling pad.
- Include drainage stone and a perforated pipe daylighted away from the wall.
- Backfill in compacted lifts; install geogrid if wall height or soil requires it.
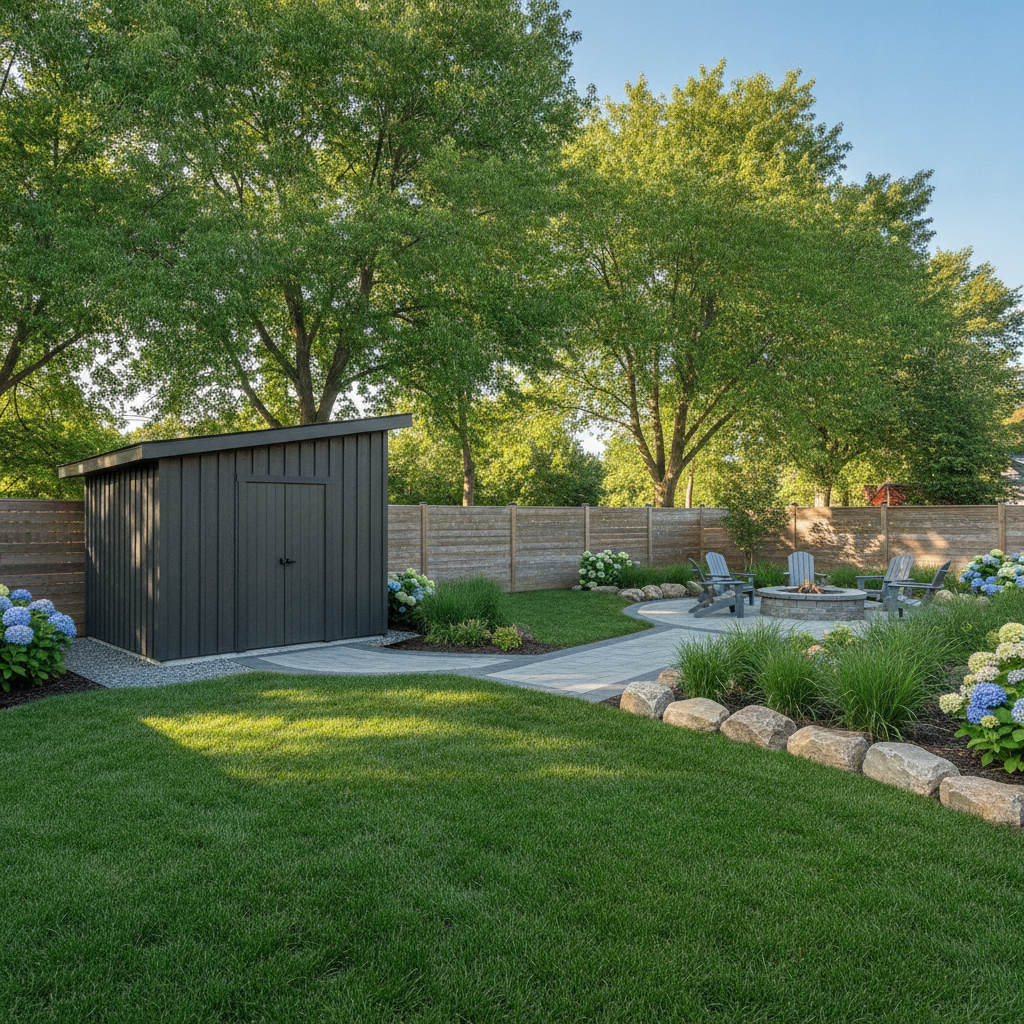
Garden shed installation
- Place on a leveled, compacted gravel pad with edge restraint.
- Confirm door swing, snow-shed zones, and eave water management.
- Route power safely; protect conduits and plan lighting ahead.
Mulching & garden beds
- Define crisp bed edges; add 2–3 inches of mulch for weed suppression.
- Group plants by water and sun needs; target Zone 6-friendly species.
- Leave trunk clear of mulch (2–3 inches) to prevent rot.
Need help choosing which projects to combine this season? Our landscaping GTA guide walks through smart phasing to fit real timelines and weather windows.
Comparisons You’ll Actually Use
Use comparisons to clarify long-term performance, maintenance, and installation realities. The table below summarizes trade-offs for common decisions: DIY vs. pro install, pavers vs. poured concrete, and wood vs. composite decking.
Decision Option A Option B Key Differences Best For Install method DIY Pro DIY saves on labor but risks base depth or slope errors; pros bring compaction gear and sequencing that cut callbacks. DIY for small beds; Pro for patios, driveways, and walls Hardscape surface Interlocking pavers Poured concrete Pavers allow repairs and permeable options; concrete is monolithic but cracks can be hard to fix. Patios/walkways needing detail work or future access Deck boards Wood Composite Wood offers natural look and lower upfront material outlay; composite offers color stability and low maintenance. Wood for traditional feel; Composite for minimal upkeepFor deeper planning context, this third-party landscape construction guide outlines sequencing concepts that echo the best practices we apply across the GTA.
Best Practices and Common Mistakes
The best landscape projects get drainage, base prep, and edge control right the first time. Most failures trace back to skipped compaction, undersized base, poor slope, or rushed curing. Use these habits to raise quality and reduce maintenance.
Best practices
- Drainage first: Target ~2% slope away from structures; use swales where runoff concentrates.
- Lift-by-lift compaction: Compact base in 2-inch layers for density and stability.
- Edge integrity: Lock pavers with staked aluminum edge restraints; maintain clean bed edges for mulch.
- Protect cure windows: Keep polymeric sand dry for roughly 24 hours; limit traffic accordingly.
- Document as-built details: Record base depths and materials for warranty and maintenance.
Common mistakes
- Skipping utility locates: Always mark services before digging—fences, posts, and trees included.
- Underestimating base depth: Especially on driveways; aim for 8–12 inches depending on subgrade.
- Ignoring frost line: Deck and fence posts must extend below frost depth to prevent heave.
- Mixing plant needs: Don’t place shade lovers in hot, reflected-sun zones.
- Neglecting edge control: Unrestrained pavers migrate; mulch without crisp edges bleeds into lawns.
We’ve found that a 15-minute pre-task review of the checklist with your crew prevents most of these issues. It’s simple—and powerful.
Tools, Materials, and Resources
Successful installs depend on the right tools and specs. Plan for compaction gear, geotextiles, drainage stone, polymeric sand, quality topsoil, and edged beds. A short tool list and material standards will speed your day-one setup and keep results consistent.
Core tools
- Plate compactor (or reversible compactor for thicker bases)
- Screed rails and level for bedding sand
- String lines, laser level, and measuring tapes
- Concrete saw with dust control for paver cuts
- Tamper, rakes, landscape rake, and grading tools
Materials and specs
- Base aggregate: Dense-graded stone compacted in thin lifts (2 inches or less each pass).
- Geotextile: Stabilization layer over weak or pumping subgrades.
- Bedding sand: Screeded uniformly; avoid over-compaction before laying pavers.
- Edge restraint: Staked aluminum or concrete curbing for long-term interlock stability.
- Polymeric sand: Sweep and mist per manufacturer; protect from rainfall about 24 hours.
- Topsoil for sod: Screened, well-graded, 3–4 inches depth before rolls.
Local considerations for Mississauga
- Book utility locates early during spring rush; warmer months compress schedules for digs and deliveries.
- Sequence heavy excavation before consistent summer heat; polymeric sand and curing tasks are easier to protect in stable weather.
- Choose plants proven for Zone 6a–6b swings and salt tolerance near driveways and sidewalks.
For inspiration on layout ideas you can adapt, explore these third-party landscape design ideas and backyard landscaping concepts that echo principles we use locally.
Free planning consult: If you want a pro set of eyes on your checklist, our Mississauga design–build team can align scope, drainage, and materials so installation runs smoothly. Reach out and we’ll map the fastest path to a durable finish.
See our landscaping services in Mississauga
Mini Case Studies and Examples
Real-world sequencing prevents rework. These brief examples show how a checklist fixed slope issues, stabilized bases, and simplified maintenance across varied GTA properties.
- Front walk reset: A heaving walkway stabilized after we rebuilt the base to 6 inches and re-established a 2% slope to the curb.
- Sod over clay: We added 3–4 inches of screened topsoil and improved grading; the lawn rooted in three weeks with daily watering.
- Driveway upgrade: A 10-inch compacted base with edge restraints stopped paver migration and winter rutting.
- Deck ledger leak risk: Proper flashing and joist spacing eliminated moisture traps identified during checklist review.
- Fence alignment: String lines and consistent post spacing corrected a wave effect; posts set below frost held true through winter.
- Retaining wall drain path: We daylighted the perforated pipe and switched backfill to clean stone; hydrostatic pressure dropped.
- Permeable border band: A permeable paver strip along a patio edge helped manage roof runoff without a trench drain.
- Garden shed pad: A compacted gravel pad with a crisp edge restraint kept the shed square and dry through rain events.
- Pool surround safety: Textured pavers and correct pitch reduced slip risk and eliminated puddles.
- Winter salt zone: We replaced sensitive shrubs near the driveway with salt-tolerant plantings suited to Zone 6 conditions.
- Bed edge clarity: Steel edging and 2–3 inches of mulch cut weekly string-trim time noticeably.
- Tree root conflict: We re-routed a path to avoid root flare, trading a straight line for long-term tree health.
- Downspout redirection: A small swale and river stone dissipated roof water that previously ponded on the lawn.
Buying Guide: Choosing Materials and Features
Select materials by performance, maintenance, and fit to site conditions. Prioritize base depth, edge restraints, and drainage accessories over surface “looks.” Then match finishes—pavers, deck boards, fencing—to your upkeep preferences.
Hardscape surfaces
- Pavers: Look for interlocking profiles, spacer nubs, and compatible edge restraints. Permeable options aid drainage.
- Concrete: Monolithic look; consider control joints and surface texture to manage cracking and slip.
Decking
- Wood: Natural aesthetic; plan periodic sealing and board replacement over time.
- Composite: Color stability and low care; verify hidden-fastener compatibility and expansion gaps.
Fencing
- Privacy styles: Board-on-board for full coverage; lattice accents for filtered views.
- Hardware: Use exterior-rated fasteners; crown post caps to shed water.
Walls and edges
- Retaining units: Confirm height ratings and whether geogrid is required for your wall plan.
- Bed edging: Steel, aluminum, or paver soldier courses provide clean separation and reduce mulch creep.
Planting and sod
- Sod type: Choose blends suited to Zone 6a–6b and your sun exposure.
- Plant palette: Group by water needs; place salt-tolerant species near driveways and sidewalks.
If you prefer a single coordinated plan and build team, our integrated process in the Mississauga design–build guide shows how we align design intent with site realities.
Frequently Asked Questions
These fast answers clarify the most common planning, timing, and installation questions we hear when building landscape project checklists across Mississauga and the GTA.
What should I do first—design or utility locates?
Define goals and rough layout first so you can place features in the right zones. Then request utility locates before any digging or post holes. This sequencing reduces redesigns and protects your timeline.
How much slope should my patio or lawn have?
Aim for about 2% slope away from structures—roughly 1/4 inch per foot. This helps water shed, reducing freeze–thaw damage and puddling. Fine-tune slope at thresholds and along edges.
How long before I can use a new patio with polymeric sand?
Protect the surface from rain and heavy traffic for about 24 hours while the sand activates and cures. Light foot traffic may be okay sooner; confirm with product instructions and weather conditions.
When is the best time to install sod in the GTA?
Spring and early fall offer consistent moisture and moderate temperatures, which help rooting. In summer, water more frequently the first two weeks; avoid water stress during heat waves.
Conclusion and Next Steps
A reliable landscape project checklist connects design intent to durable construction. Start with drainage, lock in base specs, and pace installations with cure windows. Document as-built details and hand off a simple maintenance plan to keep results sharp all season.
Key takeaways
- Plan drainage and grading before surface materials.
- Compact base in thin lifts; respect frost depth for posts and footings.
- Protect polymeric sand and rooting windows from weather and traffic.
- Edge control and documentation prevent migration and missed details.
- Phase projects to match weather windows and crew availability.
What to do next
- Adapt this checklist to your yard and priorities.
- Walk your property with string lines and a level to visualize slope.
- Book locates early and stage materials before excavation.
- For a coordinated design–build path, connect with our Mississauga team for an on-site consult.
Ready to put your plan in motion? Our Mississauga landscaping services bring drainage-first planning, durable base prep, and clean finishes together—so your space looks intentional on day one and stays practical through the seasons.