A hardscape maintenance checklist is a structured, season-by-season plan for inspecting, cleaning, and preserving pavers, retaining walls, steps, and other built features. In Mississauga’s freeze–thaw climate, consistent upkeep reduces cracking, shifting, and staining. HR Greenroots Landscaping uses this checklist to keep patios, walkways, and walls looking sharp across the GTA.
By HR Greenroots Landscaping • Last updated: May 7, 2026
At a Glance
Use a hardscape maintenance checklist to catch small issues before they spread. Inspect joints, edge restraints, drainage, and wall alignment each season. Clean stains promptly, top up polymeric sand, and reseal when water no longer beads. In Mississauga’s climate, spring and fall checks protect against freeze–thaw movement.
Here’s what you’ll find in this guide:
- Plain-English definitions and why maintenance matters for Ontario properties
- A complete, seasonal hardscape maintenance checklist you can run in under an hour
- How paver systems work (base, bedding, jointing, edge restraints)
- Methods for sealing, re-sanding, and resetting stones the right way
- Buying guide for sealers, polymeric sand, cleaners, and essential tools
- Comparison table: jointing materials and sealers side by side
- Real GTA scenarios and quick wins our team has delivered
What Is a Hardscape Maintenance Checklist?
A hardscape maintenance checklist is a repeatable list of tasks to inspect, clean, and preserve built outdoor features like pavers, retaining walls, steps, and coping. It standardizes seasonal checks for joints, drainage, and alignment, helping homeowners prevent cracks, heaving, and premature wear in Canada’s freeze–thaw conditions.
Think of this checklist as preventive care for patios, walkways, driveways, pool surrounds, and retaining walls. It organizes what to inspect and when, so you can act before problems escalate.
- Scope: Interlocking pavers, natural stone, concrete features, steps, caps, coping, edging, and wall systems.
- Rhythm: Fast visual checks monthly in peak season; deeper spring and fall inspections; winter monitoring around thaw events.
- Outcome: Cleaner surfaces, tighter joints, safer footing, and fewer resets or replacements.
At HR Greenroots Landscaping, we fold this into design–build projects in Mississauga and the GTA, so the space stays low-maintenance after installation. That means strong base prep, accurate grading, and clean edge control up front—then a hardscape maintenance checklist to keep it performing.
Why Hardscape Maintenance Matters
Routine hardscape care protects structure, safety, and appearance. Proper cleaning, re-sanding, and sealing reduce water penetration and movement, extending the life of pavers and walls. A 30–60 minute seasonal check is often enough to prevent loose stones, trip hazards, and stained surfaces.
Here’s why this matters in Southern Ontario:
- Freeze–thaw cycles drive movement: Moisture in joints expands when it freezes, prying stones and caps upward.
- Water is the enemy: Poor drainage accelerates base washout, edge blowouts, and wall bulges.
- Joint erosion invites weeds: When sand washes out, seeds colonize gaps and widen them.
- Sealers wear: Traffic and UV slowly dull sealers; when water stops beading, it’s time to reseal.
We’ve found that small, consistent tasks beat occasional overhauls. If you can spot a low cap, a cracked paver, or a puddle early, you’ll spend minutes—not weekend marathons—on fixes.
How Hardscape Maintenance Works
Hardscape maintenance follows a simple loop: inspect, clean, stabilize joints, protect, and document. Start with drainage and edge restraints, then address stains and joint loss, finish with sealer, and record the date so you can track wear patterns and plan the next check.
Here’s the practical flow we use on interlocking paver patios, walkways, and driveways across the GTA:
- Inspect structure: Scan edges, steps, caps, and retaining walls for gaps, heaving, and wobble. Tap caps; a hollow sound can indicate loose adhesive.
- Check drainage: After a hose test or rainfall, identify puddling or downspouts dumping near the base. Water must exit without crossing joints.
- Clean surfaces: Start gentle (broom, low-pressure rinse). Use paver-safe cleaners on rust, oil, efflorescence, or organics. Avoid harsh acids unless specified.
- Stabilize joints: Top up polymeric sand where joints are low. Compact lightly and activate with a fine mist as per product guidance.
- Protect with sealer: When water no longer beads, apply a breathable, paver-rated sealer in dry weather. Two thin coats beat one heavy coat.
- Document: Note today’s work and any patterns (e.g., south edge loses sand first). This becomes your hardscape maintenance checklist log.

Pro tip: Always test cleaners and sealers in a low-visibility corner. Substrate, age, and previous products can change how the surface reacts.
Types, Methods, and Approaches
Different hardscape materials need different care. Interlocking pavers rely on stable joints and restrained edges; natural stone needs pH-aware cleaners; concrete prefers breathable sealers. Match your method to the material to prevent etching, whitening, or joint failure.
Interlocking pavers
- Focus: Joint height, sand stability, edge restraints, and even load transfer across stones.
- Method: Dry sweep debris; rinse gently; treat stains; re-sand low joints; compact and activate polymeric sand; reseal when water stops beading.
- Watch-outs: Over-powered pressure washers can blast bedding sand and tilt stones.
Natural stone (flagstone, armor stone details)
- Focus: Grout or joint material integrity and cap adhesion.
- Method: pH-neutral cleaners for most stone; reseal per product; re-bed loose flags with compatible mortar or polymeric jointing.
- Watch-outs: Acidic cleaners can etch limestone and sandstone; test first.
Concrete features (steps, coping, pads)
- Focus: Hairline crack monitoring and salt exposure near winter.
- Method: Clean gently; fill cracks with compatible fillers; use breathable sealers.
- Watch-outs: Avoid de-icers containing ammonium salts; they can accelerate scaling.
Retaining walls and steps
- Focus: Wall plumb, cap adhesion, and drainage outlets.
- Method: Re-adhere caps with exterior-grade adhesive; ensure weep holes are open; replace disturbed fill or topsoil above the wall to maintain grading.
- Watch-outs: Bulging indicates base or drainage issues—address the cause, not just the symptom.
Decks and fences adjoining hardscape
- Focus: Where wood meets stone; these seams trap debris and moisture.
- Method: Keep gaps clear; ensure positive slope away from posts; verify flashing around ledger areas.
- Watch-outs: Organic buildup at seams leads to algae and slipperiness.
Seasonal Hardscape Maintenance Checklist
Run this seasonal hardscape maintenance checklist: spring—deep clean, inspect edges and walls, re-sand joints; summer—spot clean and monitor traffic wear; fall—final wash, top up joints, check drainage; winter—avoid harsh de-icers and monitor heave after thaws.
Spring (primary reset)
- Blow off grit and winter debris; rinse with low pressure.
- Spot-treat oil, rust, or algae; address efflorescence if present.
- Inspect and reset any heaved pavers; add bedding sand as needed.
- Top up polymeric sand; compact lightly; activate with a fine mist.
- Examine edge restraints for lift or separation; re-secure if needed.
- Check retaining wall caps; re-adhere any loose units.
- Test water beading; if flat, plan to reseal in dry weather.
Summer (light touch)
- Quick monthly sweeps to remove seeds and sand-tracking.
- Spot clean spills quickly to prevent staining in heat.
- Monitor high-traffic joints at patios, walkways, and driveways.
- Trim plantings back from edges for airflow and faster drying.
Fall (pre-winter lock-in)
- Deep clean to remove organics before freeze–thaw.
- Re-sand any low joints; confirm edge restraint integrity.
- Verify slope and drainage; extend downspouts as needed.
- Apply breathable sealer if due, allowing full cure before frost.
Winter (monitor + protect)
- Minimize metal shovels; use plastic with smooth edges.
- Avoid de-icers that harm concrete; use sand or calcium magnesium acetate when needed.
- Watch for heave after thaws; note any stones to reset in spring.
Best Practices We Rely On
Prioritize drainage, protect joints, and seal smart. Keep cleaners gentle, compact polymeric sand carefully, and choose breathable sealers. Document dates and patterns so you can plan proactive touch-ups rather than reactive repairs.
- Drainage first: If water pauses on the surface, fix grading or downspouts before anything else.
- Right pressure, right nozzle: Keep washers under control; hold the tip off the surface and fan wide.
- Seal in the right window: Warm, dry weather and clean surfaces produce predictable cures.
- Edge integrity: Loose edges invite whole-field movement—re-secure promptly.
- Work clean: Dust and polymer residue cause hazing—blow, sweep, then mist.
- Small resets now: A 10-minute reset today prevents a trip hazard tomorrow.
Local considerations for Mississauga
- Plan spring maintenance soon after the last thaw to reset any heave from winter and to re-establish tight joints before rainy weeks.
- Schedule sealing in late spring or early fall when humidity drops and surfaces dry quickly after overnight dew.
- Where driveways meet sidewalks, expect sand loss from plows; keep a small bag of polymeric sand on hand for fast top-ups.
Tools and Buying Guide
Equip your maintenance kit with a stiff broom, leaf blower, bucket, low-pressure washer, paver-safe cleaners, polymeric sand, edge spikes, exterior adhesive, and a breathable sealer. Choose products rated for interlocking systems and follow label guidance for activation and cure.
Core tools (fit in a tote)
- Stiff push broom and soft sweep broom
- Leaf blower with variable speed
- Low-pressure washer or garden hose with nozzle
- Knee pads, safety glasses, nitrile gloves
- Rubber mallet, small level, jointing trowel
- Hand tamper or light plate compactor for re-sands
Consumables
- Polymeric sand (color to match your pavers)
- Breathable, paver-safe sealer (gloss, satin, or natural finish)
- Exterior-grade concrete adhesive for caps and steps
- Paver cleaners for oil, rust, and efflorescence
- Edge spikes and replacement edge restraint lengths
Buying guide tips
- Polymeric sand: Match grain size to your joint width; cure windows commonly require dry weather for 24–48 hours.
- Sealers: Favor breathable, UV-stable products rated for interlocking systems; two thin coats resist whitening.
- Cleaners: Use substrate-safe formulations; pH-neutral for natural stone, targeted products for rust or efflorescence.
- Edge restraints: Rigid edges for straight runs; flexible for curves; anchor into the base, not just top sand.
Comparison Table: Jointing and Sealing Options
Choose jointing and sealer options based on joint width, traffic, and appearance goals. Polymeric sand suits most interlocking joints; stone dust is outdated for modern systems. Breathable sealers protect color and resist stains without trapping moisture.
Option Best For Pros Cons Maintenance Notes Polymeric sand Interlocking paver joints (narrow–medium) Locks in place, resists washout, deters weeds Requires dry install and careful activation Top up where low; avoid heavy water blasts Traditional sand Temporary fixes, very narrow joints Easy to apply, inexpensive Washes out, invites weeds Frequent reapplication needed Stone dust Legacy installs Readily available Holds moisture, can destabilize systems Consider upgrading to polymeric Two-part joint compounds Wide joints, specialty applications Very strong, durable in traffic More complex install Follow exact mix and cure windows Breathable sealer Most pavers and concrete Protects color, resists stains Needs re-application over time Apply thin coats in dry weather Non-breathable sealer Specialty, non-porous surfaces High gloss possible Risk of whitening/blushing on pavers Use only when specified by manufacturerCase Studies and Examples (GTA)
Targeted maintenance often solves the whole problem. By resetting edges, topping joints, and correcting drainage, we’ve stabilized patios and walkways across Mississauga and the GTA without full rebuilds—saving time and disruption while improving safety and appearance.
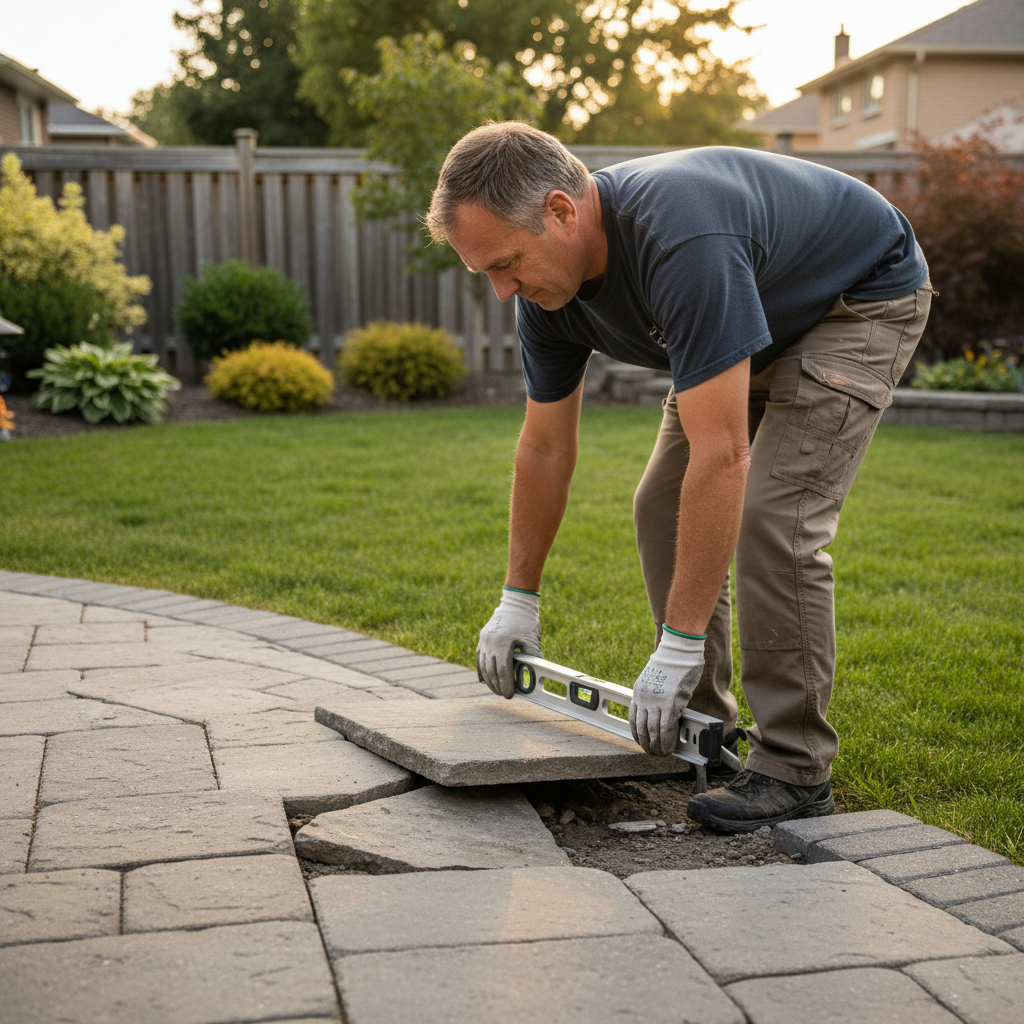
- Mississauga patio tune-up: Winter heave left three walkway pavers proud of neighbors. We lifted, re-leveled bedding sand, and reset. A quick re-sand and mist activation restored a flush, safe walking surface.
- GTA driveway refresh: Tire tracks had stripped joints. We deep-cleaned, replaced jointing with polymeric sand, and applied a breathable sealer. Water now beads, and tracking has dropped noticeably.
- Backyard steps and wall check: A few caps rocked underfoot. We removed debris, applied exterior adhesive, and re-seated. Weep holes were cleared to maintain behind-wall drainage.
- Pool surround care: Sunscreen and organics stained coping. Using paver-safe cleaners and a gentle rinse preserved the surface without lifting bedding sand.
- Deck–paver seam: Algae formed at the wood–stone junction. We improved airflow by trimming back plantings and cleaning the seam, reducing slip risk.
Need a hands-on assessment? If you’re in Mississauga or the GTA, our team can audit drainage, joints, and edges, then build a simple hardscape maintenance checklist for your property. Book a quick consultation.
FAQ: Hardscape Maintenance Checklist
Most homeowners can maintain pavers and walls with seasonal checks, light cleaning, polymeric sand top-ups, and occasional sealing. Call a pro when you see bulging walls, repeated edge blowouts, or drainage that undermines the base.
How often should I reseal my pavers?
Reseal when water stops beading on the surface or stains set faster than usual. In our climate, that’s commonly every few years, depending on traffic, exposure, and product type. Apply thin coats in warm, dry weather for predictable results.
Do I need polymeric sand or regular sand?
For most interlocking systems, polymeric sand offers better stability and weed resistance than regular sand. It requires dry installation and a fine mist to activate. Use traditional sand only as a temporary top-up or in very narrow joints.
What’s the best way to remove oil stains from pavers?
Blot fresh spills, then use a paver-rated degreaser and a stiff brush. Rinse gently to avoid dislodging sand. For set-in stains, repeat applications help. Always test cleaners in a discreet area before full use.
When should I call a pro instead of DIY?
If you notice wall bulging, repeated edge failures, widespread heave, or persistent puddling near structures, bring in a pro. These point to base or drainage issues that need targeted correction, not just surface fixes.
Does pressure washing damage pavers?
It can if overdone. High pressure or a narrow tip can blast out jointing and bedding sand. Use a wider fan at a safe distance, then plan to re-sand joints after washing to keep the system stable.
Key Takeaways
Your hardscape will last longer and look better when you follow a consistent checklist. Prioritize drainage, protect joints, clean gently, and reseal as needed. A few seasonal hours prevent bigger repairs and keep patios, walks, and walls safe and attractive.
- Follow this hardscape maintenance checklist each spring and fall.
- Drainage fixes come first; water control protects every other step.
- Use polymeric sand for most interlocking joints; activate correctly.
- Choose breathable, paver-rated sealers and apply in thin coats.
- Log dates and observations to plan proactive touch-ups.
Conclusion: Turn Maintenance into a Simple Habit
Keep hardscapes strong with a simple routine: inspect, clean, re-sand, seal, and log. In Mississauga’s climate, spring and fall touch-ups control movement and staining, extending service life and curb appeal without major disruption.
Here’s the bottom line: a well-built patio or wall deserves a maintenance rhythm. With this hardscape maintenance checklist, you’ll tighten joints, keep edges locked, and preserve color and traction through the seasons. If you’re in Mississauga or anywhere in the GTA, we’re ready to help you tune up what you have—or design and build a low-maintenance space from the start.
Next step: Want a maintenance walkthrough or a design–build consult? Visit HR Greenroots Landscaping and tell us what you’re working with.