Garden shed placement is the deliberate process of choosing a safe, durable, and code-aware location for your shed so it stays dry, accessible, and compliant. In Mississauga and across the GTA, a reliable garden shed placement guide helps you evaluate setbacks, drainage, frost, and access—before you build—so you avoid rework later.
By HR Greenroots Landscaping • Last updated: 2026-05-05
At a Glance: Quick Summary
Place a shed on high, level ground with a compacted gravel base, 2% surface slope away from walls, and clear access for doors and maintenance. Keep safe setbacks from fences and utilities, route downspouts, and plan paths before installation. Document photos and measurements so your layout stands up to weather and time.
Here’s what you’ll get in this complete guide—built from our design-build work across Mississauga and the GTA:
- Clear definitions and a simple decision flow for location, base, and access
- Top placement mistakes to avoid and how to fix them the right way
- Step-by-step site assessment, with measurements you can take today
- Foundation comparison table (gravel pad vs. pavers vs. slab)
- Walkway, fence, deck, and lawn integration so the yard feels intentional
- Local considerations for Mississauga weather, soils, and schedules
What Is a Garden Shed Placement Guide?
A garden shed placement guide explains how to choose a shed location that drains well, meets local setbacks, resists frost movement, and stays easy to reach year-round. It blends zoning basics, foundation choices, and landscape circulation so your storage stays dry, safe, and useful without constant maintenance.
We use "placement" to cover more than a dot on your plan. It includes path layout, base preparation, door swing clearances, and how water moves during rain and thaw cycles. In our experience across Ontario properties, the right spot often sits slightly higher than surrounding lawn with a defined edge and a clean route from driveway or back door.
- Setbacks: Keep enough distance from property lines, pools, and easements to stay compliant and leave service space.
- Drainage: Aim for a gentle 2% surface slope away from shed walls and redirect roof runoff with gutters or a splash line.
- Frost and soils: Southern Ontario frost can reach 40–48 inches; floating bases avoid cracks by accommodating seasonal movement.
- Access: Size door zones and walkways for mowers and bins—36–48 inches of clear width is comfortable for most users.
Why Shed Placement Matters (More Than You Think)
Shed placement drives longevity, safety, and day-to-day usability. Good siting prevents rot, trip hazards, and water damage, while smart access saves minutes every week. The right base and slope resist freeze–thaw cycles, reducing heave and door binding so your shed performs through Ontario’s seasons.
Here’s the thing—placement decisions compound. A shed tucked into a soggy corner often needs repeated shimming, door planing, or full relocation. Conversely, a level, draining pad with a defined paver path and mulch edge tends to stay stable. We routinely see headaches vanish when clients shift a shed just 3–6 feet to higher ground.
- Durability: Elevated, compacted bases resist ruts and rot; a ground-contact frame without airflow can trap moisture.
- Safety: Straight, lit paths limit slips; 2–3 stepping stones aren’t enough when carts weigh 100+ pounds loaded.
- Maintenance: A 12–18 inch service gap around walls allows gutter cleaning and siding inspections without trampling plantings.
- Design cohesion: When paths, edges, and planting beds align, your yard “reads” as intentional—not pieced together.
10 Common Shed Placement Mistakes (And How We Prevent Them)
The biggest shed placement mistakes are siting on low, wet ground; skipping a compacted base; ignoring door clearances; and crowding fences or trees. We prevent these with grade checks, 4–6 inches of compacted gravel, 36–48 inch access paths, and downspout control away from the pad.
- Low spots and ponding: If water lingers 24–48 hours after rain, raise the pad or shift to higher ground.
- No base compaction: Use 4–6 inches of 3/4 inch crushed stone over geotextile; compact in 2-inch lifts to 95%+ density.
- Zero slope: Target ~2% fall away from walls (about 1/4 inch per foot) so runoff doesn’t backwash under siding.
- Door pinch points: Keep 36–48 inches clear in front of doors and align paths with actual traffic from driveway or deck.
- Too close to fences: Leave 12–24 inches for painting, cleaning, and leaf blow-out; tight gaps collect debris and ice.
- Under large canopies: Drip lines dump organic debris; place outside heavy leaf fall to avoid gutter clogs and mossy pads.
- Ignoring utilities: Mark gas, hydro, and irrigation; a single puncture or dig-in can become a major repair.
- Skipping edging: Without a rigid edge, gravel migrates; add paver restraints or timber to lock the base footprint.
- Unplanned downspouts: Direct roof runoff to splash pads or soak-away trench; standing water near skids accelerates rot.
- No circulation plan: A beautiful shed still frustrates if the mower route kinks; test a 36-inch cart path before settling.
Step-by-Step: Site Assessment You Can Do Today
Walk your yard after rain, measure slopes and clearances, and mark a 10x10 test footprint before you build. Check drainage patterns, utilities, sun, door swing, and route lines from driveway or deck. Document everything with photos and notes so your plan survives second-guessing.
- Pick likely zones: Shortlist two or three high, level candidates with natural wind shelter.
- Check water behavior: After a rainfall, note where puddles persist beyond 24 hours; avoid or raise those spots.
- Confirm utilities: Locate buried lines and any shallow irrigation headers before digging or staking.
- Measure slope: A 2% slope equals about 2.4 inches of drop over 10 feet; laser levels or a string line work well.
- Mock the footprint: Lay out a 10x10 or your actual size with stakes and string; walk the perimeter.
- Test the path: Push your mower or bin along the intended route; if your shoulders brush, widen it.
- Sun and shade: Morning sun helps dry dew; heavy shade often tracks moisture into the shed.
- Door swing: Add door width plus 36 inches for operating space; for double doors, add 48 inches.
- Service gap: Reserve 12–24 inches around walls for maintenance and snow shed-off.
- Take photos: Shoot from all four corners and the path approach; save with measurements in captions.
Which Foundation Is Best? (Gravel Pad vs. Pavers vs. Slab)
For most backyard sheds in Southern Ontario, a compacted gravel pad with edging is the best balance of drainage, speed, and frost tolerance. Interlocking pavers add a finished floor and path continuity. Concrete slabs suit heavy workshops but demand frost-aware design and higher build complexity.
Foundation Best For Strengths Watch-outs Compacted gravel pad General storage 6x8 to 12x16 Drains well; 4–6 in. stone; fast to build; frost-friendly Needs edging; top-up every few years if traffic is high Interlocking pavers Integrated floors and walkways Clean finish; joint sand locks; easy snow clearing Requires 6–8 in. base; precise screeding and compaction Concrete slab Heavy gear and workshops Rigid, level surface; easy to roll equipment Must address frost (deepened edges or floating design); drainage planning crucialOn many Mississauga lots, we favor a gravel pad framed with paver edge restraint and a 1–2 inch top layer of screenings for fine leveling. For clients seeking a seamless look, we extend interlocking pavers from patio to shed, keeping a consistent 6–8 inch compacted base for uniform performance.
Drainage, Frost, and Slope: The Non-Negotiables
Keep water moving and off wood. Target a 2% surface slope, route gutters to splash pads or a soak-away trench, and separate soil from wood with a ventilated base. In Ontario, frost depths up to 40–48 inches make flexible, well-drained foundations the reliable, low-maintenance choice.
- Surface slope: About 1/4 inch per foot away from walls; maintain a 1–2 inch drainage gap beside siding.
- Gutters and diverters: Even small sheds benefit from mini-gutters; discharge at least 4–6 feet from the pad.
- Ventilation: Air under the floor dries spills and tracked snow; solid soil contact keeps wood wet.
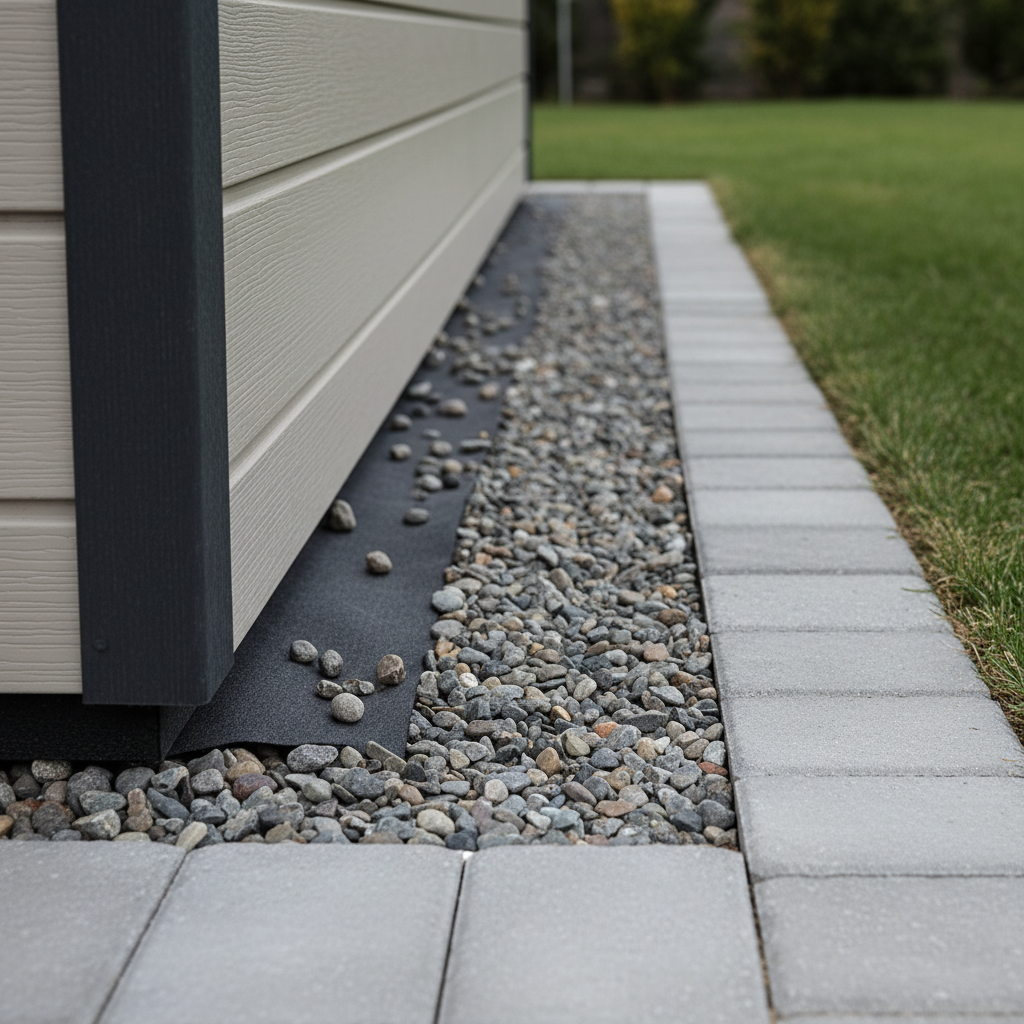
- Freeze–thaw: A granular base with geotextile separates stone from clay soils and limits pumping.
In our projects, a simple fabric + 3/4 inch crushed stone assembly dramatically cuts maintenance. The geotextile stops fines from migrating, and the stone matrix drains even during spring melts. Where slopes exceed 5–7%, we step the pad or install a small retaining wall to hold grade.
Access Paths, Fences, and Door Clearances
Plan the route first. Give yourself a straight, 36–48 inch path from driveway or deck to the shed, keep 12–24 inches free beside fences for maintenance, and align door swing with natural traffic. Smooth, level transitions reduce trips and protect the shed threshold.
- Path width: 36 inches works for push mowers and bins; 48 inches is comfortable for wheelbarrows and two-way passing.
- Materials: Interlocking pavers over 6–8 inches of base compacted to 95%+ keep paths flat through winter.
- Fence spacing: Avoid wedging sheds into corners; airflow limits mildew and snowpack friction.
- Thresholds: A flush or ramped sill (1:12 slope) helps move heavy items without catching edges.
Don’t forget lighting. A low, warm path light every 8–10 feet improves nighttime safety and keeps the route visible when snow narrows edges. We often continue the same paver style from patio to shed for a cohesive look and simpler snow clearing.
Integrating the Shed with Your Landscape Design
Treat the shed as a design anchor. Extend paver lines, mirror bed curves, and use planting layers for screening. A defined edge with mulch or stone, plus a consistent path material, makes the shed feel deliberate—like it always belonged in the plan.
In coordinated projects, we combine shed placement with practical upgrades so everything works together:
- Sod replacement: After construction, regrade and install premium sod with 3–4 inches of topsoil for even rooting.
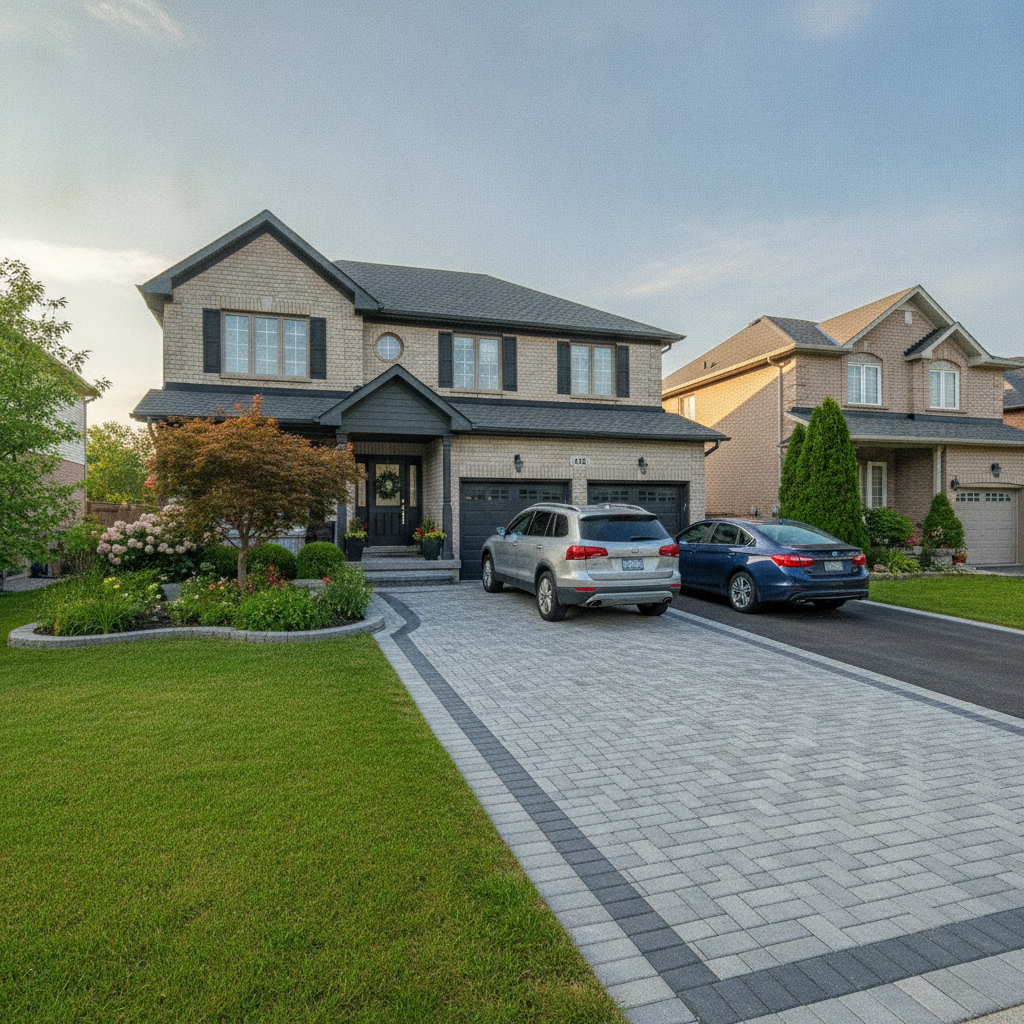
- Interlocking paths: Tie the shed to patios or driveways using matching pavers and clean edge restraint.
- Privacy fencing: Set sheds at a breathable distance; use fence height and lattice to soften mass without trapping snow.
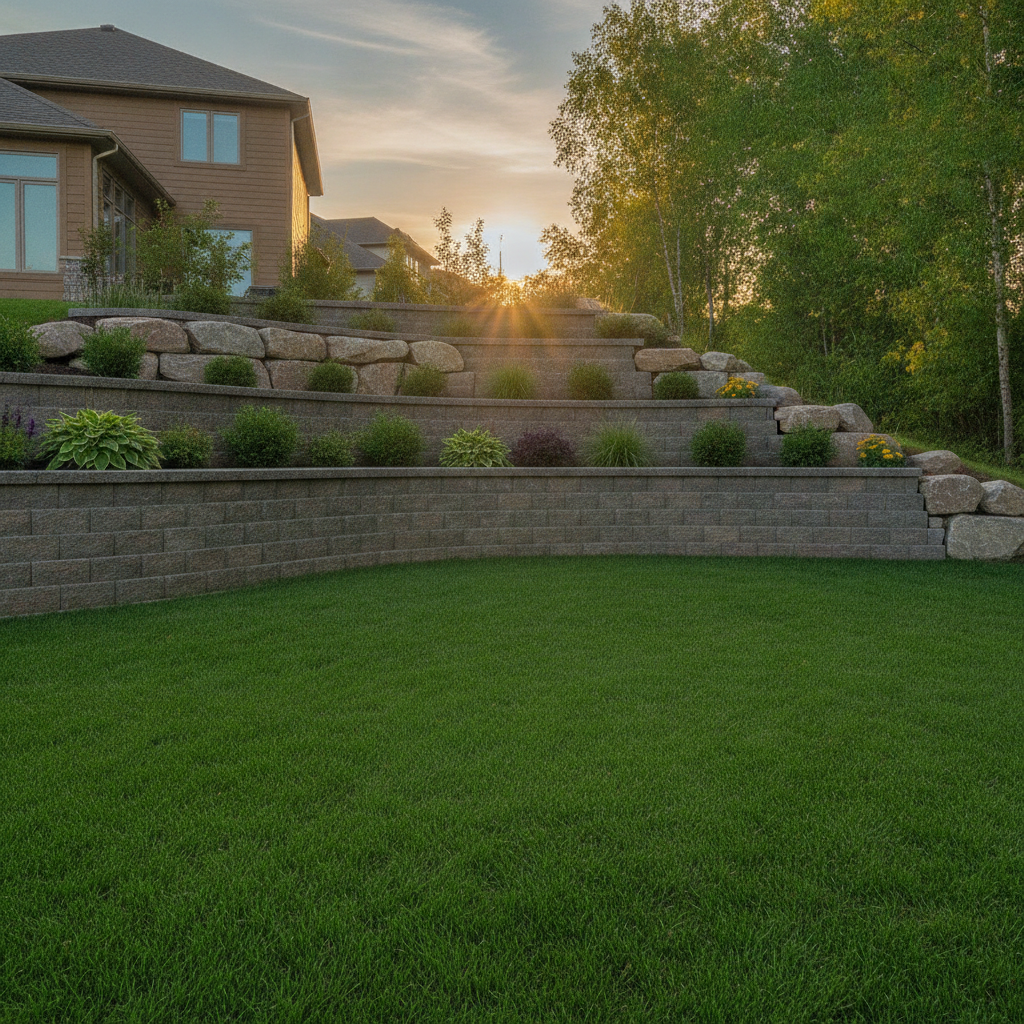
- Retaining and stone work: On sloped yards, small walls or armour stone steps create level pads and safe approach routes.
If you want a deeper dive on cohesive planning, explore our practical approach in this Mississauga-focused overview of landscape design and build. We apply the same circulation and edge principles to sheds that we use for patios and walkways.
Local Considerations for Mississauga
Plan around freeze–thaw, spring melt, and leaf drop. Choose well-drained, slightly elevated spots, compact stone bases, and clear routes for snow management. Schedule installation outside the wettest weeks and document yard conditions before work so post-build restoration is straightforward.
Local considerations for Mississauga
- Seasonal timing: Aim for late spring through early fall to avoid saturated soils that compromise compaction quality.
- Snow routes: Keep paths straight for winter shoveling; 36–48 inches lets you clear without scuffing paver edges.
- Clay pockets: Many GTA yards mix loam with clay; use geotextile to separate base stone from fines and maintain drainage.
How Our Design–Build Process Gets Placement Right
We start with a walk-through and grade check, then map access routes, utilities, and drainage. Next, we build a compacted base, lock edges, and align paths. Finally, we restore lawn and beds so the shed sits like it was always part of the plan—clean, level, and easy to use.
- On-site assessment: Measure slopes, note ponding, and photograph approach lines.
- Utility and setback review: Mark buried services and confirm clearance zones for maintenance.
- Foundation selection: Choose gravel pad, interlocking floor, or slab based on use and weight.
- Base construction: Install geotextile, add 4–6 inches of compacted stone, and set edge restraint.
- Path integration: Build 36–48 inch routes with 6–8 inches of base and a flush threshold.
- Water control: Add gutters/diverters and a discharge path 4–6 feet away from the pad.
- Restoration: Regrade disturbed soil and install sod with tight seams and defined edges.
- Maintenance plan: Set simple upkeep notes (joint sand top-ups, seasonal gutter cleanouts).
Tools, Materials, and Specs We Trust
Consistent results come from consistent materials: geotextile fabric, 3/4 inch crushed stone, rigid edge restraint, polymeric joint sand, and a plate compactor. Add a string line or laser, long level, and a tamping tool to hit grade accurately the first time.
- Geotextile fabric: Stabilizes the base and prevents fines from migrating up into stone.
- 3/4 inch crushed stone: 4–6 inches for pads; 6–8 inches when building interlocking paths.
- Edge restraint: Paver edge with spikes or pressure-treated timber to lock the footprint.
- Polymeric sand: Swept into paver joints and activated with light misting to resist washout and weeds.
- Compaction: Plate compactor for lifts; hand tamper for edges and tight corners.
- Layout tools: Stakes, string, laser or bubble level, and measuring tape for slope and square.
Mini Case Studies from the GTA
Small placement shifts often unlock big wins. By moving a shed a few feet to higher ground, adding edge restraint, and tying in a paver path, clients report smoother access and fewer seasonal adjustments. These three GTA scenarios show how details create durable outcomes.
Mississauga: Wet Corner Rebuild
A 10x12 shed sat in a low corner where puddles lingered for days. We relocated it 8 feet upslope, built a geotextile + 5 inches of crushed stone base, added paver edging, and routed downspouts to a splash line 6 feet away. Result: doors now swing freely in spring thaws.
Etobicoke: Tight Fence Clearance
Double doors were jamming against snowpack. We widened the path to 48 inches, kept a 18 inch gap to the fence, and installed a 1:12 threshold ramp. Winter access improved, and the client now rolls a 30-inch mower without scraping posts.
Brampton: Sloped Yard Leveling
On a 6% grade, we stepped the pad and built a short retaining surround with armour stone. A matching interlock path now connects deck to shed with consistent base depth. The client reports easier snow clearing and no more heave-related shimming.
Seasonal Maintenance and Inspection Checklist
Twice a year, clear gutters, check the drainage gap, top up joint sand, and re-level displaced edge stones. After winter, verify doors close without binding. Address issues while they’re small to protect the base, siding, and thresholds from cumulative wear.
- Spring: Clean gutters, inspect splash pads, and sweep debris out of the 1–2 inch wall gap.
- Summer: Reapply polymeric sand where joints opened; light mist to set.
- Fall: Blow leaves from service gaps and paths; trim plantings 12–18 inches back from walls.
- Winter: Keep a straight shovel route; avoid piling snow against siding and doors.
Frequently Asked Questions
Homeowners ask about setbacks, base depth, and whether to use pavers or slabs. The short answers: leave service space, compact 4–6 inches of stone for pads, and choose pavers when you want a finished floor that ties into nearby walks. Details below.
How much space should I leave between a shed and a fence?
A 12–24 inch service gap works for most yards. It allows painting, cleaning, and debris blow-out, and it keeps airflow moving so siding dries after rain and snow. In tight lots, prioritize at least 12 inches on one side with a 36–48 inch clear approach to the doors.
What’s the best base for a garden shed in the GTA?
A compacted gravel pad over geotextile is the most forgiving in freeze–thaw conditions. Use 4–6 inches of 3/4 inch crushed stone, compact in lifts, and add edge restraint. Choose interlocking pavers if you want a finished floor that continues into a walkway.
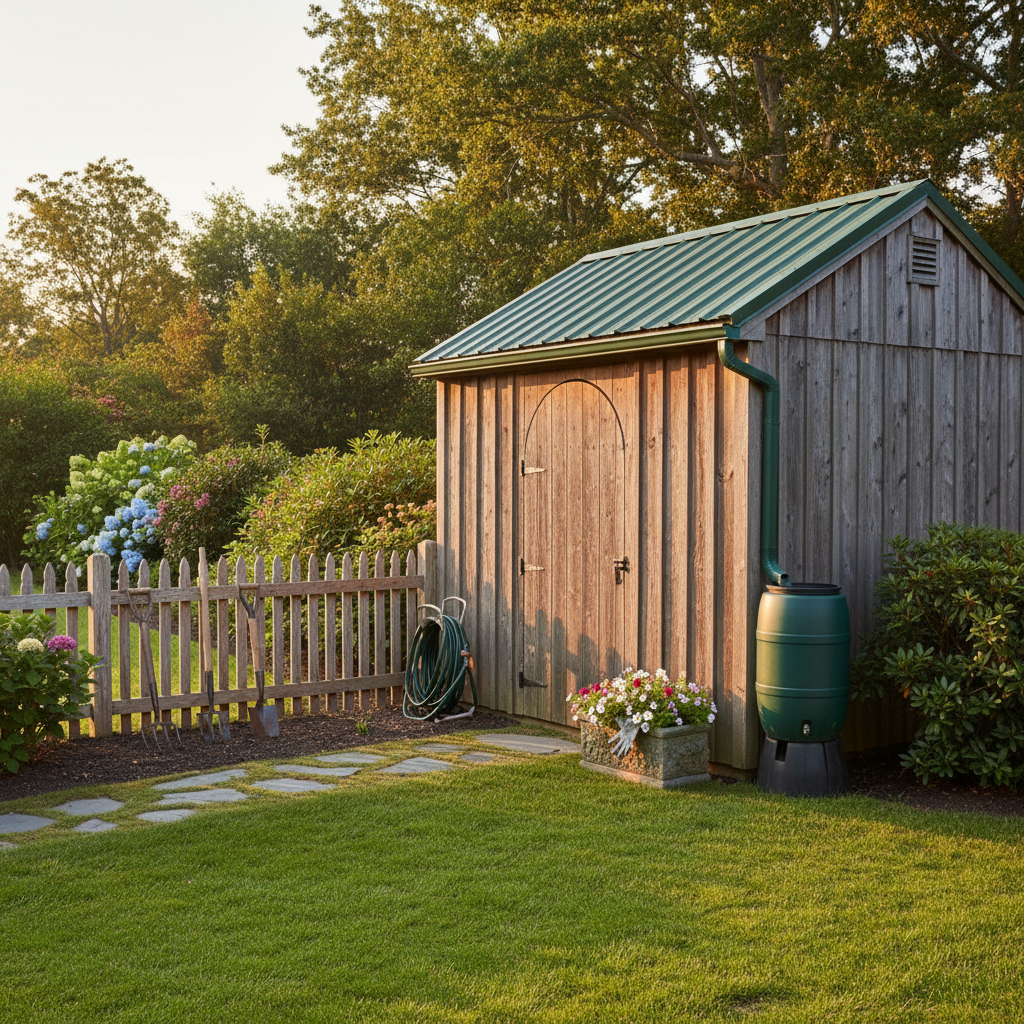
Do I need gutters on a small shed?
They help a lot. Even a short run of gutter with a diverter keeps splash-back off siding and reduces water pooling at the base. Discharge at least 4–6 feet from the pad to protect skids and threshold areas from saturation.
Should I place a shed under trees for shade?
Partial shade is fine, but avoid heavy drip lines where leaves and tannins collect. Constant debris shortens gutter life and can keep the base damp. A spot with morning sun and afternoon dappled shade typically dries faster and tracks in less mess.
Key Takeaways and Next Steps
Choose high, level ground; build a compacted, edged base; plan a 36–48 inch path; and control roof water. Photograph and measure before you build. If you want a seamless result, coordinate shed placement with paths, fencing, and sod restoration in one design-build plan.
- High-and-dry beats low-and-pretty—always protect wood from water.
- Paths and doors drive daily experience; give them generous space.
- Edge restraint is small work that prevents big movement later.
- Document now so later changes don’t derail the plan.
- For coordinated help, explore our sod installation and garden shed services.