Front yard curb appeal is the combined impact of your lawn, hardscapes, plantings, lighting, and entry details on how inviting your home looks from the street. In Mississauga, HR Greenroots Landscaping plans and builds upgrades—like sod, interlocking, and crisp beds—that make the approach look polished and work better year-round.
By HR Greenroots Landscaping • Last updated: 2026-05-06
Overview
To improve front yard curb appeal fast, prioritize structure first: grading, base preparation, and edge control. Then add durable interlocking, premium sod over 4–6 inches of topsoil, 2–3 inches of mulch in beds, and warm 2700–3000K lighting. Aim for 36–48-inch walkways and a consistent 2% slope away from the house.
Here’s what you’ll get in this complete, Mississauga-focused guide from our design–build team:
- Clear definitions with practical specs (slopes, widths, depths).
- Why curb appeal matters for safety, value, and daily use.
- How a professional design–build sequence reduces rework.
- Upgrade types that move the needle—sod, interlocking, beds, lighting.
- Best practices we apply across Ontario’s freeze–thaw climate.
- Essential tools and materials with simple selection tips.
- Real scenarios from GTA front yards with before/after results.
Use this as your planning checklist. If you’d like a right-sized plan for your home, our Mississauga crew can meet you on-site and map the exact sequence that lasts through winter.
What Is Front Yard Curb Appeal?
Front yard curb appeal is the visible quality of your home’s approach—lawn, hardscape, planting, lighting, and entry—that signals care, safety, and style. It blends function and aesthetics: stable surfaces, clear circulation, healthy plants, and intentional focal points guided by site grading and local climate.
Think of curb appeal as a system where small elements add up. Each component has a job and a target spec you can measure on day one and maintain over time.
- Grading and drainage: Target a steady 2% slope away from the foundation to move water. In practice, that’s about 1/4 inch per foot.
- Circulation widths: Set front walks to 36–48 inches so two people can pass comfortably. Add a landing at the door at least the door width plus 18 inches.
- Turf health: New sod knits reliably when placed over 4–6 inches of screened topsoil and watered daily in week one.
- Planting structure: Use layered heights—trees, shrubs, perennials, groundcovers—to build depth. Plant holes should be twice the root ball’s width.
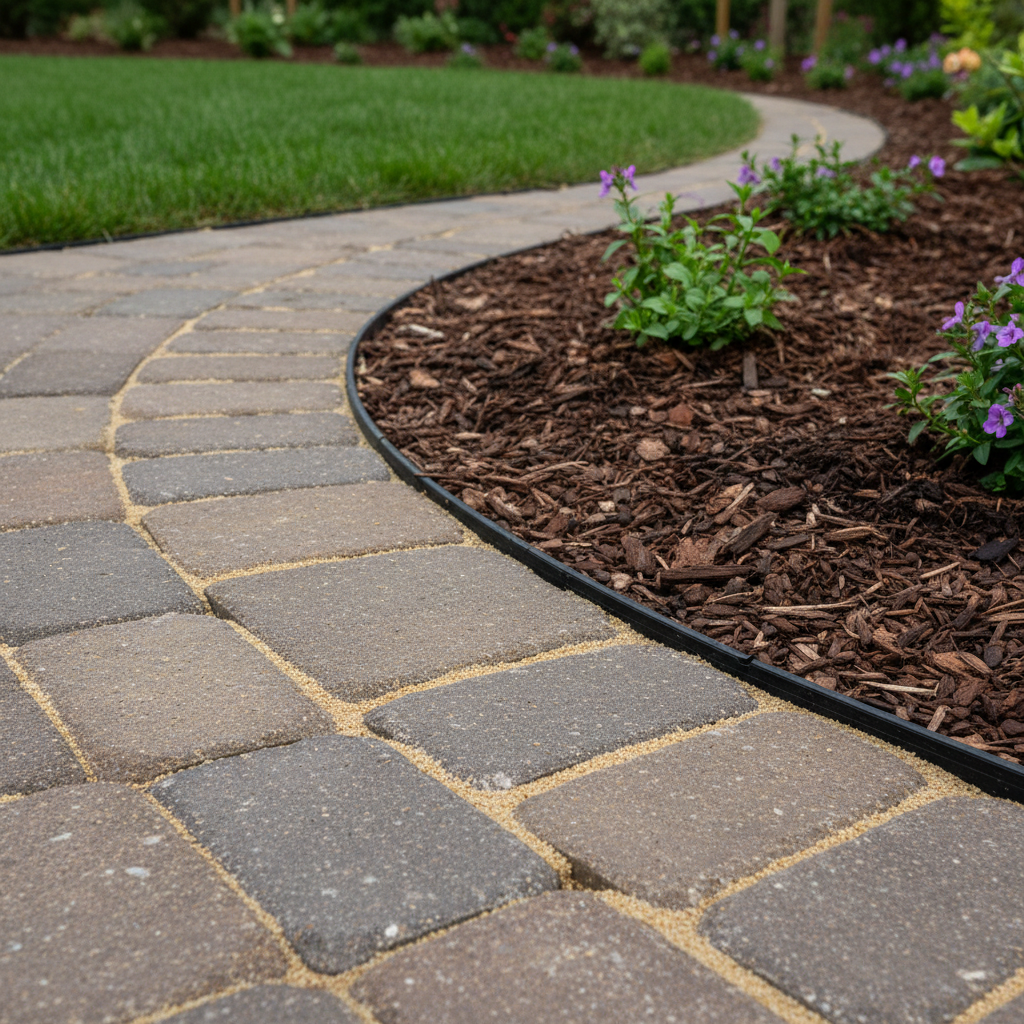
- Edge control: Defined borders keep mulch in place, turf out of beds, and pavers locked. Spike edge restraints every 8–12 inches on curves.
- Lighting: Warm 2700–3000K fixtures spaced 8–12 feet apart guide safe movement without glare.
We’ve found that when the approach is obvious and surfaces feel solid underfoot, the whole facade reads cleaner—even before you add seasonal color. That’s the essence of durable front yard curb appeal.
Why Curb Appeal Matters in Mississauga
Great curb appeal improves first impressions, guides safe movement, and reduces upkeep. In Mississauga’s freeze–thaw climate, durable base preparation and grading prevent heaving, pooling, and trip hazards—protecting your investment while making daily arrivals smoother in all seasons.
Here’s why a strong, well-planned frontage pays off every day for homeowners across Mississauga and the GTA:
- Safety and accessibility: Even surfaces and readable steps lower the chance of slips. Keep paver joint height differences under roughly 1/8 inch to avoid catching toes and wheels.
- Weather resilience: Ontario winters test everything. For walks, a compacted 4–6-inch granular base resists frost movement; for driveways, plan for 6–10 inches.
- Wayfinding at night: Low-voltage LEDs at 2700–3000K spaced 8–12 feet apart make the route obvious without harsh glare.
- Everyday usability: Widened drive edges (18–24 inches) stop door dings and turf ruts, while 36–48-inch walks make stroller and cart movement simple.
- Perceived value: Clean lines, healthy turf, and layered beds signal a well-cared-for home, which helps when you list and while you live there.
- Lower maintenance: Mulch at 2–3 inches suppresses weeds and moderates soil temps, trimming weekend chores all season.
In our experience, a few precise numbers drive big, lasting results. Hit the slope, base, and width targets, and your front entry will feel better underfoot and look better from the curb—through rain, snow, and spring thaw.
How Curb Appeal Projects Work (Design–Build Flow)
A curb appeal project moves from on-site assessment to concept, then to base prep, installation, and final detailing. Sequence matters: correct grading first, set durable edges, install hardscapes, then plant and mulch. A documented punchlist and 14–30 day establishment period lock in results.
At HR Greenroots Landscaping, we deliver end-to-end projects across Mississauga and the GTA. That means one team coordinates layout, materials, logistics, and maintenance planning so your front entry looks purposeful on day one and stays that way.
- On-site assessment: We measure slopes, confirm drainage patterns, locate utilities, and note traffic lines. If water pools by the step, we quantify the pitch and plan a 2% correction.
- Concept plan: You’ll see a scaled layout with walkway widths (36–48 inches), landing size, bed shapes, and any driveway extensions (often 18–24 inches for comfortable door swing).
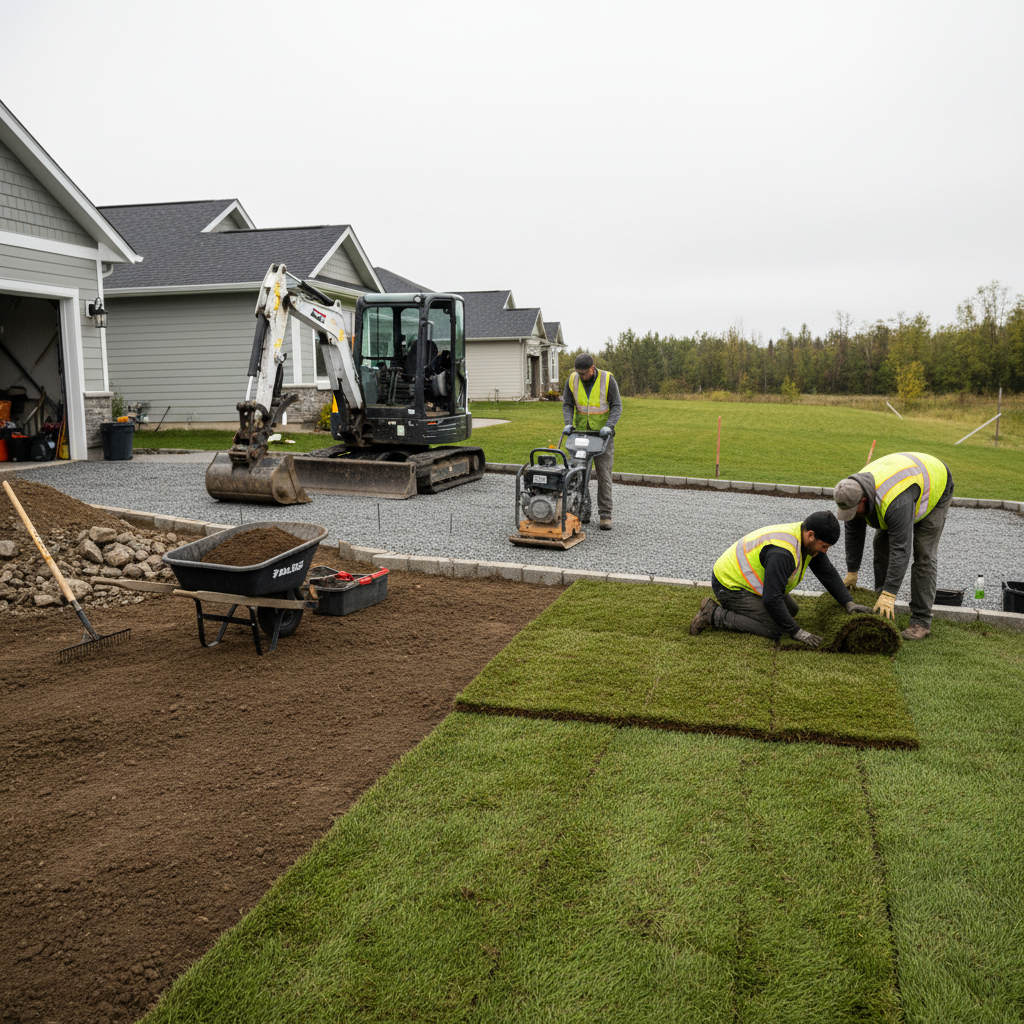
- Base preparation: We remove organics and compact aggregate in 2–3-inch lifts: 4–6 inches for walks and landings, 6–10 inches for drive edges that carry vehicles.
- Edge control & restraints: Paver edges are secured with restraints spiked every 8–12 inches on curves to prevent spread during freeze–thaw cycles.
- Hardscape installation: Interlocking pavers are set with 1/16–1/8-inch joints and finished with polymeric sand to stabilize and resist weeds.
- Turf and beds: We grade 4–6 inches of screened topsoil under premium sod and place 2–3 inches of shredded mulch in beds, keeping mulch 2–3 inches away from trunks.
- Lighting: Warm LED path lights (2700–3000K) are spaced along turns and steps for clear wayfinding without glare.
- Punchlist and care: You’ll get a short, plain-English care plan—water sod daily in week one, inspect joints at day 14, and schedule a quick seasonal check.
When projects follow this order, rework drops and performance soars. We record slope percentages and compaction passes so you know the approach was built to outlast Ontario winters.
Types of Upgrades That Boost Curb Appeal
High-impact upgrades include premium sod, interlocking walkways, widened driveways, defined garden beds, low-voltage lighting, privacy fencing, and small retaining solutions. Tackle circulation first—paths and parking—then frame the entry with layered plantings and mulch for color, contrast, and low upkeep.
As a full-service landscape design–build team, we integrate hardscape and planting so each addition supports the next. Start with movement (walks, steps, drive apron), then add the green and lighting.
Hardscape moves
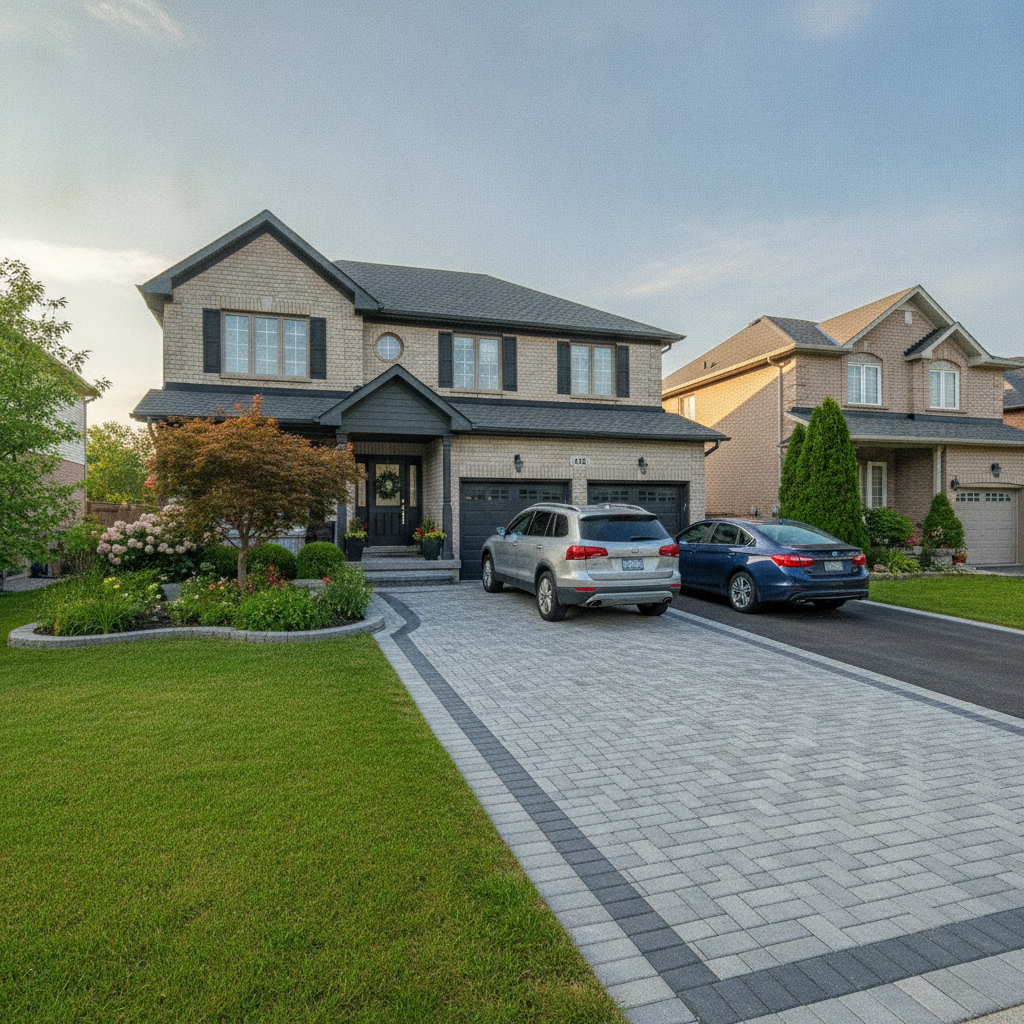
- Interlocking walkways: A 36–48-inch path with gentle turns (45–90 degrees) makes arrivals intuitive and stroller-friendly. Polymeric sand and secure edge restraints limit washout during storms.
- Driveway extensions: Adding 18–24 inches to the passenger side prevents rutting and scuffed turf. We build these with an 8–10-inch compacted base to handle vehicle loads.
- Steps and landings: Treads around 11 inches and risers at 6–7 inches feel natural underfoot. A landing at the door that’s at least the door width plus 18 inches keeps the swing clear.
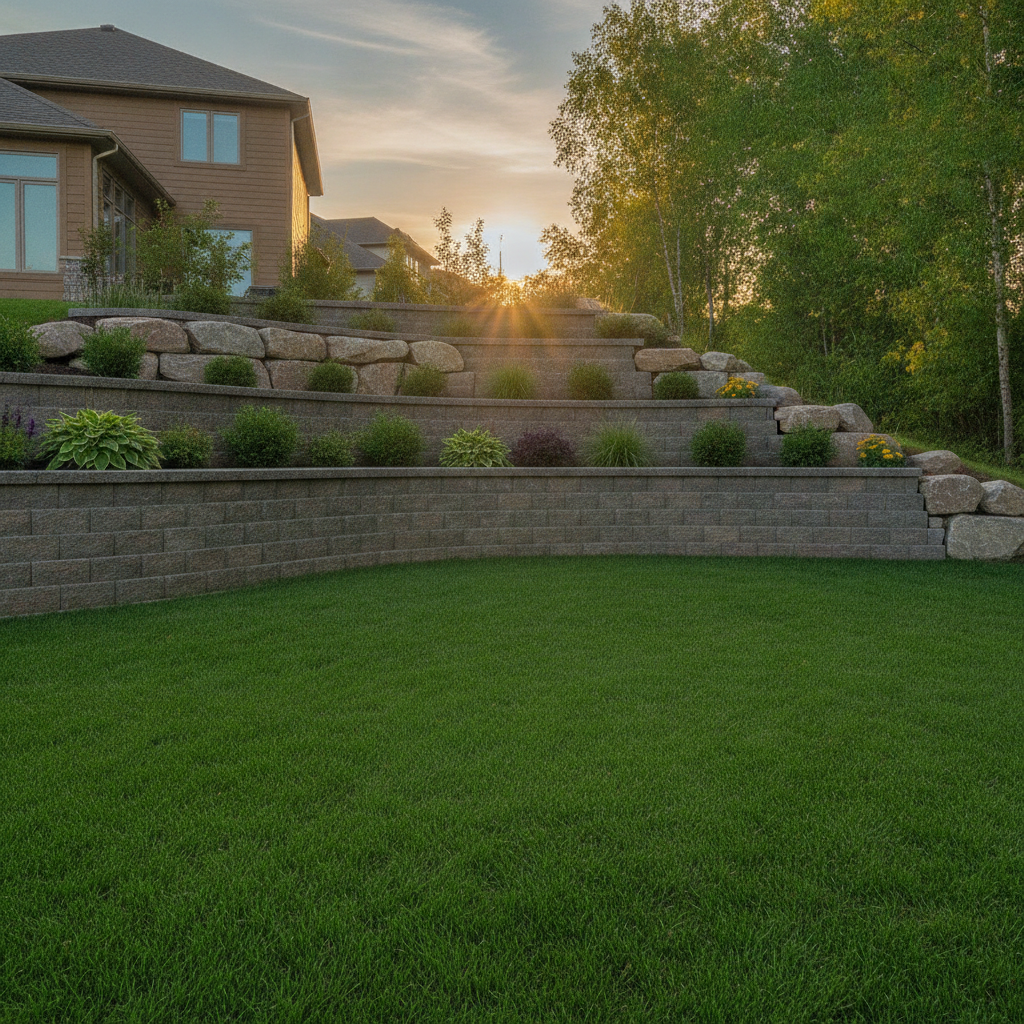
- Retaining accents: A small 6–18-inch seat wall or single-course armour stone edge can hold grade, frame beds, and create a subtle focal line.
Green upgrades
- Sod replacement: Over 4–6 inches of screened topsoil, premium sod delivers instant green and better density. Water daily in week one, then taper.
- Layered beds: Use a thriller–filler–spiller layout to get height, mass, and groundcover working together. Keep the crown of plants at finished grade to prevent rot.
- Mulch refresh: Maintain 2–3 inches. It stabilizes soil temperature, reduces weeds, and adds clean contrast to turf and stone.
Framing and privacy
- Privacy fencing: Staggered panels soften exposure without closing off the yard. We align fence rhythm with planting beds for a cohesive border.
- Decorative screens: Inset lattice or slatted screens can frame a porch view and break wind around the entry.
Small changes, applied consistently—crisp edges, even turf, a readable front walk—pull the eye to the entry and set the tone for the whole home. That’s front yard curb appeal that lasts past the first season.
Want a right-sized front yard plan? Our Mississauga team can assess grade, layout, and materials in one visit and provide a clear sequence that fits your home. Schedule an on-site consultation.
Best Practices for Lasting Results
Durability starts underground. Remove organics, compact in 2–3-inch lifts, and maintain a steady 2% slope. Use 3/4-inch minus aggregate for base, polymeric sand for paver joints, and 2–3 inches of shredded mulch. Space path lights 8–12 feet apart and water new sod daily in week one.
These field-proven practices keep your front approach stable, readable, and easy to maintain through Ontario winters:
- Subgrade and base: Compact the subgrade before placing aggregate. Two passes per 2–3-inch lift build density and reduce frost heave.
- Edge integrity: Avoid floating edges. Install secure restraints and spike every 8–12 inches on curves; straight runs can be spaced farther.
- Joint stability: Sweep polymeric sand into 1/16–1/8-inch paver joints and mist to lock. It helps resist weed germination and washout.
- Drainage seams: Where runoff concentrates, add a 3–6-inch river rock strip so water slips by without carrying mulch.
- Planting technique: Dig holes twice the root ball’s width. Keep the crown at grade and mulch 2–3 inches deep, pulling mulch 2–3 inches back from trunks.
- Lighting layout: Focus fixtures on turns, steps, and the landing. Warm 2700–3000K light renders materials naturally and reduces glare.
Build to these numbers once and your annual maintenance becomes predictable—simple spring edging, a mulch top-up, and quick inspections after heavy rain.
Tools, Materials, and Resources
Prioritize compactors, line levels, and graded aggregates for structure; polymeric sand, edge restraints, and geotextiles for stability; and 2700–3000K LED fixtures for safe wayfinding. Use 4–6 inches of screened topsoil under sod and 2–3 inches of mulch in beds to balance moisture and reduce weeds.
Here’s a concise kit we rely on for Mississauga front entries:
- Tools: Plate compactor, hand tamper, string line/level, masonry saw, landscape rake, wheelbarrow.
- Materials: 3/4-inch minus aggregate for base, bedding sand at ~1 inch, polymeric sand for joints, shredded mulch for beds.
- Geotextiles: A woven or nonwoven separator can stabilize base over weaker subgrades.
- Lighting: Low-voltage LED fixtures (2700–3000K) with transformer capacity sized for total load plus ~20–30% headroom.
- Watering: Early-morning irrigation reduces evaporation and fungus risk for new sod and plantings.
For additional homeowner-friendly planning context that aligns with this approach, see these practical guides on layout and materials: thoughtful patio and walkway planning tips, a regional design primer, and a step-by-step pool and patio guide. Each reinforces the importance of sequence, base prep, and clear circulation.
Case Studies: Before-and-After in the GTA
Front yard projects that pair base prep with clean layout deliver visible wins fast. Replacing patchy turf, widening tight walks to 42 inches, and adding a 6-inch curb or stone edge often cuts weekly tidy-up time while making daily entries feel easier and safer.
We’ve gathered a few real-world scenarios similar to what we see around Mississauga and neighboring GTA cities. Details vary home to home, but the sequence stays constant: fix grading, secure edges, set surfaces, then add green and light.
Scenario 1: Patchy lawn and puddling walk
- Issues: Thin turf, pooling at the step, and uneven paver joints created a slippery approach after rain.
- Intervention: Regraded to a consistent 2% slope, compacted a new 4–6-inch walkway base, reset pavers with 1/16–1/8-inch joints, and installed premium sod over 4–6 inches of topsoil.
- Outcome: Even surfaces and a dry step within the first storm. After 3–4 weeks of establishment, the lawn read as a single, dense plane.
Scenario 2: Tight driveway entry and scuffed turf edge
- Issues: Doors opened into grass, causing ruts and mud. Snow piles destroyed the edge each winter.
- Intervention: Added a 24-inch interlock apron with an 8–10-inch base, secure restraints, and a 3–6-inch river rock seam for meltwater.
- Outcome: Cleaner parking and zero ruts. The front turf edge stayed intact through plow season.
Scenario 3: Hidden front step and flat facade
- Issues: From the street, the approach was unclear. Mulch bled into turf; no focal point.
- Intervention: Introduced a serpentine bed with layered shrubs and perennials, refreshed mulch to 2–3 inches, and placed warm LED path lights at 8–12-foot intervals.
- Outcome: A readable approach and a softer facade with night-time clarity and lower watering needs.
Frequently Asked Questions
Homeowners ask about timing, sequence, and maintenance. In Mississauga, spring through early fall is ideal. Grade and hardscapes come first, then sod and planting, with mulch last. Plan for a 14–30 day establishment window and simple seasonal touch-ups to keep lines crisp.
What should I do first to improve curb appeal?
Fix grading and edges first. Establish a consistent 2% slope away from the house, compact base layers for walkways and driveways, and install edge restraints. Then lay interlocking or concrete surfaces, add sod over 4–6 inches of topsoil, and finish with 2–3 inches of mulch in beds.
How wide should a front walkway be?
Aim for 36–48 inches. Thirty-six inches works for one person or a stroller; forty-two to forty-eight inches lets two people pass comfortably. Add a landing at the door that’s at least the door width plus 18 inches for safe clearance.
When is the best time to install sod in Mississauga?
Late spring through early fall is typical when soil temperatures support rooting. Water daily in week one, then every other day in week two, tapering as the turf knits in. Avoid heavy foot traffic until the first mowing.
Do I need landscape lighting for curb appeal?
Low-voltage LED lighting improves safety and highlights the entry. Use warm 2700–3000K fixtures and space path lights roughly 8–12 feet apart to avoid glare. Focus on turns, steps, and the front landing rather than flooding the facade.
Key Takeaways and Next Steps
Prioritize structure—grading, base prep, and edges—then layer in durable surfaces, healthy turf, and simple plantings. Keep numbers in mind: 2% slope, 36–48-inch paths, 2–3 inches of mulch, and 2700–3000K lighting. Document care for 14–30 days to lock in results that last through Ontario winters.
- Key numbers: 2% slope; 4–6-inch walkway base; 6–10-inch driveway base; 2–3-inch mulch; 2700–3000K lighting.
- Fast wins: New sod, crisp edge definition, and a readable 42-inch walkway.
- Sequence once: Hardscape → turf → planting → mulch → lighting for fewer callbacks.
- Care window: 14–30 days of watering and checks lock in the build.
Ready to upgrade your frontage? Our Mississauga crew coordinates design, build, and maintenance planning under one roof. Book a local assessment to align scope, timing, and materials with how you use your home every day.
Local considerations for Mississauga
- Freeze–thaw cycles demand compacted base layers and reliable edge restraints for pavers; plan 4–6 inches for walks and 6–10 inches for drivable edges.
- Spring and fall installs reduce heat stress on new sod and shrubs; water in the morning to conserve moisture.
- Snow storage planning protects turf edges—consider a 24-inch paver apron near the driveway to catch plow spillover.