
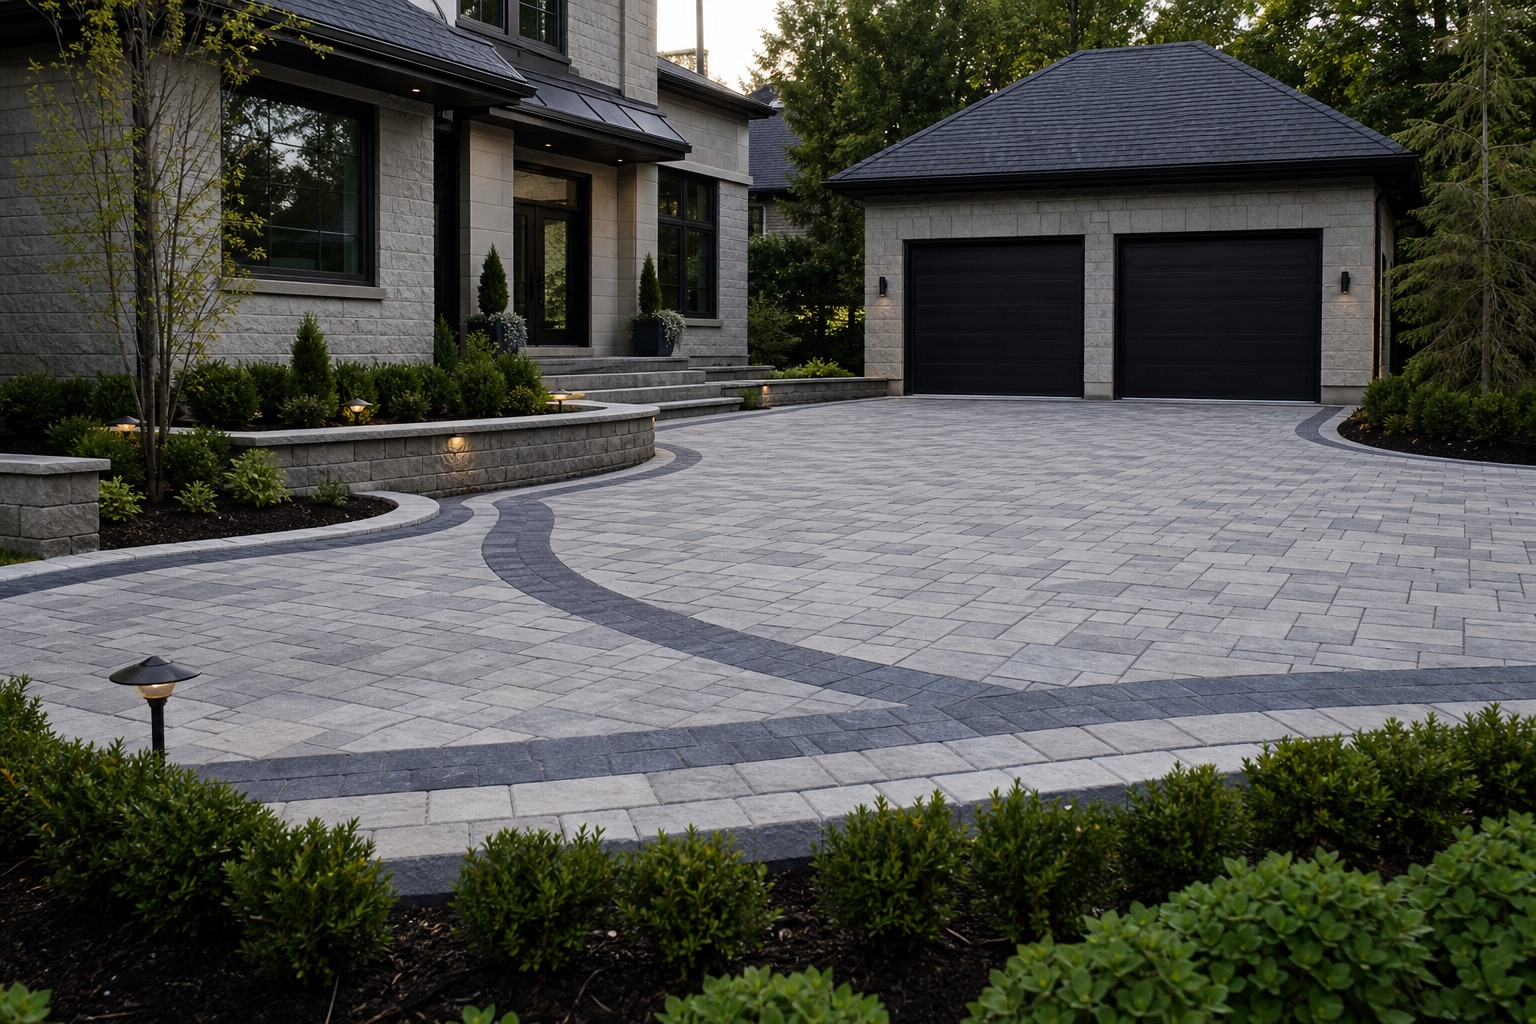
A Practical Guide to Mississauga Interlocking Driveway Planning
Interlocking paver driveways are popular for their clean lines, modular repairability, and long-term curb presence. Yet the difference between a driveway that performs for years and one that shifts or stains often comes down to planning. This guide offers a practical, step-by-step framework you can use to evaluate your property, align the design with how you actually park and move, choose materials that fit your goals, and map out a build and maintenance plan that protects your investment.
Plan the purpose and traffic
Before sketching patterns or choosing colors, clarify how your driveway must function day to day. A clear purpose prevents scope creep and helps you make trade-offs with confidence.
- Vehicle count and size: How many vehicles will regularly park? Are any oversized (SUVs, vans, work trucks)?
- Parking and maneuvering: Do you need side-by-side parking, a turnaround area, or a widened throat near the street for easier entry?
- Snow and service access: Where will snow be stored? Where do waste and delivery carts travel?
- Walkway integration: Should the driveway connect to a front walk, side yard, or a path to a shed or gate?
- Visual goals: Modern minimal, classic, or blended with nearby walks and garden beds?
Translate answers into a simple brief, for example: “Two vehicles side-by-side, room to open doors without stepping into planting beds, a flush transition to the front walk, and a discrete pad for refuse bins.” Keep this brief visible during design and purchasing decisions.
Assess site conditions and drainage
Good drainage planning limits frost movement, puddles, and staining. Even small grade tweaks can improve performance and comfort.
- Existing grades: Check where water currently flows after rain. Note any low spots or areas where water runs toward the garage or house.
- Soil behavior: Clay-rich soils can hold moisture; sandy soils drain faster. Your base and edge choices should accommodate these tendencies.
- Hard edges and thresholds: Note fixed elevations at the garage slab, sidewalks, or utility covers. Your final surface should transition cleanly and safely.
- Downspouts and sump outlets: Plan where they discharge and how that water will leave the driveway area without cutting across traffic paths.
Document findings with quick sketches and photos. If you discover chronic pooling, plan for targeted solutions such as subtle regrading, channel drains, or redirecting downspouts into landscaping where appropriate. Always verify that any changes you make allow water to move away from structures and toward safe discharge areas.
Select pavers, bases, and edges
Material selection is a balance of durability, maintenance, and the look you prefer. Align each choice with your use brief and site conditions.
- Paver format and thickness: Larger-format slabs create a sleek look but may require extra care in base preparation. Traditional brick and cobble formats distribute loads effectively and blend easily with walks.
- Texture and color: Light tones brighten shaded entries; darker blends can hide tire marks. Textured surfaces add grip; smoother units read more modern.
- Base approach: A well-compacted granular base is standard for load-bearing driveways. Some homeowners explore permeable systems designed to move water through joints into a free-draining base. Choose the approach that fits your site’s water movement plan.
- Edge restraint: Hidden aluminum edge or concrete curb restraint helps lock the field in place. Prioritize a restraint that suits your layout curves and straight runs.
- Joint material: Joint sand is typical; polymeric sand can help resist washout and inhibit weed growth when installed per manufacturer guidance.
Request batch-consistent product when ordering, and confirm lead times before scheduling excavation to avoid an unfinished site if materials are delayed.
Layout design and ergonomics
Good layouts think about how people and vehicles actually move. Your pattern, banding, and transitions should clarify edges and make parking intuitive.
- Pattern orientation: Running bond along the primary travel direction can feel more natural when driving in. Herringbone patterns are prized for interlock strength.
- Banding and borders: A contrasting border frames the field, protects edges from chipping, and visually guides wheels. Use banding to separate parking from walkways.
- Thresholds: Keep transitions at the street and garage smooth for rolling carts and snow tools. Avoid lips that could catch shovels or plow blades.
- Curves vs. straights: Curves soften the look and guide movement to doors or gates; straight lines can emphasize modern symmetry. Choose based on the architecture and how you want to park.
- Lighting and sightlines: Plan any low-voltage lighting sleeves or conduits before the base is compacted so future wiring doesn’t disturb the pavers.
Lay out full-size arcs and parking footprints with marking paint or rope before finalizing. This quick test often reveals pinch points near steps, planters, or vehicle doors.
Base preparation sequence
Interlocking systems rely on the foundation. A stable, well-compacted base and clean edge restraint are critical to long-term performance.
- Utility checks: Identify and mark utilities before any digging. Protect irrigation, lighting runs, and drainage pipes.
- Excavation: Remove existing surface and soft subsoil until you reach a firm, uniform subgrade. Shape the subgrade to encourage water to leave the driveway area.
- Subgrade compaction: Compact in multiple passes. Address soft spots with additional granular material rather than attempting to compact saturated clay.
- Separation layer (as needed): In challenging soils, a geotextile separator can help keep the base aggregate from migrating into the subgrade.
- Base installation: Place quality base aggregate in lifts, compacting thoroughly between lifts. Maintain consistent slopes that align with your drainage plan.
- Edge restraint setup: Install your chosen edge restraint in straight, well-anchored lines. For curves, use segmented or flexible restraint to maintain smooth arcs.
- Screed bedding layer: Screed a uniform bedding layer to receive pavers. Avoid walking on the screeded surface; stage pavers for efficient placement.
- Set and cut pavers: Place pavers according to your layout, keeping tight joints. Make clean cuts for borders and around utilities.
- Final checks: Confirm transitions, drainage, and edging. Clean the surface of dust and residue before any sealing.
Patience during base preparation pays back with reduced movement, cleaner lines, and simpler maintenance later.
Jointing, sealers, and finishing
Finishing choices influence appearance and upkeep. Consider how much time you want to spend on maintenance and what visual effect you prefer.
- Joint sand: After compaction, joints often settle and need a second or third sweep to fully fill. Follow the product’s moisture and curing guidance to prevent hazing.
- Sealer options: Sealers can deepen color, add sheen, and assist with stain resistance. If you choose to seal, verify compatibility with your paver and joint products and follow manufacturer timing after installation.
- Stain management: Plan a spot for regular oil-drip prone parking, or use mats under vehicles during maintenance to help keep the surface clean.
When in doubt, test sealer and joint materials on spare pavers first to preview the look and confirm application steps.
Maintenance and longevity
Interlocking systems are maintenance-friendly because individual units can be lifted and reset. A light, regular care plan preserves appearance and function.
- Seasonal cleaning: Sweep debris, rinse with a hose, and spot-treat stains promptly. Avoid harsh chemicals not recommended for your specific paver.
- Joint top-ups: If joints erode or settle over time, top them up with compatible sand to maintain interlock and limit weed growth.
- Edge inspections: Check edge restraints annually. Early correction of minor movement prevents larger adjustments later.
- Snow care: Use shovels or equipment compatible with paver surfaces. Rubber edges and proper blade height help prevent scuffing.
- Drainage watch: After heavy rain, confirm water still leaves the site as planned. If you see new pooling, investigate for blockages or minor grade changes.
Keep a small attic stock of your pavers. If a future repair is needed, matched units make for nearly invisible fixes.
Budgeting and scope control
A good plan protects your budget. The key is to set clear priorities, choose materials that match them, and avoid late-stage changes.
- Rank must-haves vs. nice-to-haves: For example, two full-width parking bays (must-have) and a decorative border (nice-to-have). If costs rise, you can trim the nice-to-haves without compromising function.
- Lock materials early: Confirm availability and delivery timing to prevent schedule gaps that add labor costs.
- Minimize custom cuts: Designs that fit modular dimensions often reduce waste and time.
- Plan staging: Clear access for equipment and material drops reduces handling time and site disturbance.
- Document decisions: Keep a one-page scope sheet listing layout, materials, edges, joint product, and finishing choices. Refer back to avoid on-the-fly changes.
If you’re coordinating multiple outdoor projects—like a walkway, retaining wall, or a shed foundation—sequence them so groundwork and grading happen first, followed by surfaces and finishes. That order streamlines logistics and reduces rework.
Risk checks and quality controls
Simple checks throughout a project can prevent common issues.
- Elevation proof: Dry-lay a few pavers at the garage and sidewalk transitions to confirm slopes and flush thresholds before you screed the full bedding layer.
- Compaction records: Note the number of passes and lift thickness as you build the base. Consistency is more important than speed.
- Edge integrity: Inspect restraint spikes or anchors at regular intervals, and verify curves are smooth with no kinks.
- Surface flatness: Use a long straightedge across the field to spot highs and lows early, when adjustments are easiest.
- Weather windows: Schedule jointing and sealing in appropriate weather per product guidance to avoid haze and washout.
Coordination with adjacent spaces
Your driveway does not exist in isolation. Tying it into surrounding elements enhances daily usability.
- Front steps and porches: Keep rise heights consistent and transitions smooth for safe footing.
- Side yards and gates: If a cart path or walkway connects to the driveway, align joints and elevations for a continuous feel.
- Planting beds: Define bed edges so soil and mulch don’t migrate onto pavers. Consider a subtle grade break or a narrow band of contrasting pavers.
- Storage pads: Designate a small, durable pad for garbage and recycling to preserve the primary field from staining and scuffing.
FAQs
How do I choose between traditional and permeable interlocking?
Choose based on how you want water to move. Traditional interlocking is built over a compacted base with joints filled to limit washout, shedding water to planned drainage paths. Permeable systems are designed so water passes through larger joints into a free-draining base. Consider your site’s soil behavior, nearby planting that might benefit from water, and your maintenance preferences before deciding.
Do I need to seal an interlocking driveway?
Sealing is optional. It can deepen color and help resist stains, but it also adds a maintenance step over time. If you prefer a natural look with minimal upkeep, you can skip sealing and focus on periodic cleaning and joint top-ups. If you like enhanced color or expect frequent drips, test a compatible sealer on spare pavers to preview the result.
What causes pavers to shift or settle, and how can I prevent it?
Shifting often traces back to base issues: inadequate excavation, inconsistent compaction, or weak edge restraint. Prevent movement by building on a firm, well-compacted subgrade, installing base aggregate in consistent lifts with thorough compaction, anchoring a suitable edge restraint, and keeping joints filled so units remain locked together.
Can I expand my driveway later without it looking patched?
Yes, if you plan for it. Keep detailed records of the original paver brand, color blend, format, and joint material. Store extra pavers from the original batch. When expanding, replicate the base structure and edge restraint approach, and consider a border band to intentionally transition between the original area and the new section.
How should I plan for snow removal on pavers?
Design smooth, flush transitions at the street and garage to keep blades from catching. Use shovels or plows compatible with paver surfaces, and place snow where meltwater can drain safely away from structures. If you use de-icers, verify they are appropriate for your specific paver and joint materials.
Next step
A practical next step
To discuss the options that apply to your situation, contact HR Greenroots Landscaping and request the relevant details before moving forward.


